Deep Learning — Beginner
From zero to a working smart camera app that recognizes everyday objects.
This course is a short, book-style guide for absolute beginners who want to build something real: a smart camera app that recognizes everyday objects. You do not need any background in AI, coding, or math. We’ll move step by step, explaining each idea from the ground up, and you’ll practice by collecting your own small set of photos and training a model to recognize what it sees.
By the end, you’ll have a working demo that takes camera images and returns a label (what the object is) plus a confidence score (how sure the model feels). You’ll also understand what makes AI succeed or fail in the real world—lighting, angles, backgrounds, and the quality of your training examples.
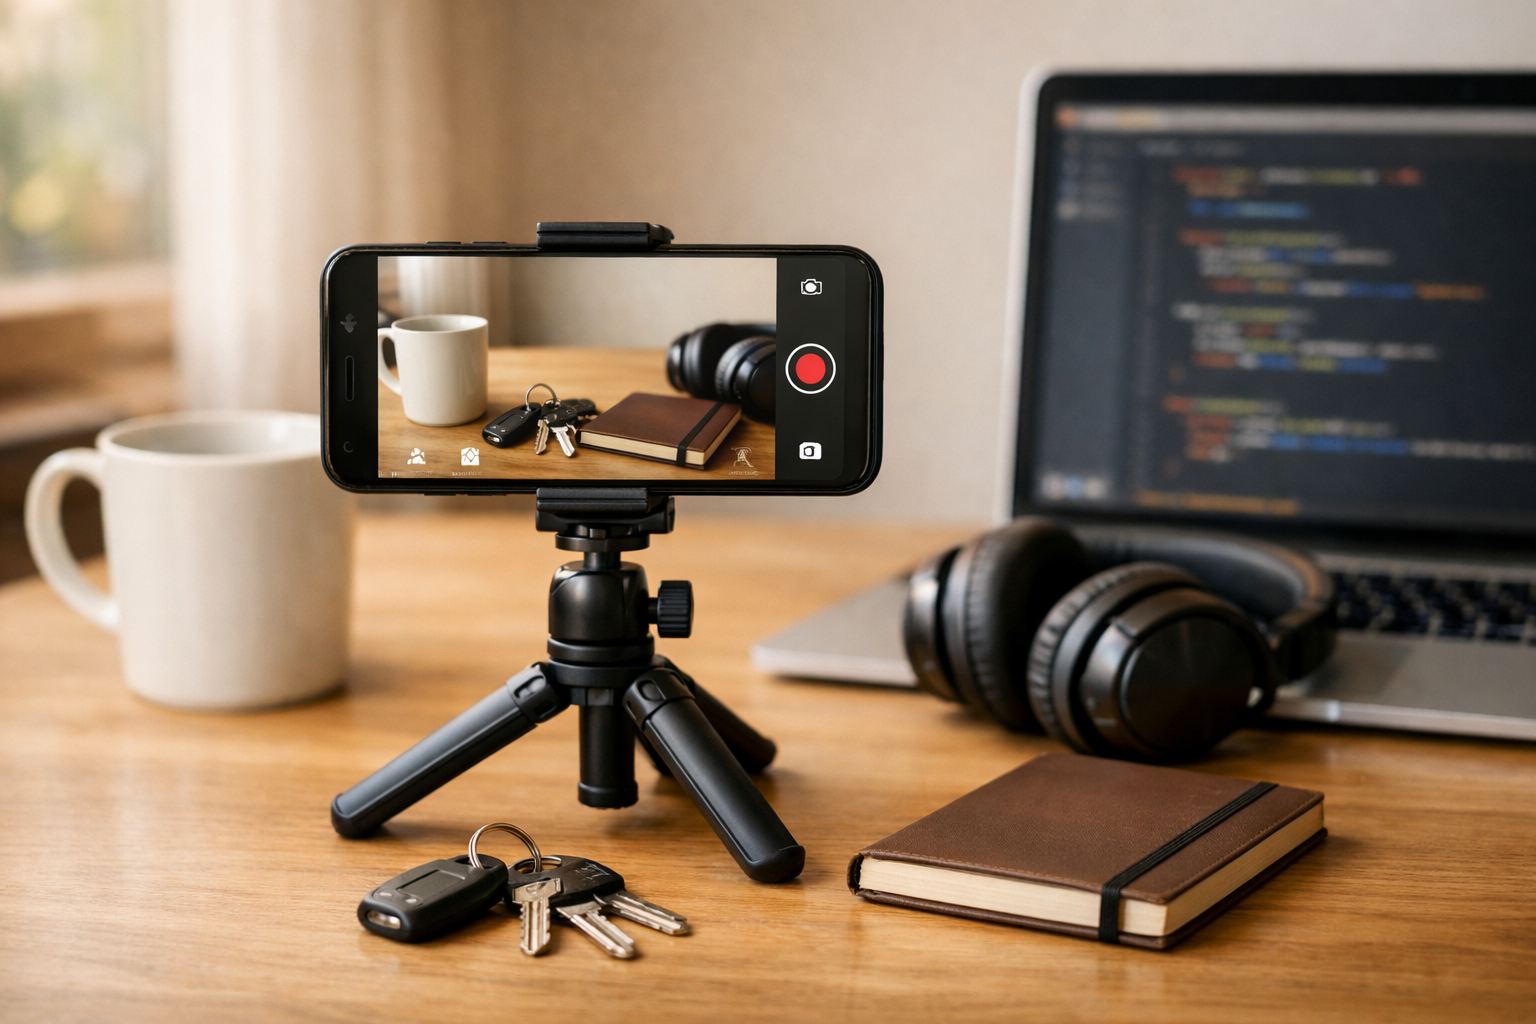
Your project is an “object recognition” camera experience. That means the model chooses one label from a list you define (for example: mug, keys, notebook). You’ll train the model using beginner-friendly training tools and then connect it to a simple app interface that can show predictions live.
Many AI tutorials jump straight into code and unfamiliar words. This course does the opposite. First, you’ll learn the basic workflow: data → training → testing → using the model. Then you’ll apply it with short milestones in each chapter. Every new concept is introduced only when you need it, and explained using plain language and practical examples.
You’ll also learn a key truth early: most AI results depend more on data than on fancy tricks. That’s why we spend real time on collecting balanced photos and avoiding common pitfalls like data leakage (accidentally testing on images too similar to training images) and overfitting (when a model memorizes instead of learning).
This course is for anyone who wants to understand AI by building a real project: students, career changers, product thinkers, and curious beginners. If you can use a browser, take photos, and follow step-by-step instructions, you can complete the course.
If you’re ready to build your first AI project, you can begin right away. Register free to save your progress, or browse all courses if you want to compare learning paths before you start.
Machine Learning Engineer, Computer Vision
Sofia Chen is a machine learning engineer focused on practical computer vision systems for mobile and web apps. She has helped teams ship image recognition features end-to-end, from data collection to on-device testing. She teaches beginners by translating AI concepts into simple, hands-on steps.
This course builds a “smart camera” that looks at a live camera frame (or a photo) and tells you what it sees from a small set of objects you choose. In this first chapter you’ll do five important beginner moves: (1) watch/understand what a smart camera demo is doing and define your own goal, (2) learn the basic AI workflow (data → train → test → use), (3) choose the objects your app will recognize, (4) set up a clean project folder and a tools checklist, and (5) capture a few quick test photos as a reality check before you invest time collecting lots of data.
The big idea: the “AI” here is a model trained from examples. It does not understand objects the way humans do; it learns visual patterns that correlate with your labels. That’s why your choices (what classes you pick, how you collect photos, how you decide whether it works) matter as much as clicking “train.” You’ll practice engineering judgment early so you don’t end up with a model that only works on your desk under one lamp.
By the end of Chapter 1 you will have a clear goal statement, a short list of object classes, a tidy project structure, and a small set of initial photos that help you spot early problems (like confusing backgrounds or inconsistent labeling). That makes the rest of the course faster and less frustrating.
Practice note for Milestone: See a smart camera demo and define the goal: document your objective, define a measurable success check, and run a small experiment before scaling. Capture what changed, why it changed, and what you would test next. This discipline improves reliability and makes your learning transferable to future projects.
Practice note for Milestone: Learn the basic AI workflow (data → train → test → use): document your objective, define a measurable success check, and run a small experiment before scaling. Capture what changed, why it changed, and what you would test next. This discipline improves reliability and makes your learning transferable to future projects.
Practice note for Milestone: Choose what objects your app will recognize: document your objective, define a measurable success check, and run a small experiment before scaling. Capture what changed, why it changed, and what you would test next. This discipline improves reliability and makes your learning transferable to future projects.
Practice note for Milestone: Set up your project folder and tools checklist: document your objective, define a measurable success check, and run a small experiment before scaling. Capture what changed, why it changed, and what you would test next. This discipline improves reliability and makes your learning transferable to future projects.
Practice note for Milestone: Capture a few test photos for a quick reality check: document your objective, define a measurable success check, and run a small experiment before scaling. Capture what changed, why it changed, and what you would test next. This discipline improves reliability and makes your learning transferable to future projects.
Practice note for Milestone: See a smart camera demo and define the goal: document your objective, define a measurable success check, and run a small experiment before scaling. Capture what changed, why it changed, and what you would test next. This discipline improves reliability and makes your learning transferable to future projects.
Practice note for Milestone: Learn the basic AI workflow (data → train → test → use): document your objective, define a measurable success check, and run a small experiment before scaling. Capture what changed, why it changed, and what you would test next. This discipline improves reliability and makes your learning transferable to future projects.
Practice note for Milestone: Choose what objects your app will recognize: document your objective, define a measurable success check, and run a small experiment before scaling. Capture what changed, why it changed, and what you would test next. This discipline improves reliability and makes your learning transferable to future projects.
“Object recognition” is simply the ability to look at an image and name what’s in it. In this course, we’ll focus on a beginner-friendly version: image classification. That means the model looks at the whole image (or camera frame) and chooses one label from a short list, such as “mug,” “keys,” or “not sure.” If you’ve seen a phone app that identifies plants or sorts photos by “cat” vs “dog,” you’ve already seen classification.
It’s helpful to contrast this with two related tasks you might hear about: object detection (drawing boxes around multiple objects) and segmentation (coloring pixels by object). Those are powerful, but they add complexity. Classification is the fastest way to build a working smart camera as a beginner, and it still teaches the core deep-learning workflow you’ll reuse later.
Milestone connection: when you “see a smart camera demo,” what you’re watching is a model repeatedly classifying each frame. The app is not “thinking”; it’s running math very quickly over the pixels. Your goal in this course is to make that demo yours by training a model that recognizes objects you care about, under conditions you expect in real life.
One practical rule: object recognition only works well within a defined scope. If you ask for “recognize anything,” you need huge datasets and massive models. If you ask for “recognize my three desk items,” you can succeed with a small dataset and careful collection.
A smart camera app has three main parts: the camera input, the model, and the labels/output. The camera input supplies images—either still photos or frames from a live preview. The model is a trained file (often a compact format like TensorFlow Lite) that takes an image and returns a set of numbers (scores). The labels map those scores to human-readable names like “mug” or “marker.”
Think of it as a pipeline: camera frame → preprocessing → model inference → postprocessing → UI. Preprocessing usually means resizing the image to the model’s expected shape (for example 224×224 pixels), and normalizing pixel values. Postprocessing means picking the top label, showing confidence, and sometimes applying a threshold so the app can say “I’m not sure” instead of confidently being wrong.
When you define the goal for your demo milestone, make it specific to this pipeline. For example: “When I point the camera at my desk, the app shows the correct label for my chosen objects at least 80% of the time in normal room lighting.” Notice how that ties to what the app actually does: it labels frames. If your goal is vague (“make it smart”), you can’t tell if you’re improving.
This is also where data quality shows up early. If your labels are inconsistent (some “mug” images include a spoon sometimes and sometimes not), the model may learn the spoon pattern instead of the mug pattern. A clean label set is part of building the app, not an afterthought.
Deep learning models don’t store a list of objects or “understand” meaning. They learn patterns in pixel data that tend to appear when an image has a certain label. During training, the model repeatedly predicts a label for each training image, compares the prediction to the true label, and adjusts internal parameters to reduce errors. This is the “train” step in the workflow: data → train → test → use.
In practice, a modern image model learns layers of features. Early layers detect simple edges and textures; later layers combine them into shapes and more complex visual cues. That sounds human-like, but it’s still just optimization: the model is tuned to be good at predicting your labels on data similar to what it has seen.
This explains two common beginner surprises. First, a model can be very accurate on your training photos but fail in the real world. That’s often overfitting: the model memorized quirks of the training set (the same table background, the same lighting) instead of learning general cues. Second, the model can latch onto the “wrong” pattern—like identifying your “keys” class mainly because the keys were always photographed on a blue notebook.
Milestone connection: your “quick reality check” photos are a simple way to test whether your early assumptions hold. Take a few photos that differ from your initial setup—different angles, different backgrounds, slightly different lighting—and keep them as a mini test set. If the model struggles later, these photos help you diagnose whether the issue is data diversity, label ambiguity, or unrealistic expectations.
Engineering judgment here means planning for the world you’ll actually deploy in. If the app will be used in a kitchen, train with kitchen lighting and clutter. If it will run on a phone, expect motion blur and imperfect framing.
Before you collect hundreds of images, make a small plan. Start by choosing 2–4 classes (object categories) that are visually distinct and easy to photograph. Good beginner classes: “mug,” “remote,” “scissors.” Harder classes (save for later): “black pen” vs “dark marker” (too similar), or “my mug” vs “other mug” (requires fine-grained differences).
Next, define what counts as an example. For classification, each image should have a single “main” object. The object does not need to fill the frame, but it should be clearly visible. If you include multiple objects, the model may get confused about what the label refers to.
Then define success criteria so you can tell if your model is improving. Pick measurable targets like:
Now connect this to the workflow milestone (data → train → test → use). Your classes and success criteria shape your dataset. If you want robustness to lighting, you must capture examples in multiple lighting conditions. If you want robustness to angles, you must photograph from multiple angles. Data collection is not just “more photos”; it’s “the right variety of photos.”
Practical action for this chapter: write down your classes and your definition of “done,” then capture 5–10 quick photos per class as a reality check. Don’t aim for perfection yet—aim to reveal problems early, such as one class always being photographed on a unique background.
This course is designed to keep the toolchain approachable while still teaching real skills. The beginner-friendly stack typically includes: a phone camera (or webcam) for data capture, a simple labeling method (folders or a lightweight labeling tool), a training environment that can run in the browser or locally (often using transfer learning), and an export format suitable for running on-device in a small app.
Why beginner-friendly tools matter: the goal is to learn the workflow—collect data, train, evaluate, and deploy—without spending week one debugging GPU drivers. You’ll still learn the important engineering ideas (dataset splits, accuracy, overfitting), but with fewer setup barriers.
Milestone connection: “set up your project folder and tools checklist” is not busywork. A clean structure prevents common mistakes like mixing training and test images or losing track of versions. Use a simple layout like:
Also keep a checklist: camera available, enough storage, consistent naming, and a note of your chosen classes. The habit you’re building is reproducibility: if a model works, you can explain what data and settings produced it. If it fails, you can isolate what changed.
Finally, make your “quick reality check” photos a first-class artifact: store them in data/test_quickcheck/ and do not train on them. They become your early warning system for overfitting and brittle behavior.
Building camera-based apps comes with responsibility. Even if your project is “just for learning,” your camera can capture faces, addresses on mail, computer screens, or other sensitive information. Treat your dataset like personal data: minimize what you collect, store it carefully, and delete what you don’t need.
Start with data minimization. If you’re training a model to recognize desk objects, avoid photographing people in the background. Don’t include documents, screens, or anything with personally identifying text. If you notice sensitive content in a photo, remove it from the dataset rather than hoping it “won’t matter.” It can matter—especially if you later share your dataset or screenshots.
There’s also a practical engineering angle: privacy-friendly choices often improve your project. A dataset filled with random background clutter (screens, faces, reflections) increases noise and can lead the model to learn irrelevant cues. Clean, intentional images are safer and usually produce better accuracy.
As you capture your first test photos for the reality check milestone, make “privacy scan” part of your routine: glance at each image before saving. If it contains sensitive content, retake it. Building this habit early makes the rest of the course smoother and keeps your smart camera project respectful and safe.
1. What is the main purpose of the “smart camera” you build in this course?
2. Which sequence best describes the basic AI workflow taught in Chapter 1?
3. Why does Chapter 1 emphasize that your choices (classes, photos, and evaluation) matter as much as clicking “train”?
4. What is the best reason to capture a few quick test photos early in the project?
5. Which set of outcomes best matches what you should have by the end of Chapter 1?
When beginners think about “building an AI,” they often picture the model as the main event. In practice, your model is mostly a reflection of your data. For a smart camera object recognizer, the training algorithm is like a student: it can only learn from what you show it, and it will learn patterns you did not intend if your dataset nudges it in that direction.
This chapter is a practical, repeatable workflow for creating a small but strong image dataset. You’ll define labels (classes) and a naming system, collect balanced photos of each object, organize them into train/validation/test splits, clean out the junk (blurry or duplicate images), and document what you did so your future self—or a teammate—can reproduce it.
As you work, keep one mindset: your goal is not to create “pretty photos.” Your goal is to capture the variety your camera app will face in the real world, while keeping labels consistent and unambiguous. The better your data decisions, the easier training becomes—and the more honest your evaluation will be later.
We’ll keep things beginner-friendly: you can collect photos with a phone, label with filenames and folders, and follow simple rules that scale when you later use labeling tools or larger datasets.
Practice note for Milestone: Create labels (classes) and a naming system: document your objective, define a measurable success check, and run a small experiment before scaling. Capture what changed, why it changed, and what you would test next. This discipline improves reliability and makes your learning transferable to future projects.
Practice note for Milestone: Collect balanced photos for each object: document your objective, define a measurable success check, and run a small experiment before scaling. Capture what changed, why it changed, and what you would test next. This discipline improves reliability and makes your learning transferable to future projects.
Practice note for Milestone: Organize data into train/validation/test splits: document your objective, define a measurable success check, and run a small experiment before scaling. Capture what changed, why it changed, and what you would test next. This discipline improves reliability and makes your learning transferable to future projects.
Practice note for Milestone: Clean the dataset (remove blurry and duplicate images): document your objective, define a measurable success check, and run a small experiment before scaling. Capture what changed, why it changed, and what you would test next. This discipline improves reliability and makes your learning transferable to future projects.
Practice note for Milestone: Document your dataset so you can reproduce it: document your objective, define a measurable success check, and run a small experiment before scaling. Capture what changed, why it changed, and what you would test next. This discipline improves reliability and makes your learning transferable to future projects.
Practice note for Milestone: Create labels (classes) and a naming system: document your objective, define a measurable success check, and run a small experiment before scaling. Capture what changed, why it changed, and what you would test next. This discipline improves reliability and makes your learning transferable to future projects.
Practice note for Milestone: Collect balanced photos for each object: document your objective, define a measurable success check, and run a small experiment before scaling. Capture what changed, why it changed, and what you would test next. This discipline improves reliability and makes your learning transferable to future projects.
Practice note for Milestone: Organize data into train/validation/test splits: document your objective, define a measurable success check, and run a small experiment before scaling. Capture what changed, why it changed, and what you would test next. This discipline improves reliability and makes your learning transferable to future projects.
Practice note for Milestone: Clean the dataset (remove blurry and duplicate images): document your objective, define a measurable success check, and run a small experiment before scaling. Capture what changed, why it changed, and what you would test next. This discipline improves reliability and makes your learning transferable to future projects.
Training data is the set of examples your model uses to learn. For image object recognition, each example is an image paired with a label (the “class” name). During training, the model adjusts internal parameters so that images with the same label end up producing similar outputs. The key point is that the model does not learn “what an object is” in a human sense; it learns statistical patterns that correlate with your labels.
This is why data quality matters more than most beginners expect. If every photo of your “mug” is on your wooden desk, the model may learn “wood grain” as a shortcut for “mug.” If your “keys” are always photographed in bright sunlight, the model may struggle indoors. If some labels are sloppy (sometimes you call the same object “cup” and sometimes “mug”), the model sees contradictions and learns a weaker boundary.
Start by defining your classes and a naming system (your first milestone). Choose classes that are visually distinct and useful for your app. For a first project, 2–5 objects is ideal: for example mug, keys, remote, phone. Write the class list down once and treat it like an API: stable names, consistent spelling, no synonyms.
mug, keys.mugs vs cup vs coffee-cup unless you truly mean different classes.A simple file naming convention helps later debugging and reproducibility. One practical approach is {class}_{source}_{index}.jpg, such as mug_phonecam_001.jpg. If you collect over multiple days, add a date: keys_2026-03-27_012.jpg. Consistent names make it easier to spot missing classes, duplicates, and mix-ups before you ever train.
There is no magic number of images, but there are useful ranges that keep beginner projects moving. For a small classifier (predicting which object is present), aim for 50–150 images per class to start. If you have 3 classes, that’s 150–450 photos total—very doable with a phone in an hour or two. If you can reach 200–300 per class, your results usually become more stable, especially if your environment changes (different rooms, lighting, backgrounds).
The bigger rule is balance (your second milestone). If you have 300 images of mug but only 40 of keys, many models will lean toward predicting mug more often. You might still see “high accuracy” if your evaluation data has the same imbalance, but the model will feel unreliable in real use. A simple engineering habit: when you collect, rotate objects and keep a rough tally.
Also decide whether you need a “background/none” class. If your smart camera will sometimes see none of the known objects, consider adding a none class with photos of the environment without the target objects. This reduces the “forced choice” problem where the model always guesses one of the known objects, even when the object is not present.
Finally, collect in waves. Don’t spend all day collecting before you validate your process. Capture ~20 images per class, label and organize them, then confirm your workflow is smooth. Once you’re confident, scale up.
Good datasets contain variety that matches real use. Your smart camera will see objects at odd angles, partially occluded, near clutter, and under changing light. If your dataset is too “studio-like,” training may look successful but your app will fail the first time you move to a different room.
When collecting balanced photos for each object, deliberately vary four things: lighting, angles, backgrounds, and distance. For lighting, capture the same object in daylight, indoor warm light, and dim light. For angles, rotate around the object: top-down, side view, tilted, and partially cropped. For backgrounds, use different surfaces (desk, couch, floor) and different clutter levels (clean background vs everyday mess). For distance, include close-ups and medium shots similar to how a camera feed frames the object.
Common beginner mistake: collecting all images in one sitting from one spot. The model then learns the camera viewpoint and environment. A stronger approach is to collect in at least two sessions (different times of day) and at least two locations (different rooms). If you can’t change locations, change the background and lighting aggressively.
Another practical habit: keep your camera settings consistent enough to avoid accidental cues. For example, if one class is always shot with flash and others are not, the model may learn “flash reflection” as the label. Variety is good, but accidental one-class-only artifacts are not.
Labeling is where you turn photos into training signal. A model can tolerate some noise, but inconsistent labels create a ceiling on accuracy. Before labeling hundreds of images, define rules (your first milestone in action): what counts as the object, what does not, and what to do in edge cases.
Start with a simple written labeling guide—just a few bullets per class. Example: “keys = at least one key visible; keychain allowed; if keys are inside a closed bag pocket, label as none.” This avoids the situation where half your dataset treats “keys in pocket outline” as keys and the other half does not.
mug_full vs mug_empty unless your app truly needs that distinction and you can collect balanced data for both.Apply a naming system that prevents drift. Use a fixed class list and enforce it in folders (e.g., data/raw/mug/, data/raw/keys/) or filenames. Folder-based labeling is especially beginner-friendly: every image inside the folder inherits the folder label, which reduces typos. If you use filenames, keep a strict pattern and avoid spaces and special characters.
Finally, do a quick label audit. Randomly sample 10–20 images per class and verify they belong. Catching label confusion early saves hours of training and debugging later.
Model evaluation only means something if your test is honest. That requires splitting your data into train, validation, and test sets (your third milestone). The model learns from the training set. You use the validation set during development to tune choices (like number of epochs or augmentation). The test set is the final exam: you do not “peek” at it while making decisions.
A practical split for beginners is 70/15/15 or 80/10/10. With small datasets, you mainly want enough test images per class to be meaningful. For example, if you have 100 images per class and 3 classes, a 15% test split gives 15 test images per class—small, but still useful for a first pass.
How you split matters as much as the percentages. Avoid “near-duplicates” crossing splits. If you took 20 photos of the mug in the same position with tiny hand movements, and some go to train while others go to test, the test becomes too easy. The model appears accurate because it sees almost the same image during training. A stronger approach is to split by capture session: put Day 1 photos mostly in train/val, and Day 2 photos in test. This better simulates real deployment.
Organize the split with folders such as data/train/mug/, data/val/mug/, data/test/mug/. This structure works with many beginner-friendly tools and reduces accidental mixing.
Most “model problems” are actually data problems. Three of the most common are bias, imbalance, and leakage—and they can quietly ruin your smart camera experience if you don’t look for them.
Bias means your dataset overrepresents some conditions and underrepresents others. A classic example: all remote photos are on a dark couch, while all phone photos are on a bright desk. The model learns background cues and fails when you swap contexts. The fix is intentional variety: place each object in multiple environments and ensure conditions overlap across classes.
Imbalance means some classes have far more images than others. This often leads to a model that predicts the majority class too frequently. Balance during collection (your second milestone) is the best solution. If you notice imbalance later, you can sometimes compensate with sampling strategies, but it’s better to collect more for the underrepresented class.
Leakage is the most deceptive. Leakage happens when information from the test set leaks into training—often through duplicates or near-duplicates, or by splitting randomly after capturing bursts of almost identical images. Leakage makes metrics look great while real-world performance stays poor. Prevent leakage by cleaning the dataset (your fourth milestone) and splitting by session or scene rather than purely random selection.
Documentation is the quiet superpower of good datasets. Create a small dataset.md (or a note) that records: class list and definitions, how many images per class, capture devices, locations, dates, split strategy, and any cleaning rules you applied. This makes your training results explainable and repeatable—and it prevents the “it worked yesterday, I don’t know why” trap as your project grows.
1. Why does the chapter emphasize “data first” instead of focusing mainly on the model?
2. What is the main goal when collecting photos for a smart camera object recognizer?
3. Which workflow best matches the chapter’s recommended steps for building a strong small dataset?
4. What is the purpose of organizing images into train/validation/test splits?
5. Why does the chapter include cleaning the dataset and documenting what you did?
In the last chapter you collected and labeled images. Now you will turn that dataset into a working object recognizer. This chapter is intentionally practical: you will train a first model using a no-code/low-code trainer, learn to read the training results in plain language, test with new photos, record failures, improve the dataset, and retrain until the model is “good enough” for a first smart camera app.
Think of this chapter as your first complete loop: data → train → evaluate → fix data → retrain → save the best version. Most beginner frustration comes from skipping steps (for example, training once and assuming the model is finished) or misreading metrics (for example, celebrating high training accuracy while the model fails on new photos). We’ll avoid those traps by using a simple mental model of how a neural network learns and by making engineering-style decisions—small, testable improvements rather than random tweaks.
You do not need to understand every math detail to succeed. You do need to be disciplined about (1) keeping your labels consistent, (2) checking performance on images the model has not seen, and (3) tracking what changed between attempts. By the end of the chapter you will have a saved, versioned “best model so far,” plus a short list of failure cases to guide the next chapter’s app integration.
Practice note for Milestone: Train a first model using a no-code/low-code trainer: document your objective, define a measurable success check, and run a small experiment before scaling. Capture what changed, why it changed, and what you would test next. This discipline improves reliability and makes your learning transferable to future projects.
Practice note for Milestone: Read the training results (accuracy and loss) in plain words: document your objective, define a measurable success check, and run a small experiment before scaling. Capture what changed, why it changed, and what you would test next. This discipline improves reliability and makes your learning transferable to future projects.
Practice note for Milestone: Test with new photos and record failures: document your objective, define a measurable success check, and run a small experiment before scaling. Capture what changed, why it changed, and what you would test next. This discipline improves reliability and makes your learning transferable to future projects.
Practice note for Milestone: Improve the dataset and retrain for better results: document your objective, define a measurable success check, and run a small experiment before scaling. Capture what changed, why it changed, and what you would test next. This discipline improves reliability and makes your learning transferable to future projects.
Practice note for Milestone: Save and version your best model: document your objective, define a measurable success check, and run a small experiment before scaling. Capture what changed, why it changed, and what you would test next. This discipline improves reliability and makes your learning transferable to future projects.
Practice note for Milestone: Train a first model using a no-code/low-code trainer: document your objective, define a measurable success check, and run a small experiment before scaling. Capture what changed, why it changed, and what you would test next. This discipline improves reliability and makes your learning transferable to future projects.
Practice note for Milestone: Read the training results (accuracy and loss) in plain words: document your objective, define a measurable success check, and run a small experiment before scaling. Capture what changed, why it changed, and what you would test next. This discipline improves reliability and makes your learning transferable to future projects.
Practice note for Milestone: Test with new photos and record failures: document your objective, define a measurable success check, and run a small experiment before scaling. Capture what changed, why it changed, and what you would test next. This discipline improves reliability and makes your learning transferable to future projects.
Practice note for Milestone: Improve the dataset and retrain for better results: document your objective, define a measurable success check, and run a small experiment before scaling. Capture what changed, why it changed, and what you would test next. This discipline improves reliability and makes your learning transferable to future projects.
A neural network for images is a pattern-finder. It looks at pixels and learns combinations of shapes, edges, textures, and parts that tend to appear together. Early layers detect simple features (like edges or corners). Middle layers combine those into parts (like a handle shape or a circular rim). Later layers combine parts into object-level cues (like “this looks like a mug” versus “this looks like a bottle”).
In a beginner object recognizer, you usually train a classifier: you give the model an image and it outputs a label. During training, the model repeatedly guesses a label, compares its guess to the correct label, and slightly adjusts internal weights so that next time it is more likely to guess correctly. Those small adjustments are guided by a score called loss: high loss means “very wrong,” lower loss means “less wrong.”
Here is the practical mental model to hold onto: the model does not understand objects the way humans do. It learns shortcuts that work on your dataset. If all your “mug” photos are on a wooden desk and all your “bottle” photos are on a white counter, the model may learn “wood texture = mug.” This is why data quality matters as much as model choice.
When you use a no-code/low-code trainer (for example, a web tool or a desktop app that trains from folders of images), you are still doing real machine learning. Your job is to choose clean labels, provide enough variety, and interpret the results like an engineer: “What is it doing well, what is it failing on, and what data would fix that?”
Training an image model from scratch usually requires a huge dataset and lots of compute. Transfer learning is a shortcut: you start with a model that has already learned general image features from millions of images, then you “fine-tune” it for your small set of classes. For beginners, transfer learning is the difference between a model that learns in minutes and one that never stabilizes.
In most no-code/low-code trainers, transfer learning is the default. You upload labeled images, pick your labels, and press Train. Under the hood, the tool keeps most of the pre-trained feature extractor and only trains a smaller classification head for your labels (sometimes with partial fine-tuning). This means your model begins with useful visual knowledge: edges, shapes, textures, common object parts.
To successfully hit the milestone “train a first model using a no-code/low-code trainer,” focus on workflow, not perfection:
Transfer learning also makes iteration faster. When you retrain after improving your dataset, you are not starting from zero; you are refining. This makes the “improve dataset and retrain” milestone realistic within a single afternoon.
When your trainer shows training and validation metrics, it is showing two different jobs. Training is where the model learns from examples it is allowed to study. Validation is where the model is tested on different examples it did not train on, as a reality check.
A common beginner misunderstanding is to treat training accuracy as the score that matters. Training accuracy answers: “How well can the model remember what it just practiced?” Validation accuracy answers: “How well does it generalize to new photos?” For a smart camera app, generalization is the entire point.
Most trainers automatically split your dataset (for example, 80% training, 20% validation). If your tool lets you choose the split, keep it simple: use a standard split and do not “peek” by moving hard images into training just to raise the validation number. You want the validation set to represent the real world your camera will see.
How to read the charts in plain words (the milestone “read the training results”):
Engineering judgment: if validation accuracy is improving steadily, let training continue. If training accuracy is near-perfect but validation stops improving or gets worse, do not just train longer. That usually increases overfitting. Instead, improve the dataset and retrain.
Overfitting happens when the model learns details that are specific to your training photos rather than features that define the object. It is like a student who memorizes the exact practice questions but cannot solve new ones.
Real photo examples of overfitting in a beginner object recognizer:
This is where the milestone “test with new photos and record failures” matters. Do not only test with images from your dataset. Take 20–50 new photos with different backgrounds, distances, and lighting. Keep a small failure log: the image, the predicted label, the confidence, and what changed (angle, glare, clutter, partial object).
Then complete the milestone “improve the dataset and retrain.” Typical fixes are boring—but effective:
Overfitting is not a moral failure; it is feedback. Your model is telling you which visual situations you forgot to teach it.
Your classifier has a simple interface: an image goes in, and a set of label scores comes out. Many tools present this as “label + confidence.” The confidence is typically derived from a probability-like score across your labels (often a softmax). If your model outputs:
…the model is saying “mug is the most likely label under what I learned.” This is not a guarantee. Confidence can be high even when the model is wrong, especially when the image is outside what it has seen (for example, a new object class or an unusual background).
For a smart camera app, you will eventually choose a confidence threshold. If the top confidence is below the threshold (for example, 0.60), your app can show “Unknown” or “Not sure.” This is often better than confidently wrong predictions.
Practical testing workflow (connects to the “record failures” milestone):
These observations guide dataset improvements and help you design app behavior that feels trustworthy. A beginner-friendly goal is not “always correct,” but “correct when confident, and gracefully uncertain when not.”
In real projects, you rarely ship the model with the highest training accuracy. You ship the model that performs reliably on realistic tests and fits the constraints of your device. “Good enough” means it meets your first app’s needs while leaving room to improve later.
Use a simple checklist before you lock in a model:
Now complete the milestone “save and version your best model.” Treat models like code: name them, track what data they used, and record what changed. A practical versioning pattern is: project-labels_v1, v2_more-lighting, v3_balanced-classes. Save alongside a short note: dataset size per class, validation accuracy, test observations, and the chosen confidence threshold.
Finally, resist the urge to endlessly chase metrics. Your goal is a first working smart camera recognizer. Ship a solid baseline model, document its weak spots, and move forward. The next chapter will be much easier when you already have a model you trust, even if it’s not perfect.
1. What is the main workflow loop Chapter 3 wants you to follow when building your first object recognizer?
2. Which situation best matches a common beginner trap the chapter warns about?
3. Why does Chapter 3 emphasize testing on images the model has not seen?
4. When your model performs poorly on certain new photos, what does the chapter suggest you do next?
5. Which discipline is explicitly listed as necessary to succeed in this chapter without needing all the math details?
By now you have a trained image model that can recognize your chosen objects. That’s exciting—but it’s also the moment many beginner projects accidentally go off the rails. A model can look impressive in a quick demo and still be unreliable in real use. This chapter gives you a practical way to measure performance, explain results in plain language, and decide what to improve next.
We’ll treat evaluation like a small engineering experiment: you’ll run a structured test on a held-out test set, summarize the mistakes with a confusion table, set a confidence threshold so the app can say “I’m not sure,” and then stress test in real conditions (different rooms, distances, and lighting). The goal isn’t perfect accuracy; the goal is accuracy you can trust because you know how it was measured.
As you work through the milestones, keep one mindset: evaluation isn’t about proving your model is good. It’s about discovering where it fails, so you can fix the right thing—data, labels, or expectations—without guessing.
Practice note for Milestone: Run a structured test on your held-out test set: document your objective, define a measurable success check, and run a small experiment before scaling. Capture what changed, why it changed, and what you would test next. This discipline improves reliability and makes your learning transferable to future projects.
Practice note for Milestone: Build a simple confusion table and interpret it: document your objective, define a measurable success check, and run a small experiment before scaling. Capture what changed, why it changed, and what you would test next. This discipline improves reliability and makes your learning transferable to future projects.
Practice note for Milestone: Set a confidence threshold to reduce bad guesses: document your objective, define a measurable success check, and run a small experiment before scaling. Capture what changed, why it changed, and what you would test next. This discipline improves reliability and makes your learning transferable to future projects.
Practice note for Milestone: Perform “real life” tests (different rooms, distances, lighting): document your objective, define a measurable success check, and run a small experiment before scaling. Capture what changed, why it changed, and what you would test next. This discipline improves reliability and makes your learning transferable to future projects.
Practice note for Milestone: Create an improvement plan based on evidence: document your objective, define a measurable success check, and run a small experiment before scaling. Capture what changed, why it changed, and what you would test next. This discipline improves reliability and makes your learning transferable to future projects.
Evaluation means measuring how well your model performs on images it has not seen during training, using a consistent process you can repeat. This sounds simple, but it’s where many smart camera projects accidentally “grade themselves on the homework.” If you test using the same images (or near-duplicates) that helped train the model, you’re not measuring recognition—you’re measuring memory.
A demo can mislead because it is usually curated: you naturally point the camera at easy angles, good lighting, and centered objects. You may also stop testing after a few correct guesses. Real users do the opposite: they move quickly, hold objects partially out of frame, and use the app in messy environments. Evaluation forces you to face those conditions systematically.
Milestone: Run a structured test on your held-out test set. Use a dedicated test split that you did not touch during training decisions. If your tool already created train/validation/test splits, keep them fixed. If you created your own dataset folders, make sure the test folder stays “locked.” Don’t move failed test images into training just to make the score go up; that turns the test into training and destroys its value.
Think of evaluation as your project’s “truth meter.” Without it, you can’t tell whether changes helped, hurt, or did nothing.
Most tools report accuracy—the percent of test images the model labeled correctly. Accuracy is useful, but only when you understand what it hides. A model can have high accuracy while being dangerously wrong on one important class, especially if your dataset is imbalanced (for example, 300 “mug” photos and 40 “scissors” photos). In that case, the model can ignore scissors and still look “good.”
Errors are the incorrect predictions. You learn more from errors than from correct predictions because errors show what the model confuses or what your data fails to represent. When you review errors, don’t just note “wrong”—note the situation: glare, far distance, cluttered background, partial view, motion blur, or an object that looks similar to another class.
Confidence is the model’s self-reported strength of its guess (often a number like 0.0–1.0 or 0–100%). Beginners often interpret confidence as “probability of being correct.” It’s closer to “how strongly the model prefers this label over the others,” based on its training experience. A model can be confidently wrong—especially when it sees something outside your dataset (for example, a new object or unusual lighting).
Practical outcome: by the end of this chapter, you should be able to say, in plain language, “My model is accurate on my test set, but it struggles with X condition; I can reduce bad guesses by requiring at least Y confidence; here’s the evidence.”
A confusion table (often called a confusion matrix) is a simple grid that shows what the true label was versus what the model predicted. It’s one of the fastest ways to move from “accuracy is 82%” to “it keeps mixing up these two classes.” This is the milestone where evaluation becomes actionable.
Milestone: Build a simple confusion table and interpret it. You don’t need advanced math. For each test image, write down (1) the correct label and (2) the predicted label. Then count how many times each pairing occurs. Many training tools can export this automatically; if not, you can do it in a spreadsheet with rows as “actual” and columns as “predicted.”
How to read it: the diagonal cells (actual = predicted) are correct predictions. Off-diagonal cells are mistakes. Large off-diagonal numbers tell you exactly which classes are getting confused.
Practical outcome: after you build the confusion table, you should be able to pick one improvement target such as “collect more images of scissors at different angles” or “separate two classes that are visually too similar,” rather than randomly retraining and hoping.
In a smart camera app, a wrong confident label can be worse than no label at all. A confidence threshold is a simple rule: “Only show a prediction if confidence is at least T; otherwise show ‘I’m not sure.’” This turns your model from a forced guesser into a safer assistant.
Milestone: Set a confidence threshold to reduce bad guesses. Start with a conservative threshold like 0.70 (70%). Then evaluate how behavior changes on your test set and (later) your real-life tests. When you raise the threshold, you usually reduce incorrect labels, but you increase “I’m not sure” results. When you lower it, you get more predictions but more mistakes. There is no universal best value—choose based on how your app will be used.
How to pick a threshold with evidence:
Common mistake: treating the threshold as a way to “increase accuracy.” Technically it can increase the accuracy of the shown predictions, but you must also report how often the model refuses to answer. In real products this is normal—many systems prefer abstaining over hallucinating.
Practical outcome: your app will feel more trustworthy because it avoids strong claims on weak evidence, especially when the camera sees something outside the training set.
Your held-out test set is necessary, but it may still be too “similar” to your training conditions because you likely collected all images in the same places, with the same phone, and similar lighting. Robustness checks answer a different question: “Will this still work when life changes?”
Milestone: Perform “real life” tests (different rooms, distances, lighting). Create a small, structured stress test plan. Don’t improvise; intentionally cover conditions that often break vision models:
Run the same set of objects through these scenarios and record: predicted label, confidence, and whether it was correct. If your tool supports it, save example frames of failures. You are building a mini “field report” that tells you where the model is brittle.
Engineering judgment: don’t chase every failure equally. If your app is meant to recognize objects on a desk, failures at extreme angles across the room may not matter. But if the app is meant to work while walking, motion blur and distance become critical. Align the robustness checks with the real promise you want to make to users.
Practical outcome: you end up with a list of failure modes tied to real conditions, not just abstract metrics.
Once you have evidence—test results, a confusion table, and real-life stress tests—you can create an improvement plan that targets the true cause. The key skill is separating data issues (fixable by better examples and labels) from model limitations (may require different classes, more data, or a stronger model).
Milestone: Create an improvement plan based on evidence. Use this practical checklist:
Turn the checklist into a short plan with three parts: (1) the problem statement (“scissors are misclassified as pens in backlit shots”), (2) the hypothesized cause (“too few backlit scissors images; backgrounds differ”), and (3) the action (“collect 50 backlit scissors images across three backgrounds; retrain; re-evaluate on the locked test set and the stress test set”).
Practical outcome: you stop guessing and start iterating like an engineer. In the next chapter, this disciplined approach will make exporting and deploying your model much smoother, because you’ll know what performance you can realistically expect in the smart camera app.
1. Why does the chapter recommend evaluating on a held-out test set instead of relying on a quick demo?
2. What is the main purpose of building a simple confusion table?
3. What is the practical benefit of setting a confidence threshold in the app?
4. Which testing approach best matches the chapter’s idea of “real life” tests?
5. According to the chapter, what mindset should guide evaluation?
Up to this point, you trained an image model and evaluated whether it seems to recognize your objects. Now you’ll do the step beginners often find the most “real”: turning that trained model into a smart camera app that makes predictions on live images. This chapter connects the machine learning world (datasets, training, accuracy) to the product world (export formats, camera frames, performance, and user-friendly output).
The big mindset shift is that training and using a model are different jobs. Training is expensive and happens rarely. Inference (making predictions) should be fast, stable, and repeatable—every time a camera frame comes in. You’ll export your model in a usable format, build a simple camera screen that captures frames, run the model on those frames, and display predictions with labels and confidence. Finally, you’ll package a shareable demo build so you can show your work to someone else on their own device.
As you work, you’ll practice engineering judgment: when to prefer a web demo vs. a mobile demo, how often to run predictions, what “confidence” means in a UI, and how to handle the messy real world (bad lighting, motion blur, and camera permissions). The goal is not a perfect product. The goal is a working pipeline that proves your model can move from a notebook or training tool into an application.
Practice note for Milestone: Export the model in a usable format: document your objective, define a measurable success check, and run a small experiment before scaling. Capture what changed, why it changed, and what you would test next. This discipline improves reliability and makes your learning transferable to future projects.
Practice note for Milestone: Create a simple camera screen and capture frames: document your objective, define a measurable success check, and run a small experiment before scaling. Capture what changed, why it changed, and what you would test next. This discipline improves reliability and makes your learning transferable to future projects.
Practice note for Milestone: Run the model on images and display top predictions: document your objective, define a measurable success check, and run a small experiment before scaling. Capture what changed, why it changed, and what you would test next. This discipline improves reliability and makes your learning transferable to future projects.
Practice note for Milestone: Add usability features (labels, confidence, fallback message): document your objective, define a measurable success check, and run a small experiment before scaling. Capture what changed, why it changed, and what you would test next. This discipline improves reliability and makes your learning transferable to future projects.
Practice note for Milestone: Package a shareable demo build: document your objective, define a measurable success check, and run a small experiment before scaling. Capture what changed, why it changed, and what you would test next. This discipline improves reliability and makes your learning transferable to future projects.
Practice note for Milestone: Export the model in a usable format: document your objective, define a measurable success check, and run a small experiment before scaling. Capture what changed, why it changed, and what you would test next. This discipline improves reliability and makes your learning transferable to future projects.
Practice note for Milestone: Create a simple camera screen and capture frames: document your objective, define a measurable success check, and run a small experiment before scaling. Capture what changed, why it changed, and what you would test next. This discipline improves reliability and makes your learning transferable to future projects.
Practice note for Milestone: Run the model on images and display top predictions: document your objective, define a measurable success check, and run a small experiment before scaling. Capture what changed, why it changed, and what you would test next. This discipline improves reliability and makes your learning transferable to future projects.
Practice note for Milestone: Add usability features (labels, confidence, fallback message): document your objective, define a measurable success check, and run a small experiment before scaling. Capture what changed, why it changed, and what you would test next. This discipline improves reliability and makes your learning transferable to future projects.
“Deployment” sounds like a big, professional word, but for this course it means something simple: your trained model is saved in a format an app can load, and your app calls the model to get predictions on real images. Training created weights (what the model learned). Deployment is the set of steps that makes those weights useful outside the training environment.
The first milestone is exporting the model in a usable format. Many beginner tools let you export in several forms: a TensorFlow SavedModel, TensorFlow Lite (.tflite) for mobile/edge devices, ONNX for cross-framework use, or a web-friendly format such as TensorFlow.js. The “best” choice depends on where you want your demo to run (browser or phone) and what packaging is easiest for you.
When you export, keep the model’s metadata close: the label list (class names in the correct order), expected input size (e.g., 224×224 RGB), and normalization details (for example, pixel values scaled to 0–1 or standardized). A common beginner mistake is exporting the model but losing the label order. If the app’s labels are not aligned with the model’s output indices, you’ll get confidently wrong results that look like a broken model.
Practical outcome: by the end of this section, you should have (1) the model file in a deployable format, (2) a labels file (often a simple text file with one label per line), and (3) a small note in your project README stating input size and preprocessing rules.
For a first smart camera recognizer, you have two beginner-friendly paths: a web demo or a mobile demo. Both can work well, and the “right” choice is the one you can complete with fewer moving parts.
A web demo typically uses your laptop camera (webcam) via browser APIs, and runs inference either in the browser (e.g., TensorFlow.js) or by sending frames to a local server. Web demos are easier to share as a link, easier to iterate quickly, and don’t require app store packaging. However, performance can vary across browsers, and mobile browsers may have restrictions.
A mobile demo (Android or iOS) feels closer to a real “smart camera” experience. Running locally with a TensorFlow Lite model can be fast and private (no network). The downside is extra setup: developer tools, device permissions, and platform-specific build steps.
Use these rules of thumb. Choose web if you want speed of development, simple sharing, and you’re comfortable testing on a laptop first. Choose mobile if your target is “point a phone camera at an object” and you’re willing to manage permissions and device builds.
This chapter’s second milestone—creating a simple camera screen and capturing frames—looks different in each path, but the core idea is identical: render a camera preview, then periodically take frames (images) from that preview for inference. Do not start by predicting on every single frame; start with a manageable rate (like 2–5 predictions per second), confirm correctness, then optimize.
Live prediction is a loop. Each iteration takes a camera frame, prepares it the same way your training pipeline prepared images, runs the model, then interprets the output. This is the heart of the smart camera app: camera frame → resize/crop → normalize → predict → decode probabilities.
The most important engineering judgment here is consistency. Your app must replicate training preprocessing. If training used center-crop to 224×224 and scaled pixels to 0–1, but your app stretches a wide image to 224×224 and leaves pixels in 0–255, your accuracy will collapse. Many “my model is bad in the app” problems are actually preprocessing mismatches.
A practical, beginner-friendly approach is: (1) capture a frame, (2) convert it to an RGB bitmap/image tensor, (3) resize to the expected input size, (4) apply the same normalization, and (5) call the model. Keep the loop simple at first: run inference on a single still image you capture with a button. Once that works, switch to timed inference (every N milliseconds) for a live feel.
This section connects directly to the third milestone: running the model on images and displaying top predictions. Before you worry about a pretty UI, confirm the inference loop is correct by testing with a few known images from your dataset. If your app cannot correctly classify images it has effectively “seen before,” the issue is likely resizing/normalization/label order—not the model.
A smart camera demo succeeds or fails based on whether a human can understand its output. This is where usability features matter: clear labels, readable confidence, and a safe fallback message when the model is uncertain. The model’s raw output is usually a vector of scores (often probabilities after a softmax). Your job is to translate that into something useful.
Start with a simple display: show the top-1 prediction (the class with the highest probability) and its confidence. Then add top-3 predictions to build trust. When the model is unsure, the top-1 may change rapidly across frames. Showing top-3 gives a more stable picture of what the model is considering.
Confidence is not “truth,” but it is a helpful signal. A practical rule is to set a threshold. For example, if the top-1 confidence is below 0.60, display a fallback message like “Not sure—try better lighting or move closer.” This is the fourth milestone: add usability features (labels, confidence, fallback message). Without a threshold, your app will confidently label random backgrounds, which feels broken even if the model is behaving normally.
Also consider smoothing. If predictions flicker between two classes, you can average probabilities over the last few frames or require the same label for a short duration before “locking in.” Keep smoothing minimal at first; too much smoothing can make the app feel delayed.
Once the pipeline works, you’ll notice real-world factors you didn’t see during training: lighting changes, motion blur, cluttered backgrounds, and device performance limitations. This section ties together the fifth milestone—packaging a shareable demo build—by ensuring your demo behaves well enough to show others.
Start with speed. Your app has three main time costs: capturing the frame, preprocessing (resize/normalize), and inference. If it feels slow, first reduce how often you run inference (for example, from 30 times per second to 5). Then consider using a smaller model or lower input resolution if your tool supports it. Many beginners accidentally run inference on the full camera resolution and only then resize, which is unnecessarily expensive.
Lighting and stability are “performance” too because they affect accuracy. Dim lighting introduces noise; harsh backlighting creates silhouettes; motion blur removes detail. A practical demo instruction you can include on-screen is: “Good light, steady camera, fill the frame with the object.” This is not cheating—it’s setting correct expectations for what your small, beginner model can reliably do.
Also pay attention to device heat and battery. Continuous camera + continuous inference can warm a phone quickly. If your demo will run for a few minutes, add a simple control like a “Pause Predictions” toggle. This improves usability and prevents performance from degrading during a live presentation.
Practical outcome: a demo that predicts smoothly, doesn’t freeze the UI, and provides guidance to users about how to get good results.
Most first-time smart camera builds fail for reasons unrelated to machine learning. They fail due to permissions, file formats, and memory/CPU constraints. Having a troubleshooting checklist turns “it doesn’t work” into a series of testable steps.
Camera permissions: If your preview is black or never starts, confirm permissions. On mobile, you typically need a camera permission in the app manifest/config and a runtime permission request. On the web, you must use HTTPS (or localhost) and handle the user’s permission prompt. Also check that you are selecting the correct camera (front vs. rear).
Model and label formats: If the model fails to load, confirm you exported the right format for your runtime (e.g., .tflite for TFLite, TF.js files for browser). If predictions are nonsense, validate label ordering and preprocessing. A fast diagnostic: run inference in the app on a single known image from your training/validation set and compare results to what you saw during evaluation.
Crashes and freezes: These are often memory or threading issues. If the UI freezes, inference is probably running on the main thread. If the app crashes after a few seconds, you may be allocating new frame buffers repeatedly. Reuse image buffers and avoid storing full-resolution frames.
“Works on my machine” demo problems: Before you package a shareable demo build, test on at least one other device if possible. Differences in camera resolution, orientation, and performance can expose assumptions in your code. Package your demo with clear instructions: how to install, how to grant permissions, and what objects the model knows.
This section completes the final milestone: package a shareable demo build. Your definition of “done” is a build that runs on a fresh install, requests camera permission correctly, loads the model without manual file copying, and shows understandable predictions with a fallback message when uncertain.
1. What is the key mindset shift emphasized in Chapter 5 when moving from a trained model to a smart camera app?
2. Why does the chapter have you export the model in a usable format before building the camera experience?
3. In the smart camera pipeline described, what happens after the camera captures frames?
4. Which UI behavior best reflects the chapter’s guidance on making predictions user-friendly in messy real-world conditions?
5. What is the primary purpose of packaging a shareable demo build at the end of Chapter 5?
You have a working smart camera recognizer. That’s a big milestone—but “working” is not the same as “reliable.” In real life, lighting changes, backgrounds get messy, and users do surprising things (like holding an object too close to the lens or half out of frame). This chapter is about the final 20% of effort that often creates 80% of the value: improving accuracy with better data, reducing false positives with sensible thresholds and “unknown” handling, running lightweight user testing, and packaging your project so someone else (or future you) can reproduce it.
Think like a product engineer for a day. Your goal is not just a higher accuracy number; it’s a model that fails more gracefully, communicates uncertainty, and is easy to demo and hand off. We’ll keep the techniques beginner-friendly: improve the dataset first, use simple augmentation when it matches reality, add confidence thresholds, write a short testing checklist, and finish with a one-page README and demo script. Finally, you’ll map out next upgrades—whether that’s adding more objects, moving to object detection, or running fully on-device.
By the end of this chapter, you should have a “ship-ready” prototype: more consistent predictions, fewer embarrassing confident mistakes, and a clear plan for what to improve next.
Practice note for Milestone: Improve accuracy with better data and simple augmentation: document your objective, define a measurable success check, and run a small experiment before scaling. Capture what changed, why it changed, and what you would test next. This discipline improves reliability and makes your learning transferable to future projects.
Practice note for Milestone: Reduce false positives with thresholds and “unknown” handling: document your objective, define a measurable success check, and run a small experiment before scaling. Capture what changed, why it changed, and what you would test next. This discipline improves reliability and makes your learning transferable to future projects.
Practice note for Milestone: Add a small user testing checklist and iterate: document your objective, define a measurable success check, and run a small experiment before scaling. Capture what changed, why it changed, and what you would test next. This discipline improves reliability and makes your learning transferable to future projects.
Practice note for Milestone: Write a one-page project README and demo script: document your objective, define a measurable success check, and run a small experiment before scaling. Capture what changed, why it changed, and what you would test next. This discipline improves reliability and makes your learning transferable to future projects.
Practice note for Milestone: Plan your next upgrade (more objects, detection, or on-device): document your objective, define a measurable success check, and run a small experiment before scaling. Capture what changed, why it changed, and what you would test next. This discipline improves reliability and makes your learning transferable to future projects.
Practice note for Milestone: Improve accuracy with better data and simple augmentation: document your objective, define a measurable success check, and run a small experiment before scaling. Capture what changed, why it changed, and what you would test next. This discipline improves reliability and makes your learning transferable to future projects.
Practice note for Milestone: Reduce false positives with thresholds and “unknown” handling: document your objective, define a measurable success check, and run a small experiment before scaling. Capture what changed, why it changed, and what you would test next. This discipline improves reliability and makes your learning transferable to future projects.
Practice note for Milestone: Add a small user testing checklist and iterate: document your objective, define a measurable success check, and run a small experiment before scaling. Capture what changed, why it changed, and what you would test next. This discipline improves reliability and makes your learning transferable to future projects.
Practice note for Milestone: Write a one-page project README and demo script: document your objective, define a measurable success check, and run a small experiment before scaling. Capture what changed, why it changed, and what you would test next. This discipline improves reliability and makes your learning transferable to future projects.
If you want a fast accuracy boost, improve your data before touching model settings. Beginners often assume the model is the problem, but most early failures come from the dataset: too few examples, inconsistent labels, or images that don’t match how the camera will be used. A practical workflow is: (1) review mistakes, (2) decide what kind of data would fix them, (3) collect and label that data, then (4) retrain and re-check.
Start by inspecting false predictions from your validation set (and a few real camera runs). For each error, ask: “What did the model see that made this confusing?” Common issues include backgrounds that dominate the frame, objects photographed only from one angle, or one class always appearing in bright light while another class is always dim. The model learns patterns that correlate with labels—even accidental ones—so you want each class to vary in similar ways.
A strong beginner milestone here is to keep a simple error log. Each time the model fails, write one line: “Predicted X for Y when background was Z / lighting was W.” After 20–30 errors, patterns appear and your next data collection becomes targeted rather than random. This is how you improve accuracy with better data—without needing advanced deep learning tricks.
Augmentation means creating additional training examples by applying small transformations to existing images: flips, slight rotations, crops, brightness changes, blur, and so on. The goal is not to “invent” new objects; it’s to teach the model that certain changes should not change the label. Used well, augmentation reduces overfitting and helps the model generalize to real camera conditions.
Use augmentation when it matches reality. If your camera app will see objects at slightly different angles, then small rotations make sense. If users might use the app in dim rooms, mild brightness and contrast changes help. But avoid unrealistic transformations that break the meaning of the label. For example, if text direction matters (a “LEFT arrow” vs “RIGHT arrow”), horizontal flips could create incorrect labels. If color is essential (e.g., recognizing “red” vs “green” objects), heavy color jitter can confuse the model.
Keep it simple: turn on a standard augmentation preset in your training tool and change one knob at a time. Retrain, then compare: did validation accuracy rise? Did real camera performance improve? A common mistake is “augmentation overload,” where training accuracy drops and validation becomes unstable because images are too distorted. Your engineering judgment is to choose augmentation that reflects your target environment, not every transformation available.
This milestone—simple augmentation—works best after Section 6.1. First fix obvious data gaps; then use augmentation to stretch the usefulness of your improved dataset.
A classifier is forced to pick one of the known classes, even when the camera sees something completely different. That’s why false positives happen: the model must choose the “closest” label and may do it confidently. In a smart camera app, this is often worse than being uncertain. Your users would rather see “I’m not sure” than a confident wrong answer.
The simplest fix is a confidence threshold. Most models output a probability (or score) per class. If the top score is below a threshold (for example, 0.75), show “Unknown” instead of a label. This reduces false positives but can increase false negatives (more “Unknown” outputs). The right threshold depends on your use case: demos often prefer fewer wrong answers even if some correct answers become “Unknown.” Safety-critical scenarios should be conservative too.
Make this practical by testing thresholds against a small, realistic set of camera frames. Create a mini table: threshold 0.60, 0.70, 0.80. For each one, count (a) correct labeled outputs, (b) wrong labeled outputs, (c) unknown outputs. Choose the threshold that fits your tolerance for mistakes. This is a beginner-friendly reliability milestone that doesn’t require retraining.
A common mistake is setting the threshold based only on your training/validation split. Always validate thresholds on “messy reality” examples: different rooms, different people, different phones. This milestone directly targets false positives and makes your app feel far more trustworthy.
Even a beginner smart camera project can raise real privacy concerns. A camera points at spaces, people, screens, and personal items. Responsible AI isn’t only about fairness in huge datasets; it’s also about basic respect, consent, and clear limitations.
Start with privacy-by-design. If you can run inference locally (on the device) without uploading images, do it. If your app sends frames to a server, be explicit about what is sent, when, and why. Store as little as possible. If you must store images for debugging, store only with permission and delete them on a schedule.
Run a small user testing checklist that includes responsible behavior. For example: Does the app indicate when the camera is on? Is there a clear “stop” or “pause” button? Does the app avoid saving images without asking? Also include performance checks: test in two different rooms, with at least two different people, and with objects partially occluded. The goal is iteration: collect feedback, update your checklist, improve data and thresholds, and retest. This is how reliability grows in the real world.
“Shipping” a beginner AI project means someone else can run it and get similar results. That requires organization more than brilliance. Your deliverables should include: the trained model file(s), the label map (class names), the app code, and a minimal set of instructions to reproduce training and run inference. This milestone turns a notebook experiment into a real project.
Use a simple folder structure and keep it stable:
Your one-page README should answer: What does the project do? What objects can it recognize? How do I install dependencies? How do I run the demo? What hardware is required? Include the model version, the date trained, the number of classes, and your best accuracy metric (plus the evaluation conditions). If you changed the threshold, document it. Reproducibility is about reducing ambiguity.
Also write a short demo script (literally a few bullet points) so you can present consistently: environment setup, what you’ll show first (easy cases), then harder cases (low light, clutter), and how you’ll explain “Unknown.” A common mistake is improvising a demo and accidentally testing edge cases first; a script helps you tell a coherent story while still being honest about limitations.
Your current system likely does image classification: it assigns one label to the whole frame (or to a cropped region you provide). That’s perfect for a beginner smart camera, but it has clear next steps depending on what you want to build.
If you want the camera to find objects in the scene (not just recognize what you point it at), move to object detection. Detection outputs bounding boxes and labels, which is a better user experience for cluttered scenes. The tradeoff is more complex labeling (drawing boxes) and more compute. A practical upgrade path is to start with a small set of objects (2–5) and label 200–500 images carefully rather than thousands loosely.
If you want to recognize more items, scale up classes gradually. Add 1–2 new objects at a time and rebalance the dataset. Each new class increases confusion potential, so use your Section 6.1 error log to decide which classes are “too similar” without additional data or better lighting constraints.
Choose one upgrade based on a single constraint: do you need better accuracy, better speed, more objects, or better UX in messy scenes? Make a plan, run a small experiment, and keep your project reproducible. That’s the habit that turns a beginner build into an engineering practice.
1. Why does Chapter 6 emphasize “reliable” over simply “working”?
2. Which approach best fits the chapter’s recommended way to improve accuracy?
3. How does the chapter suggest reducing false positives in a beginner-friendly way?
4. What is the main purpose of a small user testing checklist in this chapter?
5. Which set of deliverables best matches the chapter’s “ship-ready” packaging guidance?
- Learning Evolved.
- Intelligence Amplified.