AI Robotics & Autonomous Systems — Beginner
Teach a robot camera to spot people and objects, step by step.
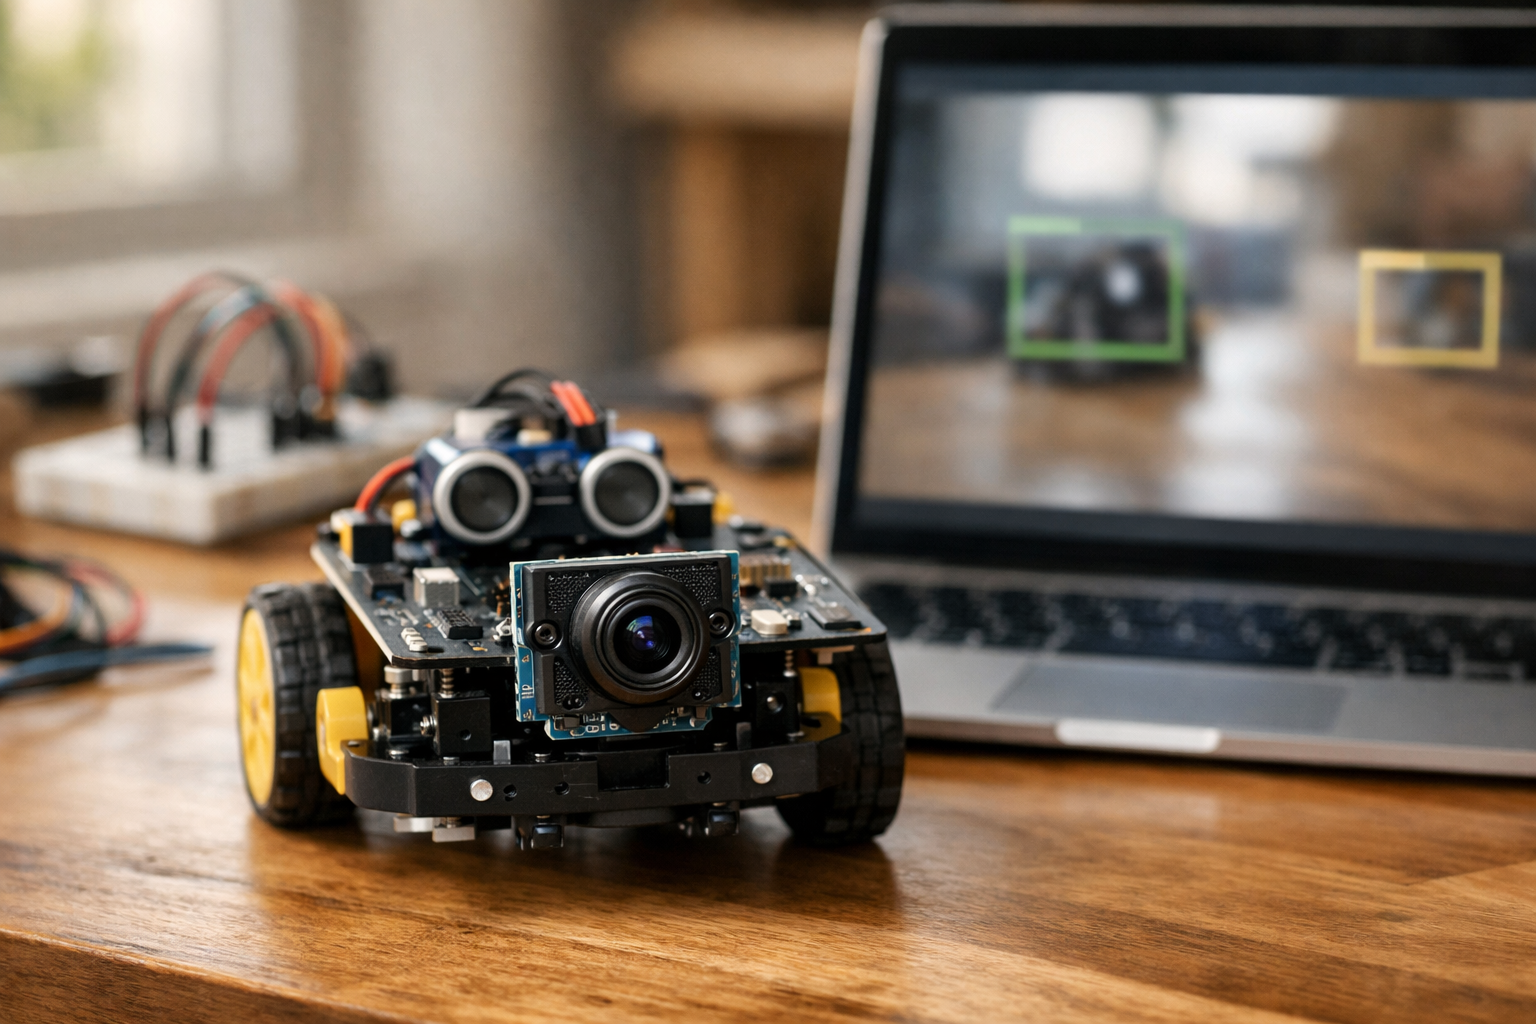
This course is a short, book-style path that teaches you how to make a robot camera “notice” people and everyday objects. You do not need to know AI, coding, or data science before you begin. We start from the basics—what a pixel is, how video is made of frames, and why lighting changes what the camera sees—then build up to a working object-detection demo you can run on a laptop or small computer.
Instead of asking you to train a model from scratch (which can be slow and confusing at the beginner level), you will use a pre-trained object detector and focus on the skills that make it useful on real robots: clean camera input, understandable outputs, reliability checks, and simple behaviors that respond safely.
By the final chapter, you will have a small project that:
The six chapters build in a straight line. First you learn what the camera is producing and how to work with it. Next you learn how images become “data” and how to prepare frames so a model can use them. Then you run your first detector on images and live video. After that, you make it more reliable in real rooms with changing light. Then you turn detections into decisions and actions. Finally, you package and test your project so it is easy to rerun, debug, and share.
Robotics and AI can feel overwhelming because there are many moving parts: hardware, software, video, and models. This course keeps the scope tight and practical. Each chapter has a clear checkpoint so you always know what “working” looks like before moving on. Every new concept is introduced from first principles, using simple language and concrete examples.
If you want to begin right away, create your account here: Register free. If you would rather explore what else you can learn on Edu AI first, you can browse all courses.
When you finish this course, you will not just recognize the words “object detection”—you will have a working, testable robot-vision demo and the confidence to improve it.
Robotics & Computer Vision Instructor
Sofia Chen designs beginner-friendly robotics labs that turn real sensor data into simple, reliable behaviors. She has built camera-based prototypes for mobile robots and teaches practical computer vision with a focus on safety, testing, and clear explanations.
A robot camera is not “eyes” in the human sense. It is a sensor that delivers a steady stream of numbers. Those numbers become pictures only after software interprets them. In this chapter you’ll build that interpretation from the ground up: what frames are, what pixels are, how RGB color is stored, and why lighting and motion can quietly break your results. Then you’ll do the first practical robotics task in this course: confirm your camera works, open a live video window reliably, and save a single snapshot for inspection.
The goal is engineering confidence. When a detector later says “person: 0.62” you should know what that number is based on (pixel data), how often it updates (frame rate), and what conditions cause it to be wrong (blur, noise, underexposure). You’ll also start a clean workspace so you can reproduce your setup on a laptop, Raspberry Pi, or robot computer without mystery dependencies.
By the end of this chapter you will have a tiny script that displays live video and writes an image file to disk. That script becomes your diagnostic tool for the rest of the course—when detection fails, you will first verify the camera feed is actually usable.
Practice note for Set up a simple workspace and confirm your camera works: document your objective, define a measurable success check, and run a small experiment before scaling. Capture what changed, why it changed, and what you would test next. This discipline improves reliability and makes your learning transferable to future projects.
Practice note for Understand pixels, images, and frames using everyday examples: document your objective, define a measurable success check, and run a small experiment before scaling. Capture what changed, why it changed, and what you would test next. This discipline improves reliability and makes your learning transferable to future projects.
Practice note for See how color works (RGB) and why lighting matters: document your objective, define a measurable success check, and run a small experiment before scaling. Capture what changed, why it changed, and what you would test next. This discipline improves reliability and makes your learning transferable to future projects.
Practice note for Run your first tiny script to open and show a live video window: document your objective, define a measurable success check, and run a small experiment before scaling. Capture what changed, why it changed, and what you would test next. This discipline improves reliability and makes your learning transferable to future projects.
Practice note for Checkpoint: capture a frame and save it as an image file: document your objective, define a measurable success check, and run a small experiment before scaling. Capture what changed, why it changed, and what you would test next. This discipline improves reliability and makes your learning transferable to future projects.
Practice note for Set up a simple workspace and confirm your camera works: document your objective, define a measurable success check, and run a small experiment before scaling. Capture what changed, why it changed, and what you would test next. This discipline improves reliability and makes your learning transferable to future projects.
Practice note for Understand pixels, images, and frames using everyday examples: document your objective, define a measurable success check, and run a small experiment before scaling. Capture what changed, why it changed, and what you would test next. This discipline improves reliability and makes your learning transferable to future projects.
Practice note for See how color works (RGB) and why lighting matters: document your objective, define a measurable success check, and run a small experiment before scaling. Capture what changed, why it changed, and what you would test next. This discipline improves reliability and makes your learning transferable to future projects.
Practice note for Run your first tiny script to open and show a live video window: document your objective, define a measurable success check, and run a small experiment before scaling. Capture what changed, why it changed, and what you would test next. This discipline improves reliability and makes your learning transferable to future projects.
In robotics, computer vision means turning camera data into decisions. The camera provides raw measurements (pixel intensities). Vision software converts those measurements into information a robot can act on: “there is a person ahead,” “the door handle is on the left,” or “the path is clear.” Unlike a photo app, robot vision must be timely and reliable. A slightly late detection can be worse than no detection if your robot is moving.
It helps to separate the vision stack into layers. First is capture: getting frames from a camera without dropping them or freezing. Second is preprocessing: resizing, color conversion, denoising, and sanity checks (e.g., is the image too dark?). Third is inference: running a model such as a pre-trained object detector. Fourth is interpretation: reading labels, confidence scores, and bounding boxes, then applying thresholds and filters to reduce false positives. Finally comes behavior: stop, follow, or alert based on what is detected.
Beginners often jump directly to inference (“run the detector!”) and ignore capture quality. That leads to confusing outcomes: the model seems inconsistent, but the real problem is that the camera is underexposed, frames are blurry, or the stream is stuttering. This chapter focuses on the foundation: camera data and basic capture, so later detection behavior is built on a stable signal.
A camera is a sensor that samples the world at regular intervals. Each sample is a frame, essentially an image captured at a specific time. A continuous stream of frames is what we call video. For a robot, the timing matters: when the robot decides to stop, it is reacting to some frame captured a fraction of a second ago.
Resolution is the frame’s width and height in pixels, such as 640×480 or 1280×720. Higher resolution can improve detection of small objects, but it increases compute cost: you process more pixels per frame, which can reduce your frame rate. The right choice depends on your robot’s CPU/GPU budget and the size of targets. A hallway-following robot may be fine at 640×480; a robot detecting small tools on a bench may need more.
Frame rate (FPS, frames per second) is how many frames you can capture and process each second. For basic person detection and simple behaviors, 10–30 FPS is often usable. Below ~5 FPS, following behavior can feel “laggy,” and your robot may overshoot before it reacts. Be aware that cameras advertise FPS, but your actual end-to-end FPS depends on exposure time, USB bandwidth, and how much processing you do per frame.
Common mistakes include assuming the camera is “real-time” without measuring, and requesting high resolution and high FPS simultaneously on limited hardware. In this chapter you will confirm your camera works and can produce a stable stream; later, you’ll learn to tune resolution and FPS for your detector and robot behavior.
A pixel is the smallest unit in an image: one tiny square that stores color information for a specific spot in the frame. An image is a grid of pixels. If your image is 640×480, that means 307,200 pixels per frame. Video is many such grids per second.
Most robot cameras provide color images. The most common representation is RGB: each pixel contains three numbers—how much red, green, and blue light is present. In typical 8-bit images each channel ranges from 0 to 255. A bright white pixel is roughly (255, 255, 255). A black pixel is (0, 0, 0). A strong red might be (255, 0, 0). Your model’s input is ultimately these channel values across the entire frame.
Important practical detail: many camera libraries (including OpenCV by default) represent color frames as BGR order instead of RGB. That means the first channel is blue, not red. If colors look “wrong,” or if you feed frames into a model expecting RGB, you may need to swap channels. This is a classic beginner bug because the image still “looks fine” in many scenes until you compare carefully.
Why should a robot builder care about color channels? Because lighting changes shift channel values. A warm indoor bulb can add red/yellow bias; daylight can add blue. Some detectors are robust, but extreme color casts can reduce confidence scores or increase false detections. Understanding that frames are just numbers helps you troubleshoot: if the scene is too dark, most pixels cluster near 0; if it’s overexposed, they saturate near 255.
Robot vision fails more often due to image quality than “bad AI.” Three common culprits are lighting, blur, and motion. You can’t control the real world, but you can design your pipeline and robot behavior to be tolerant.
Lighting: In low light, the camera increases exposure time and sensor gain. Longer exposure makes motion blur worse; higher gain adds noise. In very bright light, pixels saturate and lose detail. Both conditions reduce the useful signal that a detector relies on (edges, textures, and contrast). A practical check is to compute the average brightness of the frame (for example, by converting to grayscale and averaging). If it is below a threshold, you can decide to slow the robot, turn on an LED, or temporarily raise the detection threshold to avoid false positives.
Blur: Blur can come from focus issues (fixed-focus cameras) or motion. A robot that turns quickly or vibrates produces blurred frames that confuse detectors. A simple mitigation is mechanical: mount the camera firmly and avoid placing it on a flexible chassis panel. Another mitigation is behavioral: reduce speed when you need reliable vision, especially during turning.
Motion and rolling shutter: Many low-cost cameras scan the image line-by-line, so fast motion creates skewed shapes. Detectors may misplace bounding boxes or flicker between labels. Don’t “chase” every frame with behavior. Instead, use stability rules later in the course: require a detection to persist for N frames, or smooth the bounding box position before acting.
Engineering judgment here is about knowing what to fix first. If your snapshot looks dark and grainy, retraining a model won’t help. Improve lighting or camera settings. If frames freeze, improve capture reliability. The rest of this course builds on this mindset: validate the sensor signal before trusting the AI output.
You will write small, repeatable scripts, so a clean setup matters. The safest approach is to use a dedicated Python environment for this course rather than installing packages globally. That way, OpenCV versions and dependencies don’t collide with other projects.
Recommended baseline: Python 3.10+ and OpenCV (package name opencv-python). If you are on a Raspberry Pi or embedded Linux, you may use a system-provided OpenCV build for performance and camera driver support, but the idea is the same: keep your environment consistent and documented.
A practical workflow is:
ai-vision-starter).camera_test.py script and a snapshots/ folder for saved frames.Common mistakes: mixing pip and system packages without realizing, installing multiple OpenCV builds simultaneously, or running scripts from a different interpreter than the one you installed packages into. If your import fails or the camera cannot be opened, first confirm which Python is running and that OpenCV imports cleanly.
Also confirm your camera is not locked by another program. Video conferencing apps often keep the camera open in the background. On Linux, permissions can also block access; on Windows and macOS, privacy settings can deny camera use to your terminal or IDE. Treat camera setup as a hardware bring-up task: one change at a time, test after each change, and write down the working configuration.
Your first vision program should do two things reliably: open the camera and show live frames, and capture one frame to disk. This proves your toolchain works and gives you a “ground truth” image to inspect when something later goes wrong.
In OpenCV, the typical capture loop is: create a VideoCapture object, read frames in a loop, display them, and exit cleanly on a key press. Two practical details matter in robotics. First, always check the return value from read(). If it fails (camera disconnected, driver glitch), you should not keep processing a stale frame. Second, close resources predictably: release the camera and destroy windows, or your next run may fail to open the device.
Here is a minimal, dependable script you can adapt:
import cv2

cap = cv2.VideoCapture(0)
if not cap.isOpened():
    raise RuntimeError("Could not open camera")

snapshot_saved = False

while True:
    ok, frame = cap.read()
    if not ok:
        print("Frame read failed")
        break

    cv2.imshow("robot camera", frame)

    key = cv2.waitKey(1) & 0xFF
    if key == ord('q'):
        break
    if key == ord('s') and not snapshot_saved:
        cv2.imwrite("snapshot.jpg", frame)
        snapshot_saved = True
        print("Saved snapshot.jpg")

cap.release()
cv2.destroyAllWindows()
Run it, confirm you see a stable live window, and press s to save a snapshot. Then open the saved image with any viewer and check: is it sharp, properly exposed, and correctly oriented? If it’s too dark, add light or reposition the camera. If it’s blurry, stabilize the mount or reduce motion. This snapshot checkpoint is not busywork—it is the fastest way to diagnose future detection issues.
Once this is working, you have completed the essential “camera bring-up” step. In the next chapter, you’ll feed these frames into a pre-trained detector and start interpreting labels, confidence scores, and bounding boxes to drive robot behavior.
1. Why does the chapter say a robot camera is not “eyes” in the human sense?
2. A detector later outputs “person: 0.62.” According to the chapter, what should you understand that number is ultimately based on?
3. Which situation best explains why lighting and motion can make vision results wrong or unstable?
4. What is the most practical purpose of writing a tiny script that shows live video and saves a snapshot?
5. How does establishing a clean workspace help you in this chapter’s context?
A robot camera feels like a “sensor,” but for your AI pipeline it’s a data source: a steady stream of images that must be decoded, resized, converted, and packaged into a consistent format. The goal of this chapter is to build your intuition for what an image really is (arrays of pixels over time), and then turn that intuition into an input pipeline you can trust. If your frames are rotated, resized incorrectly, color-shifted, or intermittently missing, every downstream step—object detection, tracking, and behavior—becomes noisy and brittle.
We’ll connect practical tasks you’ll use constantly: converting and resizing images without breaking them, drawing overlays for debugging, building a mini dataset folder from snapshots, and creating a clean checkpoint “input pipeline” that loads and preprocesses frames. To sharpen your understanding of what models “notice,” you’ll also build a simple motion/edge view—an easy way to see features your robot might use even before you run a detector.
By the end of this chapter, you should be able to treat every frame as a structured record: width and height, color channels, numeric range, and timestamp. That discipline is what makes the next chapters (object detection outputs, thresholds, and robot behaviors like stop/follow/alert) reliable instead of random.
Practice note for Convert and resize images without breaking them: document your objective, define a measurable success check, and run a small experiment before scaling. Capture what changed, why it changed, and what you would test next. This discipline improves reliability and makes your learning transferable to future projects.
Practice note for Draw shapes and text overlays for debugging: document your objective, define a measurable success check, and run a small experiment before scaling. Capture what changed, why it changed, and what you would test next. This discipline improves reliability and makes your learning transferable to future projects.
Practice note for Build a mini dataset folder from your own camera snapshots: document your objective, define a measurable success check, and run a small experiment before scaling. Capture what changed, why it changed, and what you would test next. This discipline improves reliability and makes your learning transferable to future projects.
Practice note for Checkpoint: make a clean “input pipeline” that loads and preprocesses frames: document your objective, define a measurable success check, and run a small experiment before scaling. Capture what changed, why it changed, and what you would test next. This discipline improves reliability and makes your learning transferable to future projects.
Practice note for Mini-lab: create a simple motion/edge view to understand features: document your objective, define a measurable success check, and run a small experiment before scaling. Capture what changed, why it changed, and what you would test next. This discipline improves reliability and makes your learning transferable to future projects.
Practice note for Convert and resize images without breaking them: document your objective, define a measurable success check, and run a small experiment before scaling. Capture what changed, why it changed, and what you would test next. This discipline improves reliability and makes your learning transferable to future projects.
Practice note for Draw shapes and text overlays for debugging: document your objective, define a measurable success check, and run a small experiment before scaling. Capture what changed, why it changed, and what you would test next. This discipline improves reliability and makes your learning transferable to future projects.
Practice note for Build a mini dataset folder from your own camera snapshots: document your objective, define a measurable success check, and run a small experiment before scaling. Capture what changed, why it changed, and what you would test next. This discipline improves reliability and makes your learning transferable to future projects.
Practice note for Checkpoint: make a clean “input pipeline” that loads and preprocesses frames: document your objective, define a measurable success check, and run a small experiment before scaling. Capture what changed, why it changed, and what you would test next. This discipline improves reliability and makes your learning transferable to future projects.
Images come from two places: files on disk (PNG/JPG) and frames from a live camera stream (webcam, CSI camera, USB camera, or robot module). A file is static and has a filename, while a frame is transient: it exists for a fraction of a second and must be handled quickly before the next frame arrives. Your model doesn’t care where the pixels came from, but your engineering does: file loading failures are usually path/format issues, while camera failures are usually permissions, device selection, frame timing, or buffer problems.
In practice, start by confirming you can load both sources and display them reliably. With OpenCV, disk images are read using cv2.imread, which returns a NumPy array in BGR order (a common “gotcha”). For cameras, cv2.VideoCapture(index) reads frames in a loop via cap.read(). The two most common mistakes are (1) assuming read() always succeeds and (2) ignoring frame rate and buffering. Always check the boolean return flag. If it is false, skip processing and attempt to recover rather than feeding garbage to your pipeline.
None and print shape (H×W×C) before processing.ret on every loop iteration, and stop cleanly on exit to release the camera.This section sets up a key checkpoint mindset: the camera loop is your “input conveyor belt.” You want predictable, repeated steps—capture → preprocess → visualize → (later) infer. If you can’t trust capture, you can’t trust inference. Keep an eye on resolution, color order, and whether your camera is delivering frames at the expected size. If the delivered size changes, many resize and overlay operations will appear “broken,” when the real issue is inconsistent inputs.
Robots live in a world of limited compute and strict timing. Image size is one of your biggest levers: smaller frames process faster, but they lose detail that detectors need for small or distant objects. When you resize, you are not just “making it fit”—you are deciding what information your model can possibly see. If your robot must detect people across a room, resizing too aggressively will erase faces and limbs into a few pixels, making the detector uncertain or silent.
Resizing has two engineering pitfalls: aspect ratio distortion and interpolation choice. Distortion happens when you force a non-square image into a square input without preserving the original proportions. A person can become unnaturally wide or thin, and detectors trained on natural proportions may fail. Many models expect a fixed input size (for example 640×640). A safe pattern is “letterboxing”: resize while preserving aspect ratio, then pad the remaining space. If you choose direct resizing, at least track the scale factors so you can map detection boxes back to the original frame accurately.
sx and sy.INTER_AREA when shrinking (better detail retention), and INTER_LINEAR when enlarging (reasonable smoothness).“Convert and resize images without breaking them” mostly means: keep the pixel array valid (no unexpected channel drops), keep dtype consistent (usually uint8 for OpenCV display), and keep geometry consistent (width/height order differences are a classic bug). A simple discipline is to print and log: original shape → resized shape → model input shape. When something goes wrong later—misaligned boxes, strange colors, wrong cropping—these logs let you locate the exact transformation that introduced the error.
Finally, connect resizing to behavior. A follow/stop robot typically needs stable detection at close range; you can often resize smaller and still succeed. An alert robot looking down a hallway needs more detail; keep resolution higher or crop intelligently to the region that matters (for example, the center corridor).
An image is a grid of pixels, and each pixel is one or more numbers. In RGB, each pixel has three channels: red, green, and blue. In OpenCV’s default, it’s typically BGR. Grayscale compresses the information into one channel representing intensity. Choosing color vs grayscale is not only about speed—it’s about what signal you need. Many object detectors are trained on color images and implicitly use color cues (clothing, backgrounds, common textures). Converting to grayscale can reduce noise and compute for simpler tasks like motion detection or edge visualization, but it may reduce detection accuracy for models trained on RGB.
Common mistakes here are subtle. First, the channel order mismatch: if you feed BGR frames to a model expecting RGB, detections may still “kind of work” but with lower confidence and odd failures, which is harder to debug than a total crash. Second, forgetting that grayscale removes the channel dimension; some pipelines expect H×W×3 and will break if you give them H×W. When you need grayscale but must keep a 3-channel shape, you can convert to gray and then stack or convert back to 3 channels for compatibility.
cv2.cvtColor(frame, cv2.COLOR_BGR2RGB) when needed.This is where the mini-lab idea begins: make two live views side-by-side—original color and grayscale—and watch how lighting changes affect them. You’ll notice that flicker, shadows, and auto-exposure can cause intensity shifts that look like “motion.” That observation will matter later when you reduce false detections: sometimes the problem isn’t the detector, it’s unstable lighting and camera settings producing inconsistent pixel statistics.
Preprocessing is the set of transformations that make raw camera frames consistent and model-ready. The trick is to do just enough—too little and the model sees junk; too much and you erase useful detail. Three core tools are cropping, normalization, and blurring.
Cropping is strategic: remove irrelevant regions to save compute and reduce false positives. For a robot navigating forward, the top of the frame may be mostly ceiling and lights—high-contrast distractions. Crop to the region where people and obstacles appear. The common mistake is “hard-cropping” without updating later steps: if you crop before detection, the bounding boxes you get back are relative to the crop, not the full frame. Record crop offsets (x0, y0) so you can draw boxes in the right place or make correct robot decisions based on geometry.
Normalization means scaling pixel values into the numeric range expected by the model, often [0,1] float32 or standardized by mean/std. OpenCV images typically arrive as uint8 in [0,255]. A reliable input pipeline makes this explicit: convert dtype, divide by 255 if required, and keep the shape consistent. A frequent error is normalizing twice (leading to tiny values) or normalizing after converting color in a way that changes dtype unexpectedly.
Blur (usually Gaussian blur) can reduce sensor noise and small flicker that cause unstable edges or motion maps. Blur is helpful for the mini-lab motion/edge view: it makes frame differencing less sensitive to tiny pixel-level changes. But blur can also harm detectors by removing fine features. Apply blur to feature visualizations or classical algorithms, not to the input of a deep object detector unless you’ve tested the impact.
Checkpoint: a clean input pipeline is a function (or small module) that takes a frame and returns a processed tensor plus metadata: original size, resized size, scale factors, crop offsets, and color space. This metadata is what allows you to debug and to map detections back to robot space. Treat this like an interface contract: every time you change preprocessing, update what metadata you track.
Robotics vision fails quietly unless you build visualization into your workflow. Visual debugging means drawing directly on frames: rectangles, crosshairs, text labels, and status indicators. This is not “nice to have”—it is how you confirm that resizing, cropping, and coordinate transforms are correct before the robot takes action. A mis-scaled box can lead a follow robot to steer the wrong way or a stop robot to brake for empty space.
Use overlays for three categories of information. First, geometry overlays: draw the crop region, the model input boundary (if letterboxed), and a centerline or safe-zone polygon. Second, data overlays: print frame size, FPS, and preprocessing mode (RGB/BGR, normalized or not). Third, model overlays (coming soon in the course): bounding boxes with class labels and confidence scores. Even before running a detector, practice with fake boxes so you know your drawing code is solid.
cv2.rectangle for regions of interest and detections.cv2.line for centerlines, thresholds, and direction guides.cv2.putText for labels like “CROP (x0,y0)” or “FPS: 28”.Common mistakes: drawing on the wrong frame (original vs resized), forgetting that OpenCV uses BGR colors (so “red” appears blue), and mixing coordinate systems (model input coordinates vs original camera coordinates). The fix is procedural: decide which image is your “display frame,” and always map everything into that coordinate space before drawing. If you later run an object detector at 640×640 but display at 1280×720, create a clear conversion step and test it with a known point (for example, the image center).
Done well, overlays become your robot’s “explainability layer.” When a behavior triggers—stop, follow, or alert—you want to see exactly what the robot believed: which region was considered, what confidence threshold was used, and where the target appeared on screen.
Robots improve fastest when you can reproduce results. That requires data organization: consistent filenames, predictable folder layouts, and a habit of saving “interesting” frames. When you build a mini dataset from your own camera snapshots, you’re not training a model yet—you’re creating a test suite for your pipeline. Later, when you adjust thresholds or lighting checks to reduce false detections, you’ll re-run the same frames to confirm the change helped rather than just shifting the problem.
A practical folder structure separates raw captures from processed outputs and debug visualizations. Keep raw frames untouched so you can reprocess them with new code. Store processed versions (resized, cropped, grayscale) in a separate folder. Save overlay images (with boxes, text, and feature views) so you can compare runs over time.
data/raw/, data/processed/, runs/overlays/, runs/features/2026-03-28_cam0_000123.jpgrun.json with resize size, crop, color space, and model version.Repeatable runs matter because perception bugs are often “one-off” visual conditions: glare on a window, a person partially occluded, or a moving shadow. If you capture those examples and name them well, you can test fixes quickly. This is also where the mini-lab fits neatly: save your edge view (for example Canny edges) and a motion view (frame difference or background subtraction) alongside the original frame. When you later wonder why a detector fired falsely, these feature views often reveal the culprit: high-contrast patterns, flicker bands, or sudden exposure changes that look like movement.
As you finish this chapter, aim for one concrete outcome: a single command or script that (1) opens the camera, (2) loads frames reliably, (3) preprocesses them via your checkpoint pipeline, (4) displays overlays, and (5) optionally saves snapshots into your dataset folders with consistent naming. That tight loop is the foundation for everything next: confident detections, fewer false alarms, and robot behaviors that trigger for the right reasons.
1. Why does Chapter 2 treat a robot camera as a “data source” rather than just a sensor?
2. What is the main risk if frames are rotated, resized incorrectly, color-shifted, or intermittently missing?
3. What is the primary purpose of drawing shapes and text overlays on frames during development?
4. What does the chapter mean by treating each frame as a “structured record”?
5. Why build a simple motion/edge view before running a detector?
In Chapter 2 you got comfortable with frames and basic camera capture. Now we add the missing capability that makes a starter robot feel “aware”: object detection. The key promise of this chapter is that you will get results without collecting a dataset or training anything. You will run a pre-trained detector on a single image, then on live video, and you will learn how to interpret the output in a way that supports real robot behavior.
Object detection is not magic vision—it is a prediction function that takes an image (or a video frame) and produces a list of guesses about what objects are present and where they are. Those guesses are imperfect, and engineering judgment matters: you must choose thresholds, handle bad lighting, and avoid reacting to one noisy frame. By the end of this chapter, you should be able to detect people and several common objects in your room, draw bounding boxes reliably, and optionally log detections to a simple results file you can inspect later.
Throughout, we will emphasize practical outcomes: (1) you can visually verify detections by drawing boxes, (2) you can reduce false detections using confidence thresholds and simple filters, and (3) you can connect “person detected” to a robot decision such as stop, follow, or alert. The later robotics chapters will build on this pipeline.
Practice note for Run a pre-trained detector on a single image: document your objective, define a measurable success check, and run a small experiment before scaling. Capture what changed, why it changed, and what you would test next. This discipline improves reliability and makes your learning transferable to future projects.
Practice note for Run detection on live video and draw bounding boxes: document your objective, define a measurable success check, and run a small experiment before scaling. Capture what changed, why it changed, and what you would test next. This discipline improves reliability and makes your learning transferable to future projects.
Practice note for Understand confidence scores and pick a safe threshold: document your objective, define a measurable success check, and run a small experiment before scaling. Capture what changed, why it changed, and what you would test next. This discipline improves reliability and makes your learning transferable to future projects.
Practice note for Checkpoint: detect people and at least 3 object types in your room: document your objective, define a measurable success check, and run a small experiment before scaling. Capture what changed, why it changed, and what you would test next. This discipline improves reliability and makes your learning transferable to future projects.
Practice note for Mini-lab: log detections to a simple results file: document your objective, define a measurable success check, and run a small experiment before scaling. Capture what changed, why it changed, and what you would test next. This discipline improves reliability and makes your learning transferable to future projects.
Practice note for Run a pre-trained detector on a single image: document your objective, define a measurable success check, and run a small experiment before scaling. Capture what changed, why it changed, and what you would test next. This discipline improves reliability and makes your learning transferable to future projects.
Practice note for Run detection on live video and draw bounding boxes: document your objective, define a measurable success check, and run a small experiment before scaling. Capture what changed, why it changed, and what you would test next. This discipline improves reliability and makes your learning transferable to future projects.
Practice note for Understand confidence scores and pick a safe threshold: document your objective, define a measurable success check, and run a small experiment before scaling. Capture what changed, why it changed, and what you would test next. This discipline improves reliability and makes your learning transferable to future projects.
Practice note for Checkpoint: detect people and at least 3 object types in your room: document your objective, define a measurable success check, and run a small experiment before scaling. Capture what changed, why it changed, and what you would test next. This discipline improves reliability and makes your learning transferable to future projects.
Every object detector—whether it runs on your laptop CPU or a robot’s edge computer—produces the same kind of structured output: a list of detections. Each detection typically includes a bounding box, a label (class name), and a confidence score. If you can read these three pieces correctly, you can turn raw model output into a robot behavior.
Bounding box means “where in the image” the model believes the object is. Boxes are usually stored as either (x, y, width, height) or as corner coordinates (x1, y1, x2, y2). Coordinate origin is almost always the top-left pixel of the image, with x increasing to the right and y increasing downward. A common mistake is mixing up normalized coordinates (0 to 1) with pixel coordinates (0 to image_width). Always check what your library returns before you draw.
Label is the object category from the model’s known set (for example: person, bottle, chair, dog). Pre-trained detectors only recognize classes they were trained on. If your robot needs to detect “my red toolbox,” a general detector may never output that label because it isn’t in its class list.
Confidence is the model’s estimate that the detection is correct. Higher confidence usually means “more likely true,” but it is not a guarantee. Confidence is best treated as a ranking signal: use it to decide which detections you trust enough to act on.
In practice, the detection output is your interface between AI and robotics logic. Treat it like sensor data: noisy but useful when filtered and interpreted consistently.
A pre-trained model is a detector whose parameters were learned earlier using a large dataset and significant compute. You download it and run it immediately. This is why Chapter 3 can deliver results quickly: you are doing inference with an existing model, not building one from scratch.
For beginner robotics, pre-trained detectors have three big advantages. First, they give you a working perception pipeline that lets you practice the hard robotics parts: camera reliability, latency, real-time constraints, and action logic. Second, they cover many everyday object types (people, chairs, bottles, backpacks) so you can test in your own room without special equipment. Third, they provide a stable baseline: if detection fails, you can debug lighting, camera angle, or thresholds rather than wondering if your training data is broken.
There are trade-offs. General-purpose models can be wrong in unusual lighting, with motion blur, or when the object is partially occluded. They may also miss objects that are not in their label set. This is normal—and it’s why robotics code should never assume “no detection means no object.” It means “the model didn’t see it confidently.”
In this chapter’s labs, you will use a pre-trained detector to find people and common objects without training. Later, if you need custom objects, you’ll already have the full inference pipeline working—and that makes training a targeted upgrade rather than a restart.
It’s easy to confuse “AI that detects things” with “AI that learns.” They are related, but they happen at different times. Training is the learning phase: the model adjusts its parameters using labeled data (images with boxes and class labels). Inference is the usage phase: you run the trained model on new images to get detections.
Robotics projects should start with inference for a practical reason: training multiplies variables. If your detections are poor, you need to determine whether the problem is (1) camera capture, (2) preprocessing, (3) model choice, (4) thresholding, (5) label set mismatch, or (6) training data quality. Starting with inference eliminates the training-data variable and lets you validate the end-to-end pipeline first.
Inference also forces good engineering habits. You measure frame rate, check CPU load, and confirm the camera stream is stable. You learn to handle occasional missed detections by smoothing over time. These are not optional details; they are how you keep a robot from behaving erratically in the real world.
Once inference is solid, training becomes a targeted improvement: “I need better performance on my warehouse helmets” rather than “nothing works.” This chapter is about building that solid base.
The fastest way to prove your detector works is to run it on a single image. This isolates variables: no camera timing issues, no dropped frames, and easier debugging. Your workflow is: load image → run inference → filter detections → draw boxes → save or display result.
Practical checklist for the “single image” lesson:
When drawing bounding boxes, pay attention to bounds checking. Boxes can sometimes extend slightly outside the image; clamp coordinates to [0, width/height]. If your rectangles are offset or stretched, you may have mixed normalized vs pixel coordinates or swapped x/y. Fix this now, because the same bug will make video results impossible to trust.
After you can detect at least one class (ideally “person”) on a still image, deliberately test a failure case: low light or partial occlusion. Note what happens to confidence scores. This will help you later when choosing thresholds for safety. Finally, keep the annotated output image as a “known good” artifact. If later changes break detection, you can compare against this baseline quickly.
Live detection is simply the single-image workflow repeated for each frame: capture frame → run inference → filter → draw → display. The challenge is not the algorithm; it’s building a loop that is stable, fast enough, and easy to stop cleanly.
Start with reliability: make sure your camera capture loop always checks the return flag from the camera read call (many systems return a boolean plus the frame). If frames occasionally fail, skip processing that frame rather than crashing. Release the camera and close windows on exit; leaked camera handles are a common beginner headache.
Next, manage speed. Object detection is compute-heavy. If your frame rate is low, consider these pragmatic options:
When you draw bounding boxes on video, you are building your debugging interface. Include label and confidence on the overlay. If you notice boxes flickering, that is normal; do not “fix” flicker by lowering the threshold too much. Instead, use a simple temporal filter for behaviors: for example, trigger “person detected” only if a person box appears above threshold in 2 consecutive frames, and clear the state only after it has been absent for 5 frames.
Checkpoint (practical outcome): walk around your room and confirm you can detect people and at least three other object types your model supports (for example: chair, bottle, laptop, backpack). If you cannot, adjust lighting (turn on lights, face the camera toward brighter areas) and verify the model’s class list. Detection quality is often limited by the scene, not your code.
Mini-lab (results file): add a minimal logging step inside your video loop. For each frame (or each second), write a line to a CSV or JSONL file with timestamp, label, confidence, and box coordinates. Keep it simple and append-only. This log is valuable when you tune thresholds: you can compare “before” and “after” quantitatively instead of relying on memory.
A confidence threshold is the simplest tool you have to reduce false detections. You keep detections whose confidence is above the threshold and discard the rest. The difficulty is that one number changes robot behavior dramatically. A low threshold (e.g., 0.25) catches more real objects but also produces more false alarms. A high threshold (e.g., 0.80) is conservative but will miss objects in poor lighting or at the edge of the frame.
In robotics, “best” depends on risk. If the robot should stop when a person is detected (a safety behavior), you generally prefer fewer misses—even if that means occasional false stops. If the robot should follow a person (a convenience behavior), false positives can cause embarrassing tracking of a chair; you may prefer a higher threshold plus extra checks.
Practical process to pick a safe threshold:
Also consider simple filters beyond thresholds. A tiny box labeled “person” at 0.55 in the corner might be a poster, not a real person. You can require a minimum box area (as a fraction of the frame) before triggering a stop/follow behavior. You can also require persistence across time: one-frame detections are often noise.
Finally, remember that thresholds are not permanent. Treat them like configuration values tied to a specific camera, lens angle, and lighting environment. When you move from your desk to a hallway, retune using the same method: visualize, log, adjust, and then connect to behavior only after the detection signal is stable.
1. What is the main promise of Chapter 3 for a starter robot?
2. In this chapter, what does an object detector produce when given an image or video frame?
3. Why does the chapter stress choosing a confidence threshold for detections?
4. Which approach best supports reliable robot behavior when detections can be noisy?
5. What is the practical purpose of drawing bounding boxes during live detection?
Your detector worked on your desk. Then you tried it in a hallway, near a window, or with the robot rolling faster—and the “person” box flickered, jumped, or disappeared. That’s normal. A pre-trained model is only one part of a reliable robot behavior. The rest is engineering: checking the camera conditions, adding simple logic across frames, and shaping the detector’s output into something your robot can trust.
This chapter focuses on practical reliability upgrades you can implement without retraining any neural networks. You’ll learn common failure cases (glare, darkness, motion blur, clutter), how to stabilize decisions over time by requiring repeated detections, how to reduce compute and noise with a region of interest (ROI), and how to remove duplicate boxes with non-maximum suppression (NMS). You’ll also improve your physical setup—camera placement is a “sensor algorithm” too—and add basic monitoring so your demo can warn you when conditions are bad.
By the end, you’ll complete a checkpoint: the same demo should behave well in two lighting conditions (for example, daytime window light and evening indoor light). You’ll also add a mini-lab “status bar” overlay that shows readiness signals such as FPS and low-light warnings, so you can see problems before the robot makes a bad decision.
Practice note for Stabilize results using simple rules across frames: document your objective, define a measurable success check, and run a small experiment before scaling. Capture what changed, why it changed, and what you would test next. This discipline improves reliability and makes your learning transferable to future projects.
Practice note for Handle low light and backlight with practical checks: document your objective, define a measurable success check, and run a small experiment before scaling. Capture what changed, why it changed, and what you would test next. This discipline improves reliability and makes your learning transferable to future projects.
Practice note for Reduce duplicate boxes and noisy detections: document your objective, define a measurable success check, and run a small experiment before scaling. Capture what changed, why it changed, and what you would test next. This discipline improves reliability and makes your learning transferable to future projects.
Practice note for Checkpoint: improve your demo so it behaves well in two lighting conditions: document your objective, define a measurable success check, and run a small experiment before scaling. Capture what changed, why it changed, and what you would test next. This discipline improves reliability and makes your learning transferable to future projects.
Practice note for Mini-lab: add an on-screen “status bar” for robot readiness: document your objective, define a measurable success check, and run a small experiment before scaling. Capture what changed, why it changed, and what you would test next. This discipline improves reliability and makes your learning transferable to future projects.
Practice note for Stabilize results using simple rules across frames: document your objective, define a measurable success check, and run a small experiment before scaling. Capture what changed, why it changed, and what you would test next. This discipline improves reliability and makes your learning transferable to future projects.
Practice note for Handle low light and backlight with practical checks: document your objective, define a measurable success check, and run a small experiment before scaling. Capture what changed, why it changed, and what you would test next. This discipline improves reliability and makes your learning transferable to future projects.
Practice note for Reduce duplicate boxes and noisy detections: document your objective, define a measurable success check, and run a small experiment before scaling. Capture what changed, why it changed, and what you would test next. This discipline improves reliability and makes your learning transferable to future projects.
Practice note for Checkpoint: improve your demo so it behaves well in two lighting conditions: document your objective, define a measurable success check, and run a small experiment before scaling. Capture what changed, why it changed, and what you would test next. This discipline improves reliability and makes your learning transferable to future projects.
Object detectors fail in predictable ways, and you can often detect the failure mode before you trust the result. Start with four real-world troublemakers.
Glare and backlight happen when a bright window, lamp, or sun reflection enters the frame. The camera’s auto-exposure may darken the entire image to avoid clipping highlights, turning people into silhouettes. Silhouettes reduce texture and make the model less confident or cause mislabels (for example, “chair” where a person should be). A practical check is to compute average brightness (mean of grayscale pixels) and also a “highlight fraction” (percentage of pixels above a high threshold like 240). If highlights are high and overall brightness is low, you’re likely backlit.
Darkness / low light increases sensor noise and smears details, especially with cheap webcams. The image may look grainy; the model may produce random boxes with low confidence. A simple rule is: if mean brightness is below a threshold for N consecutive frames, switch the robot into a cautious mode (slow down, don’t follow, or require extra confirmation).
Fast motion causes motion blur. Even if brightness is fine, edges become soft and the detector may miss. If your robot is moving, motion blur correlates with low FPS and longer exposure. Practical fix: cap robot speed when “tracking mode” is active, and keep the camera stable (tight mount, no wobble).
Clutter (busy backgrounds, many objects) increases false positives and duplicate boxes. Engineering judgment: accept that clutter is normal, then narrow what you care about. If your robot behavior is “stop when person detected,” you don’t need perfect detection everywhere—only enough reliability to avoid unsafe moves.
Detectors operate per frame; robots operate over time. Your first stabilizer is a rule that requires evidence across multiple frames before changing behavior. This reduces flicker (stop/go/stop) and cuts false detections caused by a single noisy frame.
A simple approach is a repeat requirement: only declare “person present” if a person is detected in at least K of the last N frames. Example: N=10, K=3 is responsive but still filters one-frame noise. For “person gone,” you can use a different rule (hysteresis) such as “declare gone only if absent for M consecutive frames” (e.g., M=5). This prevents rapid toggling when the person is near the edge of the frame.
To make repeats meaningful, keep track of which box is which across frames. You don’t need full tracking yet; you can match boxes by intersection-over-union (IoU) with last frame’s best person box. If IoU is above a small threshold (0.3–0.5), treat it as the same target. If not, treat it as a new candidate.
Also smooth the box geometry you use for control. If you follow a person based on the box center, average the center over the last few frames. This avoids “steering jitter.” Use an exponential moving average (EMA): new_center = 0.8*old_center + 0.2*current_center. Do the same for box area if you estimate distance.
Starter robots often do not need full-frame awareness. A region of interest (ROI) is a defined area of the image where detections matter for behavior. Restricting attention reduces false positives, saves compute, and improves the “meaning” of a detection.
Begin by asking: where would a person appear if the robot is doing its job? If your robot follows people in front, you might ignore the top 20% of the image (ceiling lights, windows) and the bottom 10% (floor glare). A common ROI is a centered rectangle covering the forward corridor. For a tabletop robot, you might exclude the table edge region where reflections cause boxes.
There are two ways to apply ROI. The simplest is post-filtering: run the detector on the whole frame, then discard boxes whose centers fall outside the ROI. This is easy and avoids changing the input size. The second is pre-cropping: crop the frame to the ROI and run detection only there, then map box coordinates back. Pre-cropping can increase FPS on slow hardware but requires careful coordinate conversion.
ROI also helps with lighting checks. You can compute brightness metrics inside the ROI rather than the entire frame. This matters because a bright window at the top of the image can dominate the average brightness even if your target region is dark.
Many detectors produce multiple overlapping boxes for the same object. If you draw every box, the display looks noisy. If you feed every box into behavior logic, the robot may overreact (for example, thinking there are multiple people). Non-maximum suppression (NMS) is the standard cleanup step.
In plain language: NMS keeps the best box and removes “duplicates.” The algorithm sorts boxes by confidence, picks the highest-confidence box, and then deletes other boxes that overlap it too much. “Too much” is defined by IoU (intersection-over-union). If IoU between two boxes is above a threshold (often 0.4–0.6), they’re considered duplicates.
Practical tuning: if your model produces many near-identical boxes, lower the IoU threshold (e.g., 0.4) to be more aggressive. If you’re accidentally removing separate people standing close together, raise it (e.g., 0.6) so close boxes can both survive.
Also decide whether to run NMS per class or across all classes. For beginner robot behaviors, per-class NMS is safer: you don’t want a “chair” box to suppress a “person” box. Many libraries already do per-class NMS; verify this in your detector output handling.
Reliability is not only software. Camera placement determines what the model can see, how lighting behaves, and how motion blur shows up. A good mount can be worth more than hours of threshold tuning.
Height and angle: Place the camera so people appear in a consistent scale range. Too low and you see mostly legs; too high and faces shrink and backgrounds dominate. For a small ground robot, a camera roughly 20–40 cm above the floor with a slight upward tilt often captures torso-level features without too much ceiling glare.
Keep the horizon stable: If the camera shakes, the detector must constantly adapt to blur and changing perspectives. Use a stiff bracket, avoid mounting on flexible plastic, and add foam or rubber only if it reduces high-frequency vibration (too soft can create oscillation). If you have wheels that chatter, slow down or use larger wheels.
Avoid pointing into lights: If your robot drives toward windows, consider angling the camera slightly downward or adding a small hood/shade to reduce flare. Even a simple matte-black cardboard hood can help. This directly supports the chapter’s “handle low light and backlight” goal by preventing exposure extremes.
Consistent field of view: Wide-angle lenses see more but distort edges; people near the sides become stretched and harder to detect. If you must use wide-angle, focus your ROI (Section 4.3) toward the center and be careful about behaviors that depend on side detections.
To make your demo behave well in two lighting conditions, you need feedback. The easiest way is a small on-screen status bar that summarizes whether the vision pipeline is “ready” to drive behavior. This is your mini-lab: an always-visible monitoring overlay.
Include at least three metrics. FPS (frames per second) tells you if your pipeline is keeping up. Low FPS increases control lag and can look like detection instability. Compute FPS from timestamps (e.g., 1 / average frame time over the last second). Display it in the status bar and change color/text when it drops below a practical threshold (for many starter robots, <10–15 FPS is where behavior begins to feel delayed).
Add exposure clues using simple image statistics: mean brightness in the ROI and optionally highlight fraction. If mean brightness is too low, show “LOW LIGHT” and automatically increase your repeat requirement (Section 4.2) or raise the confidence threshold to reduce false positives. If highlight fraction is high while mean is low, show “BACKLIT” and consider reducing reliance on small distant detections.
Finally, add warnings based on detection quality: for example, if the person confidence is bouncing wildly or boxes appear/disappear every frame, show “UNSTABLE DETECTIONS” and temporarily switch the robot into a safe state (stop or slow). This is not overengineering—it’s how you keep a public demo from behaving unpredictably.
1. In a hallway or near a window, your “person” box flickers or disappears even though the model worked on your desk. According to the chapter, what’s the most reliable way to improve behavior without retraining?
2. Which simple rule best stabilizes decisions over time to reduce one-frame false positives and flicker?
3. How does using a region of interest (ROI) help reliability in real-world detection?
4. Your detector outputs several overlapping boxes around the same person. What technique from the chapter is meant to remove these duplicates?
5. What is the main purpose of adding the mini-lab on-screen “status bar” in this chapter?
In earlier chapters you learned how to capture frames, run an object detector, and interpret its outputs (labels, confidence scores, and bounding boxes). That is “perception.” A robot becomes useful when perception reliably turns into action—without jerky behavior, without freezing your program, and without surprising humans nearby.
This chapter focuses on safe, simple behaviors that beginners can implement and trust. You will build a small behavior loop that reads detections, decides what the robot should do (search, detect, follow, stop), and sends one clear command at a time. You will also learn to estimate whether a person is left/center/right in the camera view using bounding boxes, and you will add a safety rule such as a timeout or manual override.
Throughout, prioritize engineering judgment: prefer a behavior that is boring and predictable over one that “sometimes works” but is hard to control. You will see common mistakes—like reacting to every single frame, or letting stale detections drive motion—and how to avoid them using thresholds, timeouts, and a simple state machine.
Practice note for Define robot “states” (search, detect, follow/stop) without complexity: document your objective, define a measurable success check, and run a small experiment before scaling. Capture what changed, why it changed, and what you would test next. This discipline improves reliability and makes your learning transferable to future projects.
Practice note for Trigger an action when a person is detected (sound, message, or stop): document your objective, define a measurable success check, and run a small experiment before scaling. Capture what changed, why it changed, and what you would test next. This discipline improves reliability and makes your learning transferable to future projects.
Practice note for Estimate left/center/right position from bounding boxes: document your objective, define a measurable success check, and run a small experiment before scaling. Capture what changed, why it changed, and what you would test next. This discipline improves reliability and makes your learning transferable to future projects.
Practice note for Checkpoint: a working behavior loop that responds to detections: document your objective, define a measurable success check, and run a small experiment before scaling. Capture what changed, why it changed, and what you would test next. This discipline improves reliability and makes your learning transferable to future projects.
Practice note for Mini-lab: add a safety rule (timeout, minimum confidence, manual override): document your objective, define a measurable success check, and run a small experiment before scaling. Capture what changed, why it changed, and what you would test next. This discipline improves reliability and makes your learning transferable to future projects.
A vision-enabled robot loop has three jobs: (1) perception: read a frame and run detection, (2) decision: pick a behavior based on the detection results, and (3) action: send a command (stop, follow, alert). Keeping these as separate steps makes your code easier to debug. If the robot moves oddly, you can ask: “Was perception wrong, did the decision logic choose the wrong state, or did the actuator command fail?”
A practical pattern is to convert raw detections into a small “observation” object that your decision logic uses. For example: person_present (true/false), person_conf (0–1), person_box (x, y, w, h), and timestamp. Avoid letting the decision code rummage through a long list of detections directly. That leads to accidental complexity and inconsistent rules.
In robotics, actions should be rate-limited and conservative. If your model outputs 30 frames per second, you do not want to send 30 motor commands per second unless you have a carefully tuned controller. Beginners should instead decide at a steady pace (for example 5–10 Hz) and keep the command stable for a short window. This reduces jitter when confidence scores fluctuate.
Common mistake: triggering actions on any detection with a low confidence. Instead, treat confidence thresholds as “permission to act.” A person detected at 0.35 might be a curtain or a chair. Start with a higher threshold (for example 0.6–0.8) and only lower it if you confirm your camera, lighting, and scene are stable.
This section sets the foundation: you are not “controlling motors from pixels.” You are building a predictable pipeline from detection to a small set of actions.
A working robot behavior loop must keep running even when a frame is dropped, a detection fails, or the camera briefly disconnects. The simplest robust architecture is a single main loop with clear time budgeting: capture frame, run detector, decide, act, display/log, repeat. If any step is slow, the whole robot becomes unresponsive.
To avoid freezing, do two things. First, check return values from your camera read. If you don’t get a frame, do not run the detector; instead, command a safe stop and try again. Second, keep detector runtime under control. If your model sometimes takes 300 ms, your robot will “lag” behind reality. Prefer a smaller model, reduce input resolution, or run inference less often (for example, detect every other frame) while still updating the safety stop every loop.
Use defensive code around detection outputs. Some frames will produce no detections. Your decision logic should handle that case explicitly, rather than assuming a list has at least one box. Also guard against stale results: store a last_seen_time for the person label and treat “not seen recently” as “not present.”
A practical control loop structure looks like: (1) read frame, (2) compute now, (3) if frame missing → STOP, (4) if time to run detection → update observation, (5) run decision at fixed rate, (6) send action only if it changed, (7) optional visualization. This reduces flicker in behavior and keeps compute predictable.
At the end of this section you should have a loop that continues running for minutes without crashing, and defaults to a safe stop when inputs are invalid.
Bounding boxes are more than rectangles on the screen: they provide a simple geometric signal you can turn into movement. The easiest useful feature is the horizontal position of the box center. Compute cx = x + w/2 and compare it to the image width. Then classify the person as left/center/right using two thresholds (for example, left if cx < 40% of width, center if 40–60%, right if > 60%). This turns continuous perception into stable discrete actions.
Why discrete zones? Because beginner robots often use open-loop commands (turn left a bit, drive forward a bit). If you try to continuously steer based on every pixel change, the robot will oscillate. Zones dampen noise and are easy to tune in the real world.
Box size is a rough distance cue. The width or area of the person box generally increases as the person gets closer. You can use that to decide between “approach” and “stop.” For example: if the box area exceeds a near threshold, stop; if it is smaller, follow. This is not true metric depth, but it works well enough for a starter behavior.
Engineering judgment matters: box size varies with posture and camera angle, so treat it as a hint, not a precise measurement. Smooth it with a simple filter, such as an exponential moving average on area, or require the threshold to be met for N consecutive decisions before switching to STOP. This prevents rapid toggling when the person leans or turns sideways.
With these two cues—position and size—you can create a follow-or-stop behavior that feels purposeful without needing advanced tracking.
A state machine is simply a way to prevent your robot from changing its mind every frame. You define a small set of states and the rules for moving between them. For this chapter, keep it minimal: SEARCH, DETECT, FOLLOW, and STOP. You do not need diagrams or formal notation—just clear if/else transitions.
Start in SEARCH. In SEARCH, the robot does something safe and slow (for example, rotate in place or stay still) while looking for a person. When a person is detected above your confidence threshold, transition to DETECT. DETECT is a short “confirmation” state: require the person to be detected for a brief window (for example 0.3–0.5 seconds) before acting. This reduces false triggers from a single noisy frame.
Once confirmed, transition to FOLLOW. In FOLLOW, compute left/center/right from the bounding box and choose a simple action: turn left, go forward, or turn right. If the person is too close (box area high), transition to STOP. If the person disappears (no valid detection for a timeout), transition back to SEARCH and stop movement first.
A key beginner technique is hysteresis: use different thresholds for entering and leaving a state. For instance, enter FOLLOW at confidence ≥ 0.7, but only leave FOLLOW if confidence drops below 0.5 for a full second. This avoids rapid flipping between states when confidence bounces near a single cutoff.
If you can print the current state and see it match real-world behavior, you have a working beginner state machine—exactly what you need before adding complexity.
Robots should be designed so that the safest outcome is the default. Vision is probabilistic: lighting changes, motion blur happens, and models make mistakes. Therefore, your behavior system must include a fail-safe stop and a clear method for a human to take control.
Implement a timeout rule: if a person has not been seen for a specified duration (for example 1–2 seconds), command STOP and transition to SEARCH. This prevents the robot from continuing to move based on an old detection. Track last_seen_time whenever a valid person detection occurs, and compute now - last_seen_time each loop.
Implement a minimum confidence rule: even inside FOLLOW, ignore detections below a confidence threshold. If your detector produces frequent low-confidence boxes, consider also adding a lighting check (for example, average frame brightness) and refuse to follow when the scene is too dark or overexposed. It is better to stop than to “follow a shadow.”
Add a manual override. On a laptop demo, this can be a keyboard key that forces STOP. On a robot, it can be a physical button, gamepad input, or a ROS topic that sets an override_stop flag. Manual override should have priority over every other decision. Design it so it works even if detection fails—ideally it is checked every loop before running expensive inference.
Safety rules are not optional extras; they are part of making your robot’s behavior understandable and trustworthy.
Where your code runs changes what “simple” means. On a laptop, you can often run a heavier detector and visualize results comfortably. The risk is assuming that the same model will run on a small robot computer. Plan early for compute limits and reliability.
Laptop (best for learning and debugging): You can keep the full pipeline—camera capture, detection, drawing, logs—running in one process. Use this to tune confidence thresholds, left/center/right boundaries, and near/far area thresholds. The laptop is also the easiest place to add manual override keys and inspect frame rate.
Small computer (single-board computer or mini PC): Here you should prioritize stable frame capture and predictable inference time. Reduce input resolution, consider a lightweight model, and disable expensive overlays. Rate-limit detection if needed (for example, 5–10 detections per second) while keeping the control loop responsive.
Robot controller + separate vision compute: Many starter robots have a microcontroller that drives motors and a separate computer for vision. In this setup, the vision side should send high-level actions (STOP, TURN_LEFT, FORWARD) rather than raw detections. This reduces bandwidth and makes safety easier: the controller can enforce a stop if commands stop arriving (a “command watchdog”).
Choose hardware based on your goals: laptop for iteration, small computer for deployment, and a controller split if you want robust motion control. In all cases, the behaviors from this chapter—states, timeouts, thresholds, and override—transfer directly.
1. Why does Chapter 5 recommend using a simple state machine (e.g., search, detect, follow/stop) instead of reacting directly to every frame’s detections?
2. A person was detected a moment ago, but the detector now shows no person. What is the safest design guidance from this chapter?
3. How can a beginner estimate whether a person is left, center, or right in the camera view using bounding boxes?
4. What is the key idea of the chapter’s “working behavior loop” checkpoint?
5. Which mini-lab safety rule best matches the chapter’s goal of preventing surprising or unsafe behavior around humans?
You have a working pipeline: a camera feed, an object detector, and a simple robot response like stop/follow/alert when a person appears. Chapter 6 is about turning that “works on my laptop” prototype into a demo that starts reliably, runs smoothly, and is easy to share with someone else (or your future self). This is where engineering judgement matters: a slightly slower but stable demo is usually better than a fast demo that randomly fails to open the camera or produces inconsistent detections.
The goal is repeatability. You should be able to plug in the camera (or power on the robot), run one command, and get a window with live video and clear overlays. You should also be able to answer basic questions such as: “What FPS am I getting?”, “What resolution am I processing?”, “What confidence threshold am I using?”, and “What happens if lighting is bad?”
By the end of this chapter you will have: (1) a clean folder structure and a repeatable run command, (2) a simple test checklist with recorded results, (3) tuned speed settings for smoother video, and (4) a final checkpoint demo that starts, detects, and responds in under 60 seconds. Finally, you’ll get a practical roadmap for what to learn next: tracking, custom training, and running on small edge devices.
Practice note for Create a repeatable run command and clean folder structure: document your objective, define a measurable success check, and run a small experiment before scaling. Capture what changed, why it changed, and what you would test next. This discipline improves reliability and makes your learning transferable to future projects.
Practice note for Test with a simple checklist and record results: document your objective, define a measurable success check, and run a small experiment before scaling. Capture what changed, why it changed, and what you would test next. This discipline improves reliability and makes your learning transferable to future projects.
Practice note for Tune speed settings for smoother video: document your objective, define a measurable success check, and run a small experiment before scaling. Capture what changed, why it changed, and what you would test next. This discipline improves reliability and makes your learning transferable to future projects.
Practice note for Checkpoint: final demo that starts, detects, and responds in under 60 seconds: document your objective, define a measurable success check, and run a small experiment before scaling. Capture what changed, why it changed, and what you would test next. This discipline improves reliability and makes your learning transferable to future projects.
Practice note for Next steps: where to go after this course (tracking, custom training, edge devices): document your objective, define a measurable success check, and run a small experiment before scaling. Capture what changed, why it changed, and what you would test next. This discipline improves reliability and makes your learning transferable to future projects.
Practice note for Create a repeatable run command and clean folder structure: document your objective, define a measurable success check, and run a small experiment before scaling. Capture what changed, why it changed, and what you would test next. This discipline improves reliability and makes your learning transferable to future projects.
Practice note for Test with a simple checklist and record results: document your objective, define a measurable success check, and run a small experiment before scaling. Capture what changed, why it changed, and what you would test next. This discipline improves reliability and makes your learning transferable to future projects.
Practice note for Tune speed settings for smoother video: document your objective, define a measurable success check, and run a small experiment before scaling. Capture what changed, why it changed, and what you would test next. This discipline improves reliability and makes your learning transferable to future projects.
Practice note for Checkpoint: final demo that starts, detects, and responds in under 60 seconds: document your objective, define a measurable success check, and run a small experiment before scaling. Capture what changed, why it changed, and what you would test next. This discipline improves reliability and makes your learning transferable to future projects.
A good demo is not just code that runs—it’s code that’s easy to run again. Beginners often put everything into one script, hard-code camera IDs and thresholds, and then wonder why it breaks on another machine. A clean structure separates “what the program does” from “how it’s configured.” This makes your work repeatable and shareable.
Start with a small, readable folder layout. Keep your main entry point obvious, keep configuration in one place, and store outputs in a dedicated folder so you can compare runs.
demo.yaml holding camera index, resolution, threshold, model path.Create a repeatable run command that does not require editing code. Common options are python -m src.demo --config configs/demo.yaml or a small run_demo.sh/run_demo.bat wrapper. This is not “extra ceremony”—it prevents the classic mistake of changing a constant in code, forgetting, and shipping a demo that behaves differently than you expected.
Keep defaults safe. For example, if the robot behavior is “follow,” add a config flag like --safe_mode to start in “alert only” until you confirm detection quality. When you package your demo, aim for one clear entry point and one clear config file. If someone can run it without opening an editor, you did it right.
Performance tuning is about controlling three levers: frames per second (FPS), input resolution, and model size. You are trading detail for speed. Many demos feel “laggy” because the camera is producing frames faster than your detector can process, creating a backlog. The fix is not guessing—it’s measuring.
First, measure FPS honestly. Add a small timer around your main loop and print or overlay “FPS: X.X”. Make sure you measure the full pipeline (capture → preprocess → inference → draw → display). Next, decide what “smooth enough” means for your robot. For a beginner person-detection demo, 10–15 FPS is often acceptable if the robot response is stable and predictable.
Resolution is usually the biggest knob. If you run detection at 1280×720, you’ll often get fewer FPS than at 640×480. A practical pattern is: capture at a camera-friendly resolution, then resize to the model’s preferred input size (for example 640 wide) before inference. Keep one more detail in mind: resizing can slightly change box accuracy, so re-check your thresholds after changes.
Model size matters too. “Tiny” models run faster with lower accuracy; larger models detect better but may drop FPS. For a demo, choose the smallest model that still detects a person reliably in your target lighting. Avoid the common mistake of chasing maximum accuracy and ending up with a demo that stutters so badly that detections arrive late.
Finally, tune speed settings for smoother video: limit your processing rate (e.g., skip inference on some frames), or run detection every N frames and reuse the last boxes for display in between. This can make the UI feel responsive while still making correct robot decisions at a stable cadence.
Testing is where you turn intuition into evidence. A simple checklist catches the problems that “random testing” misses. Think in scenarios: different distances, different lighting, different backgrounds, and different motion. Your detector is not magic—it is a statistical tool that will fail in predictable ways, and your job is to learn those edges before your audience does.
Create a lightweight test sheet in a text file or spreadsheet stored in runs/. Record: date/time, machine/robot, camera used, resolution, model name, threshold, and a few scenario results. Keep it short so you actually use it.
When results are bad, don’t immediately change ten parameters. Change one variable at a time: threshold, resolution, or lighting. Document the effect. Common beginner mistakes include: testing only in the best lighting, testing only with the same person/clothes, and forgetting that confidence thresholds affect both false positives and missed detections.
Write down what “good enough” means. For example: “At threshold 0.5, detect a person 90% of the time at 2m indoors; fewer than 1 false alert per minute in an empty room.” This turns the demo from a vibe into a product-like artifact.
Most demo failures are not “AI problems.” They are camera selection, permissions, device conflicts, and performance bottlenecks. A troubleshooting guide saves you during presentations and makes your project easier to share.
Camera won’t open: Confirm the correct camera index (0/1/2), and verify no other app is using it (video call software is a common culprit). On some systems you must grant camera permissions to your terminal or Python. If using a robot camera stream, check the URL and network access before starting the detector.
Black frame / wrong colors: Ensure you are reading frames successfully and that color conversion is correct (BGR vs RGB). If frames are rotated, handle orientation once in preprocessing rather than in multiple places.
Slow runs: Print timing for each stage (capture, preprocess, inference, draw). A frequent surprise is that drawing boxes and resizing can take more time than expected at high resolution. Reduce resolution first, then consider a smaller model, then consider frame skipping. Also check that you are not accidentally running inference twice per frame (for example, calling the detector in both “logic” and “display” code paths).
Empty detections: Start by confirming the model is loaded and label mapping is correct. Then lower the confidence threshold temporarily to see if anything appears. If boxes appear only at very low thresholds, your lighting may be poor or your input size preprocessing may be wrong. Another common issue is feeding the model the wrong scale (0–255 vs 0–1) or wrong channel order. Add one debug print per run: input tensor shape and min/max pixel values.
Keep a “known good” configuration file that you do not change. When experiments fail, return to that checkpoint to confirm the system is still healthy.
Polish is what makes your work understandable in 10 seconds. Your audience should see: the camera image, the boxes, the label/confidence, and a clear statement of what the robot is doing. Without this, it’s hard to tell whether the system is working or just running.
In the video overlay, draw bounding boxes with consistent colors (e.g., green for “person”), print the confidence score, and show a small status line: “STATE: IDLE / ALERT / FOLLOW / STOP”. Add a tiny FPS counter. Keep text readable by using a solid background rectangle behind the text.
Logs matter even for demos. Print one line when the program starts that includes config details: model name, threshold, resolution, device (CPU/GPU), camera source. Then log state transitions only (not every frame) to avoid spam: “IDLE → ALERT (person 0.78)”. Save logs to logs/ with timestamps so you can compare runs.
Add simple controls so you are not trapped during a demo. At minimum: Q to quit, Space to pause, and a key to toggle the robot behavior (e.g., “alert-only” vs “follow”). If you can, add a key to increase/decrease threshold during testing. These controls turn panic into procedure.
Checkpoint: Practice the final flow until it’s boring. From a cold start, you should be able to run one command, see video, see detections, and trigger the robot response in under 60 seconds. If you can’t hit that reliably, simplify: reduce dependencies, reduce steps, and choose safer defaults.
Once your demo is stable, the next improvements usually fall into three categories: tracking, custom training, and edge deployment. Each solves a different pain point you likely noticed while testing.
Tracking helps when detections flicker frame-to-frame. A tracker (or even a simple “temporal smoothing” rule) can keep an ID on a person and reduce noisy robot behavior. Practical next steps include adding a lightweight tracker such as SORT/ByteTrack, or implementing a basic rule: require N consecutive frames above threshold before switching to FOLLOW, and M consecutive frames with no person before returning to IDLE.
Custom data matters when your environment is different from the model’s training world—warehouse lighting, unusual camera angles, uniforms, or safety vests. Before training from scratch, try collecting a small set of images from your real camera and evaluating performance. If you move to fine-tuning, focus on a narrow goal (e.g., “person” only) and keep labels consistent. The engineering win is not theoretical accuracy—it’s fewer false alerts in your real setting.
Small hardware deployment is the step from laptop to robot. Edge devices have limited compute and power, so you will rely on smaller models, quantization, and hardware acceleration. A practical progression is: run on CPU with a tiny model → optimize input size and frame rate → try an accelerator-friendly format (ONNX/TensorRT/OpenVINO depending on platform). Keep your packaging discipline from this chapter: one run command, one config, and a documented “known good” setup.
If you continue, keep the same mindset: measure, simplify, and write down what works. That’s how small robotics projects become reliable systems.
1. What is the main purpose of Chapter 6 for an AI vision robot project?
2. Which choice best reflects the chapter’s engineering judgement about demo performance?
3. Which set of information should you be able to answer about your demo to support repeatability and debugging?
4. What is the expected final checkpoint outcome for the demo in this chapter?
5. After packaging and testing, what roadmap topics does the chapter point to as next steps?
- Learning Evolved.
- Intelligence Amplified.


