AI Robotics & Autonomous Systems — Beginner
Go from zero to a clear mini self-driving “drive plan” you can explain.
This beginner course is written like a short, practical technical book. You will learn how autonomous cars work by breaking the problem into everyday driving tasks and then rebuilding those tasks as clear system steps. Instead of jumping into complex math or programming, you will focus on understanding the moving parts: what the car needs to sense, what it needs to decide, and how it safely turns decisions into steering and braking.
By the end, you will produce a mini self-driving drive plan: a structured document that describes a small route, the rules the vehicle should follow, the sensor setup it depends on, and the safety checks required to test it. This is the same kind of thinking used in real autonomy teams—made friendly for absolute beginners.
Chapter 1 gives you the foundation: what autonomy is and how to talk about it clearly. Chapter 2 adds sensing—how a vehicle measures the world. Chapter 3 turns those measurements into understanding (perception). Chapter 4 focuses on knowing where the vehicle is (localization and maps). Chapter 5 shows how the vehicle chooses actions and keeps them safe (planning and control). Finally, Chapter 6 combines everything into your mini drive plan, including testing and safety monitoring.
This course is for absolute beginners—students, career changers, operators, policy learners, and anyone curious about self-driving technology. You do not need coding, AI, or robotics experience. If you can follow step-by-step instructions and you want a clear mental model of autonomy, you are in the right place.
You will have a complete, beginner-level autonomy blueprint you can explain to others: a route description, assumptions, sensor needs, behavior rules, speed targets, and safety procedures. This is also a strong starting point for later hands-on work with simulators or small robot cars, because you will know what each part of the system is supposed to do and how to evaluate it.
If you’re ready to understand autonomous cars without getting overwhelmed, Register free to begin. You can also browse all courses to compare learning paths across AI, robotics, and automation.
Robotics Engineer and Autonomous Systems Educator
Sofia Chen designs and teaches beginner-friendly robotics and autonomy programs focused on real-world systems thinking. She has worked on sensor-based navigation prototypes and safety-first testing workflows for small robotic vehicles.
When people say “autonomous car,” they often imagine a vehicle that simply “knows what to do.” Engineering reality is more specific: autonomy is a loop of information processing and decision-making that replaces (or supervises) the human driver’s continuous work. In this chapter, you will build a clear mental model of that work using simple building blocks: sensing the world, thinking about what it means, and acting through steering, throttle, and brakes.
We will also separate the driving job into three engineering layers—perception, planning, and control—so you can read self-driving system diagrams without feeling lost. You’ll learn why assisted driving is not the same as self-driving, what the real world does to “perfect” algorithms, and which sensors appear again and again (camera, radar, lidar, GPS, IMU). Finally, you will draft a first mini “drive plan” with route, speed targets, safe stopping rules, and simple if-this-then-that behaviors you can use later in a small test drive.
Keep one principle in mind: autonomy is not magic; it is disciplined decomposition. If you can name the pieces and the information flowing between them, you can design, debug, and improve a system—even a small beginner project.
Practice note for Milestone 1: Define autonomy with the “sense–think–act” loop: document your objective, define a measurable success check, and run a small experiment before scaling. Capture what changed, why it changed, and what you would test next. This discipline improves reliability and makes your learning transferable to future projects.
Practice note for Milestone 2: Separate driver tasks into perception, planning, and control: document your objective, define a measurable success check, and run a small experiment before scaling. Capture what changed, why it changed, and what you would test next. This discipline improves reliability and makes your learning transferable to future projects.
Practice note for Milestone 3: Learn the difference between assisted driving and self-driving: document your objective, define a measurable success check, and run a small experiment before scaling. Capture what changed, why it changed, and what you would test next. This discipline improves reliability and makes your learning transferable to future projects.
Practice note for Milestone 4: Build your first simple autonomy block diagram: document your objective, define a measurable success check, and run a small experiment before scaling. Capture what changed, why it changed, and what you would test next. This discipline improves reliability and makes your learning transferable to future projects.
Practice note for Milestone 1: Define autonomy with the “sense–think–act” loop: document your objective, define a measurable success check, and run a small experiment before scaling. Capture what changed, why it changed, and what you would test next. This discipline improves reliability and makes your learning transferable to future projects.
Before we talk about autonomy, we need to describe what a human driver actually does. Driving is not one task; it is a tightly coupled set of inputs, decisions, and actions repeated many times per second. The inputs include lane markings, traffic lights, signs, other vehicles, pedestrians, road edges, and even subtle cues like the “flow” of traffic. The driver combines these with internal goals: reach a destination, stay comfortable, obey rules, and avoid collisions.
From those inputs, the driver makes decisions at multiple time scales. At the long scale: choose a route and decide when to change lanes. At the medium scale: decide your speed, headway, and gap acceptance for merges. At the short scale: micro-corrections of steering and braking to stay centered and stable. These decisions become actions: steering angle changes, throttle application, brake pressure, and signaling.
A common beginner mistake is to start by coding “actions” (e.g., steer left when the line is left) without being explicit about the decision being made and the assumptions behind it. Instead, treat driving as a job description: what must be noticed, what must be decided, and what must be controlled. This mindset sets up Milestone 2 later—separating the driver tasks into perception, planning, and control—because each part has different failure modes and safety needs.
Practical outcome: you should be able to narrate a 10-second driving clip in terms of inputs → decisions → actions. That narration becomes your first requirements document for an autonomy system.
Milestone 1 is to define autonomy with the “sense–think–act” loop. An autonomous car is a system that repeatedly (1) senses the environment and itself, (2) thinks by interpreting the scene and choosing an intent, and (3) acts by sending commands to the vehicle—then repeats, continuously.
Sense is not just “having sensors.” It means acquiring data with known timing and uncertainty. Cameras give rich visual detail (lanes, lights, signs) but struggle in glare or darkness. Radar measures range and relative speed well, especially in rain/fog, but provides limited shape detail. Lidar gives accurate 3D geometry and helps with object boundaries, but performance and cost vary and it can be affected by heavy precipitation. GPS provides global position but can drift, jump in urban canyons, or lose lock; an IMU (accelerometers and gyros) provides short-term motion estimates that drift slowly over time. Real systems fuse these because no single sensor is “enough.”
Think includes two separate jobs that beginners often mix: interpreting what’s there (perception and localization) and deciding what to do (planning). Even a simple project should separate “What do I believe the world looks like?” from “Given that belief, what should I do?”
Act is control: turning a planned path and speed target into steering/throttle/brake commands while staying stable and smooth. A common mistake is to plan an aggressive maneuver that the controller cannot track safely, leading to oscillation or late braking. Good engineering judgment keeps the plan within the vehicle’s capabilities.
Practical outcome: you can sketch a loop with arrows and label where camera/radar/lidar/GPS/IMU contribute, and where safety checks can interrupt the loop to force a stop.
Milestone 3 is to learn the difference between assisted driving and self-driving. The confusion is common: a car that can keep its lane and follow a lead vehicle may feel “autonomous,” but the responsibility model matters. In assisted driving, the human remains the supervisor who must monitor the road and take over immediately. In self-driving (in a defined scope), the system is responsible for the driving task within its operational boundaries.
From an engineering perspective, the difference shows up in design requirements. Assisted systems can rely on the driver as a fallback for rare events. Self-driving systems must have their own fallback: they need to detect uncertainty, handle failures, and reach a minimal risk condition (often a controlled stop) without assuming a human will save them.
Also, “self-driving” does not mean “works everywhere.” Real deployments define an Operational Design Domain (ODD): which roads, speeds, weather, lighting, and behaviors are supported. A system might be self-driving on certain highways in clear weather but not on snowy city streets with complex construction. Beginners often overpromise by describing autonomy as a single on/off feature. The better mental model is: autonomy is a set of capabilities plus a clear boundary around where those capabilities are valid.
Practical outcome: you can describe a system using (1) what it can do, (2) where it can do it (ODD), and (3) what it does when it cannot (fallback). This framing will guide your later “drive plan” and safety checks.
Autonomy fails less from “bad code” and more from mismatched assumptions. Roads are inconsistent: lane markings fade, temporary construction changes geometry, and signs may be occluded. Weather changes sensor behavior: rain adds reflections and reduces lidar returns; fog reduces contrast for cameras; snow can hide lanes entirely. Lighting changes quickly at sunrise/sunset, and glare can wash out critical cues.
People are the hardest constraint. Human drivers negotiate with subtle cues—eye contact, inching forward, or signaling intent by vehicle position. Pedestrians and cyclists behave unpredictably. A robust system must choose conservative behavior when uncertainty is high, but not so conservative that it becomes unsafe (e.g., stopping in a travel lane without reason). Engineering judgment here is about balancing caution with traffic norms.
A common beginner mistake is to evaluate autonomy only on “nice” videos and then be surprised when the system fails on a different road. Instead, define constraints up front: “This project works in a quiet parking lot, dry weather, under 10 km/h.” That is not a weakness; it is a correct ODD.
Practical outcome: you can list at least five environmental or human factors that could break your assumptions, and you can decide whether to handle them or exclude them from your ODD.
Milestone 2 and Milestone 4 come together through vocabulary. Autonomous driving stacks are usually described with three layers:
Two additional terms will appear frequently. Sensor fusion combines multiple sensor sources to get a better estimate than any one sensor alone (for example, radar for speed plus camera for classification). State estimation is the math behind tracking what you cannot measure perfectly (your exact pose, velocities, and sometimes road friction).
Localization deserves special attention. GPS gives a rough global fix; the IMU fills in short-term motion between GPS updates; cameras/lidar can match observed features (lane lines, poles, building edges) to a map or to a previously built model. High-level takeaway: localization is a continuous best guess with uncertainty, not a single “true” coordinate. If your localization confidence drops, the right response may be to slow down or stop.
Practical outcome: you can label a simple autonomy block diagram with these terms and explain what data flows between blocks (detections → tracked objects → plan → control commands).
This course centers on building a mini self-driving plan—more like a carefully specified “autonomy script” than a full production stack. Your deliverable is a drive plan: a compact specification that states where you will drive, how fast, what you will do in common situations, and how you will stop safely.
Your drive plan should include:
Common mistake: writing rules that conflict. For example, “always maintain 15 km/h” conflicts with “stop if localization is uncertain.” Resolve conflicts by defining priority: safety overrides comfort, and stopping overrides speed targets.
Practical outcome: by the end of this chapter, you should be able to draft a one-page drive plan and a first block diagram (Milestone 4) showing sense → perception/localization → planning → control, with a safety monitor that can command a stop at any time.
1. Which statement best matches the chapter’s definition of an autonomous car?
2. In the chapter’s three-layer breakdown of driving, what is the main role of planning?
3. Which pairing correctly matches the sense–think–act loop to engineering layers described in the chapter?
4. Why does the chapter emphasize that assisted driving is not the same as self-driving?
5. Which set of items best reflects what the chapter says belongs in an initial simple “drive plan” for a beginner project?
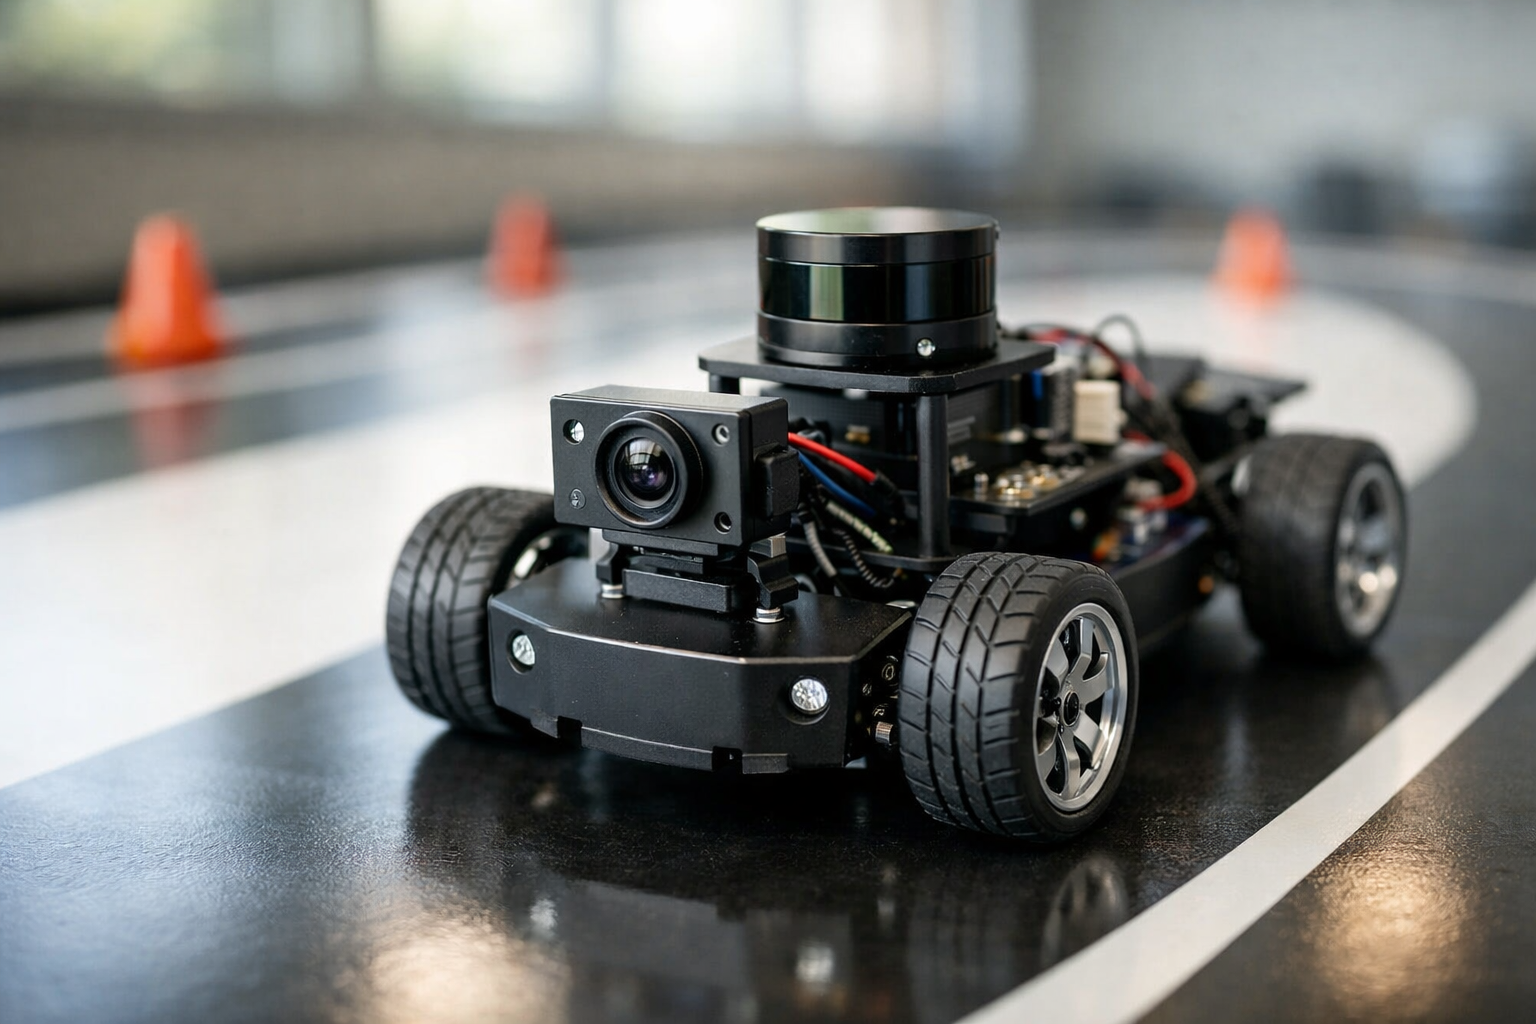
Autonomous driving starts with one deceptively simple job: measure the world well enough to make safe decisions. If Chapter 1 framed autonomy as sense → think → act, this chapter zooms into the “sense” block and treats it like an engineering system, not a magic box. A self-driving stack can only be as calm and reliable as its inputs. You don’t need the most expensive sensors to begin—what you need is a clear understanding of what each sensor actually measures, when it lies, and how to notice those lies before they become steering or braking mistakes.
We’ll work through four practical milestones as we go. First, match each sensor to what it measures (Milestone 1). Second, learn strengths, weaknesses, and failure modes (Milestone 2). Third, assemble a realistic sensor set for a mini self-driving car (Milestone 3). Fourth, write health checks and fallback rules so your car stays safe when sensors disagree (Milestone 4).
Keep a key mindset: sensors do not “understand” anything. They produce signals—images, distance returns, velocities, accelerations, timestamps. Your job is to convert those signals into a usable picture of lanes, obstacles, and your own position, while always assuming something can be wrong.
Practice note for Milestone 1: Match each sensor to what it measures: document your objective, define a measurable success check, and run a small experiment before scaling. Capture what changed, why it changed, and what you would test next. This discipline improves reliability and makes your learning transferable to future projects.
Practice note for Milestone 2: Understand sensor strengths, weaknesses, and failure modes: document your objective, define a measurable success check, and run a small experiment before scaling. Capture what changed, why it changed, and what you would test next. This discipline improves reliability and makes your learning transferable to future projects.
Practice note for Milestone 3: Create a basic sensor set for a mini self-driving car: document your objective, define a measurable success check, and run a small experiment before scaling. Capture what changed, why it changed, and what you would test next. This discipline improves reliability and makes your learning transferable to future projects.
Practice note for Milestone 4: Write simple sensor health and fallback rules: document your objective, define a measurable success check, and run a small experiment before scaling. Capture what changed, why it changed, and what you would test next. This discipline improves reliability and makes your learning transferable to future projects.
Practice note for Milestone 1: Match each sensor to what it measures: document your objective, define a measurable success check, and run a small experiment before scaling. Capture what changed, why it changed, and what you would test next. This discipline improves reliability and makes your learning transferable to future projects.
Cameras measure light. That’s it. Everything else—lane lines, stop signs, pedestrians—comes from software interpreting patterns in pixels. This makes cameras incredibly information-rich and relatively cheap, which is why almost every autonomy project starts with them. For Milestone 1, the “what it measures” answer is: a 2D image (color or grayscale) tied to a timestamp, sometimes with multiple cameras for wider coverage.
Practically, cameras are great for tasks that depend on appearance: lane markings, traffic lights, signs, road edges, and object classification (car vs. cyclist vs. cone). They also support estimating distance using geometry (stereo cameras) or motion over time (monocular depth cues), but those approaches are more fragile than direct ranging sensors. A common beginner mistake is to treat a single front camera as a full solution for both detection and precise distance. You can detect a cone far away, but braking safely requires dependable range estimates.
Engineering judgment: if your mini car will drive slowly in a controlled area (parking lot track), a camera can be your primary lane sensor. But you should still plan how you’ll stop if the camera view becomes unreliable—e.g., if the lane lines disappear or the image becomes too blurry to track. As a practical outcome, define what “camera usable” means in your system (for example: enough contrast on lane edges, and a stable frame rate). That definition becomes part of your sensor health rules later.
Radar and lidar are “ranging” sensors: they directly measure distance to objects, but in different ways. Lidar uses laser light to sample distances across many angles, producing a sparse 3D point cloud. Radar uses radio waves; it is often lower-resolution spatially, but it excels at measuring relative speed (via Doppler). For Milestone 1: lidar measures distance points in 3D around the vehicle; radar measures distance and relative velocity (often with a rough angle estimate).
Lidar is practical for obstacle geometry: where is the curb, how far is that box, what shape is the car ahead. It’s also helpful for mapping/localization when paired with a pre-built map. Radar is practical for “closing speed” decisions—are we rapidly approaching something—even in conditions that confuse cameras. A common mistake is to assume lidar is always perfect. Lidar can be degraded by heavy rain, fog, and reflective/absorptive surfaces; it can also produce dropouts or ghost returns at certain angles.
For a mini self-driving plan, you usually won’t need automotive-grade radar or a full 360° lidar. The practical takeaway for Milestone 3 is to choose a simple ranging tool that complements your camera: even a small 2D lidar or ultrasonic sensors can provide “hard” distance limits for safe stopping. Your goal is not perfect perception—it’s reliable safety margins at low speed.
GPS answers: “Where am I on Earth?” In practice, consumer GPS is often accurate to a few meters in open sky, worse near buildings or trees, and it can lag during quick maneuvers. For Milestone 1, GPS measures global position (latitude/longitude), sometimes altitude and a rough speed estimate, all with uncertainty. If you add corrections (DGPS/RTK), you can improve accuracy significantly, but that increases complexity.
Maps matter because they provide context. A route is a plan through a known network of paths; a local map is a structured representation of your driving area (lanes, boundaries, landmarks). For beginners building a mini system, “map” can be as simple as a list of waypoints on a closed course, or a hand-measured centerline with safe boundaries. The engineering judgment is to avoid pretending GPS is a lane-level truth source. If your course is narrow, GPS drift alone can put you “off the road” even when you’re perfectly centered.
Practical outcome: treat GPS as a “where on the course” hint, not a fine steering guide. Use it to select which segment of your route you’re on and to enforce geofences (“do not drive beyond this boundary”). That sets you up for the localization story: global position from GPS, refined locally by other sensors.
If GPS tells you roughly where you are, the IMU and wheel sensors tell you how you’re moving right now. An IMU measures acceleration and rotation rates (gyro). Wheel encoders measure wheel rotation, which you convert into distance traveled. Steering angle (if available) tells you the commanded turn. For Milestone 1: IMU measures linear acceleration and angular velocity; wheel sensors measure wheel speed/odometry; together they estimate short-term motion and heading changes.
This is the backbone of “dead reckoning”: integrating motion over time to estimate your pose (position and orientation). It’s extremely useful between GPS updates and when cameras momentarily lose lane markings. But it drifts. Gyros have bias; wheels slip; small errors accumulate into large position mistakes. A common beginner error is to integrate IMU acceleration directly to position without careful calibration and filtering—noise explodes quickly. In practice, you typically rely on gyro for heading changes and wheel odometry for forward motion, with frequent correction from other sensors.
Practical outcome for your mini car: mount the IMU rigidly, log data, and define realistic drift expectations (e.g., “odometry is trusted for 2–3 seconds without correction at low speed”). This directly supports high-level localization: you continuously propagate your pose with IMU/odometry, and periodically correct it with GPS, vision landmarks, or lidar features.
Sensor fusion is often described with advanced math, but the beginner-friendly core idea is cross-checking: use multiple imperfect measurements to get a result that is more reliable than any single sensor. This is where Milestone 2 (strengths/weaknesses) becomes actionable. You fuse sensors precisely because they fail differently. A camera may misread a shadow as a lane edge, but lidar won’t see that “edge” as a physical barrier. GPS may drift, but wheel odometry is smooth. Radar may see closing speed even when the camera is blinded by sun.
In a mini self-driving car, fusion can be simple and still effective. Examples of practical fusion patterns:
Common mistake: fusing without time alignment. If your camera frame is 100 ms older than your IMU estimate, your system may “fight itself,” especially during turns. Even in a simple build, you should store timestamps and reason about latency. Practical outcome: define which sensor is the “primary” for each task (lanes: camera; distance safety: lidar/ultrasonic; short-term heading: IMU), and which sensors are used to sanity-check it.
Safety comes from assuming disagreement will happen and deciding ahead of time what you’ll do. This section completes Milestone 4: write simple sensor health and fallback rules. A good fallback policy is conservative, predictable, and easy to test. For a beginner mini car, your priority is: reduce speed, increase following distance, and stop if uncertainty becomes too high.
Start with sensor health checks—small “is this plausible?” tests. Examples:
Then write fallback rules in “if-this-then-that” form that your planner can execute. Keep them simple and testable:
Finally, connect this to your mini drive plan from the course outcomes: pick a route with safe pull-over/stop points, set speed targets that your sensors can support (slower when you rely on vision), and define a “minimum risk condition” (usually a controlled stop). The practical goal is not to prove your sensors never fail—it’s to prove your car behaves safely when they do.
1. What is the core goal of the “sense” block in an autonomous driving stack, as described in this chapter?
2. Which statement best matches the chapter’s mindset about sensors?
3. Why does the chapter say you don’t need the most expensive sensors to begin?
4. What is the purpose of adding sensor health checks and fallback rules (Milestone 4)?
5. Which sequence best reflects the chapter’s four milestones for building sensing into a mini self-driving car?
Perception is the part of an autonomous car that turns messy sensor readings into a clean, useful summary of the scene: “lanes are here,” “a pedestrian is there,” “that car is moving left,” and “I’m not sure what that blob is.” Beginners often imagine perception as one magic model that recognizes everything. In real systems, it’s a workflow: capture sensor data, clean it up, detect things, track them over time, and report results with uncertainty. The goal is not perfection; the goal is dependable inputs for safe decisions.
This chapter builds four practical milestones. First, you will learn to convert sensor outputs into simple lists: objects (with positions and sizes) and lanes (with shapes and boundaries). Second, you will learn confidence and uncertainty without math so you can make safer “if-this-then-that” rules later. Third, you will build a beginner perception checklist for your chosen route—what must be visible, what can be ignored, and how you’ll know when to stop. Fourth, you’ll choose perception priorities for low-speed driving, where “safe and predictable” beats “clever and fast.”
Throughout, keep one engineering principle in mind: perception should produce outputs that are actionable. If your planner can only handle “stop/go/slow,” you don’t need 200 object classes. You need reliable distance estimates to the nearest obstacle, a clear understanding of drivable space, and strong failure detection.
Practice note for Milestone 1: Turn sensor outputs into simple “objects and lanes” lists: document your objective, define a measurable success check, and run a small experiment before scaling. Capture what changed, why it changed, and what you would test next. This discipline improves reliability and makes your learning transferable to future projects.
Practice note for Milestone 2: Understand confidence and uncertainty without math: document your objective, define a measurable success check, and run a small experiment before scaling. Capture what changed, why it changed, and what you would test next. This discipline improves reliability and makes your learning transferable to future projects.
Practice note for Milestone 3: Build a beginner perception checklist for your route: document your objective, define a measurable success check, and run a small experiment before scaling. Capture what changed, why it changed, and what you would test next. This discipline improves reliability and makes your learning transferable to future projects.
Practice note for Milestone 4: Choose perception priorities for safe low-speed driving: document your objective, define a measurable success check, and run a small experiment before scaling. Capture what changed, why it changed, and what you would test next. This discipline improves reliability and makes your learning transferable to future projects.
Practice note for Milestone 1: Turn sensor outputs into simple “objects and lanes” lists: document your objective, define a measurable success check, and run a small experiment before scaling. Capture what changed, why it changed, and what you would test next. This discipline improves reliability and makes your learning transferable to future projects.
Sensors do not deliver “cars” and “lanes.” They deliver raw measurements: camera pixels (color and brightness), lidar point clouds (3D points), radar returns (range and speed), GPS coordinates, and IMU accelerations/rotations. Milestone 1 begins here: turning these raw streams into two beginner-friendly outputs—(1) a lane list and (2) an object list. Think of these lists as the interface between perception and the rest of the car.
A practical pipeline usually includes: sync (align timestamps), calibrate (know where each sensor sits on the vehicle), preprocess (denoise, undistort, filter), and transform (convert data into a common coordinate frame like “car coordinates”). A common mistake is skipping calibration and hoping the system “learns it.” Even a small camera tilt error can shift lane boundaries enough to cause poor steering or false “off-lane” alarms.
Engineering judgment: start with outputs your planner can actually use. For low-speed tests, you can treat the world as: “lane boundaries” + “closest obstacle ahead” + “safe stopping distance.” If your perception can’t reliably produce those three, do not add complexity—tighten your route, reduce speed, and improve sensing conditions.
Practical outcome: by the end of this section, you should be able to describe what your perception system will publish every cycle (for example, 10–20 times per second): a lane list and an object list, each with a simple confidence tag. That is the foundation for later behavior rules.
“Detecting lanes” is not the same as “seeing paint.” Conceptually, it means estimating the drivable corridor the vehicle should follow. Sometimes that corridor is defined by lane markings; sometimes by road edges, curbs, cones, or even the path other vehicles are taking. For a beginner system, define lanes in the simplest way that supports your route and speed.
A typical lane pipeline for cameras includes: find edges/markings, group them into left/right boundaries, then fit a smooth curve (often a polynomial or spline) in vehicle coordinates. Lidar can help when paint is faded by detecting curbs or road boundaries, but it may struggle with flat markings unless intensity is used. A common mistake is assuming the lane is always two crisp lines. In reality, one side may disappear, be occluded by parked cars, or merge at an intersection.
Milestone 1 connects here: convert whatever lane evidence you have into a stable lane list. Your planner does not want raw pixels; it wants a centerline to follow and a “how trustworthy is this?” indicator. Engineering judgment: prefer stability over sensitivity. A slightly laggy lane estimate that is consistent is safer than a twitchy estimate that jumps with shadows.
Practical outcome: you should be able to write down what your system does when the lane is partially missing. Example: “If only one boundary is detected, infer the centerline using last known lane width; if both boundaries are missing for more than 1 second, slow to crawl and prepare to stop.” This is perception feeding safe driving behavior, not just computer vision.
Obstacle detection answers: “What might I collide with?” The tricky part is that obstacles vary wildly: moving cars, walking people, bikes, cones, trash bags, potholes, and low debris. Different sensors see different aspects. Cameras are strong at classification (what is it?) but weaker at depth. Lidar is strong at 3D shape and distance. Radar is strong at measuring relative speed and works well in rain, but provides coarse shapes. Milestone 1’s object list is the product of combining these strengths into a single, usable format.
For a beginner plan, prioritize obstacles that matter at low speed: anything in your path within stopping distance. You do not need perfect labels. In fact, mislabeling is less dangerous than missing. A good beginner rule is: treat unknown-but-solid returns as obstacles until proven otherwise.
Engineering judgment is about conservative filtering. If you filter too aggressively to reduce false positives, you may erase a real hazard (a small cone, a child, a fallen branch). If you filter too lightly, you may stop for shadows or reflections. The right balance depends on speed and environment. Low-speed testing allows you to accept more false stops because the cost is small compared to a collision.
Practical outcome: you should be able to define an obstacle-handling contract with your planner: “If any obstacle is within X meters in the drivable corridor, command slow/stop.” You’ll refine X later when you build your mini drive plan, but perception must provide the corridor-relative position reliably.
Detection is a snapshot; tracking is a story. Tracking connects object detections across time: the same car seen in frame A is the same car in frame B, now slightly closer and drifting right. Even at beginner level, tracking matters because it reduces noise and supports safer decisions like “that person is approaching the curb” versus “random detections flickering.”
Conceptually, tracking does three things: (1) association (match new detections to existing tracks), (2) prediction (estimate where each object will be next), and (3) smoothing (reduce jitter in position and velocity). You can understand this without equations: the tracker is basically saying, “objects move continuously, so don’t believe sudden teleports unless you have strong evidence.”
Milestone 4 (choosing perception priorities) shows up here: for low-speed driving, tracking pedestrians and vehicles ahead is higher priority than tracking every parked object on the side. Track what affects near-term safety and path decisions. If compute is limited, allocate it to the forward corridor and intersections where motion changes quickly.
Practical outcome: your system should be able to output not just “there is an obstacle,” but “it is moving toward/away/crossing.” That unlocks calmer behavior rules: slow early for crossing motion, keep steady if the lead vehicle is pulling away, and stop if motion is uncertain near your path.
Perception is never 100% sure. Confidence is how perception communicates “I think this is true, but here is how strongly.” Milestone 2 is learning to use confidence without math. You can treat confidence like a reliability label: high (trust it for normal driving), medium (be cautious), low (treat as uncertain and prepare a safe fallback). Uncertainty can come from distance (far objects), occlusion (partly hidden), poor lighting, sensor noise, or confusing patterns (shadows, reflections, construction zones).
Common mistake: using confidence only to discard detections. That’s dangerous because low confidence does not mean “not real.” It can mean “hard to see.” For safety, low confidence should often trigger more conservative behavior, not less. For example, a low-confidence pedestrian-like blob near a crosswalk should prompt slowing, not ignoring.
Milestone 3 (a perception checklist) uses confidence as a go/no-go gate. Before you drive your route, decide what “minimum viable perception” looks like: lane confidence must be at least medium on straight segments; forward obstacle detection must be high within your stopping distance; GPS/IMU health must be stable enough to keep the car oriented in its lane. If those conditions are not met, your plan should default to a safe stop.
Practical outcome: you should be able to write plain-language rules such as “If lane confidence is low for more than 2 seconds, slow to walking pace and pull to a safe stop.” Confidence becomes a safety tool, not a vanity metric.
Every sensor has failure modes, and beginners get into trouble when they test outside their sensor’s comfort zone. Cameras suffer in glare, low sun, night noise, and lens dirt. Lidar can degrade in heavy rain/fog and can be confused by reflective surfaces. Radar can see through weather but may struggle with stationary objects or provide ambiguous shapes. Clutter—busy backgrounds, signage, parked cars, construction—creates false detections and lane confusion.
Milestone 3 is your practical response: build a perception checklist for your route. The checklist is not theoretical; it’s the set of conditions that must be true for you to proceed safely at low speed. Include items like: “sun position does not produce direct glare into the camera,” “lane markings are visible or curbs are consistent,” “no heavy rain,” “lidar window is clean,” “radar is not blocked,” and “expected traffic complexity is low.”
Milestone 4 (perception priorities) is the final safety lesson: you cannot perceive everything equally well all the time, so choose what matters most. For a beginner low-speed drive, prioritize: (1) forward corridor obstacle detection within stopping distance, (2) lane/drivable space confidence, and (3) cross-traffic and pedestrian detection at intersections. Deprioritize distant classification and rare edge cases until your basics are robust.
Practical outcome: you finish this chapter with a realistic operating envelope—conditions where your perception is trustworthy—and explicit stop triggers when it isn’t. That discipline is what turns perception from a demo into a safer system component.
1. In this chapter, what is perception’s main job in an autonomous car?
2. Which description best matches how real-world perception works (according to the chapter)?
3. Milestone 1 focuses on converting sensor outputs into which two beginner-friendly result lists?
4. Why does the chapter teach confidence and uncertainty (without math)?
5. For safe low-speed driving, what does the chapter say matters more than having many object classes?
Driving looks easy until you try to explain it to a robot. “Go to the grocery store” is not a command a car can execute unless it can answer a smaller, constant question: where am I right now? Localization is the system that keeps track of the car’s position and direction, and it has to keep doing that over time—because the world changes, sensors drift, and the car is always moving.
In this chapter you’ll build a practical mental model of localization as position + direction + time. You’ll compare three common ways autonomous systems estimate location: GPS, map matching to known landmarks, and on-the-spot estimation (dead reckoning) from wheel and IMU sensors. Then you’ll pick a mapping approach for a small test area and, most importantly, define rules for when localization is “good enough” to drive versus when the safest move is to slow down or stop.
Think of localization as a “truth maintenance” job. You never get perfect truth; you manage uncertainty. The engineering judgment comes from recognizing how each sensor fails, what kinds of maps help, and how to set conservative thresholds that keep your mini self-driving plan safe.
Practice note for Milestone 1: Explain localization as “position + direction + time”: document your objective, define a measurable success check, and run a small experiment before scaling. Capture what changed, why it changed, and what you would test next. This discipline improves reliability and makes your learning transferable to future projects.
Practice note for Milestone 2: Compare GPS, map matching, and on-the-spot estimation: document your objective, define a measurable success check, and run a small experiment before scaling. Capture what changed, why it changed, and what you would test next. This discipline improves reliability and makes your learning transferable to future projects.
Practice note for Milestone 3: Pick a mapping approach for a small test area: document your objective, define a measurable success check, and run a small experiment before scaling. Capture what changed, why it changed, and what you would test next. This discipline improves reliability and makes your learning transferable to future projects.
Practice note for Milestone 4: Define rules for when localization is “good enough” to drive: document your objective, define a measurable success check, and run a small experiment before scaling. Capture what changed, why it changed, and what you would test next. This discipline improves reliability and makes your learning transferable to future projects.
Practice note for Milestone 1: Explain localization as “position + direction + time”: document your objective, define a measurable success check, and run a small experiment before scaling. Capture what changed, why it changed, and what you would test next. This discipline improves reliability and makes your learning transferable to future projects.
Localization is not just a dot on a map. For driving, “where am I?” means you know your position (x, y, sometimes altitude), your direction (heading/yaw, and often roll/pitch on slopes), and you know it as a function of time. That time part matters because sensors arrive at different rates: a camera might update at 30 Hz, an IMU at 200 Hz, GPS at 1–10 Hz. If you don’t align time correctly, you will fuse mismatched measurements and create errors that look like “random drift.”
In practical autonomy stacks, localization is often represented as a pose: position + orientation, typically in a global frame (like latitude/longitude converted to meters) or a local frame anchored to your test area. Your planner then asks: “Given this pose, what lane am I in? How far to the stop line? What’s my path to the next turn?” Without a reliable pose, planning becomes guesswork.
Two mindsets help beginners: (1) localization is a running estimate with uncertainty, not a single answer; (2) different driving tasks need different accuracy. Following a long straight road at low speed might tolerate 1–2 meters of error. Stopping at a crosswalk or staying in a narrow lane might require decimeter-level accuracy. When you later define “good enough,” you’ll tie accuracy requirements to the behavior rules of your mini drive plan.
Milestone 1 is achieved when you can say: “Localization is estimating pose over time, with a confidence that determines what driving actions are allowed.”
GPS (or more broadly GNSS—Global Navigation Satellite Systems) estimates your position by timing signals from satellites. In an open field, it can be surprisingly good for general navigation. In real streets, it can be unreliable in ways that matter for autonomy. GPS error is not just “a little noise.” It can be biased for minutes, jump suddenly, or drift as the satellite geometry changes.
Why does GPS drift? Common causes include multipath reflections (signals bouncing off buildings), partial sky visibility (urban canyons, trees), atmospheric delay, and receiver clock/measurement errors. Even if the position error is only a few meters, the lane-level implication can be huge: you may “snap” to the wrong road segment, think you’re in the opposite lane, or miss a turn trigger.
To improve GPS, systems often use corrections such as DGPS/RTK (Real-Time Kinematic) that can reach centimeter-level accuracy in good conditions. But RTK still has failure modes: losing correction link, poor satellite visibility, or cycle slips. For a beginner mini plan, GPS is best treated as a global anchor: it helps you know the general area, but you should avoid making safety-critical decisions on GPS alone.
Milestone 2 begins here: you can describe GPS as one localization source with specific, predictable failure patterns—and you plan around them.
Map matching means you compare what you sense right now to a stored map and “snap” your estimated position to the best match. The map can be simple (road centerlines) or rich (lane boundaries, curbs, poles, signposts). The key idea is that the world contains stable landmarks—things that don’t move much—and those are excellent for correcting drift.
A simple example: you have a pre-made map with the centerline of a loop road in a parking lot. Your GPS says you’re near the loop but a bit off. By projecting your position onto the nearest segment of that centerline, you get a better estimate of where along the loop you are. This is basic map matching and it can reduce “free-space wandering.” Another example uses visual landmarks: your camera detects a stop sign at a known mapped location. If your predicted pose says the stop sign should be 30 meters ahead but you see it much closer, your pose is off and should be corrected.
For a small test area, choose mapping complexity based on what you can maintain. A minimalist mapping approach might be: (1) a route polyline (a series of waypoints), (2) a few special points like “stop here,” “turn start,” and “safe pull-over zone.” A richer approach might include lane edges and fixed landmarks (light poles, building corners), but it requires repeatable detection and maintenance when the environment changes.
When done well, map matching is a safety feature: it helps prevent the car from believing it’s on a road it cannot physically be on.
Dead reckoning is “on-the-spot estimation”: you start from a known pose and integrate motion over time using wheel sensors (odometry) and an IMU (accelerometers and gyroscopes). If your wheels report how fast you’re going and the IMU reports how fast you’re turning, you can estimate your new pose every few milliseconds. This is powerful because it’s high-rate and works even when GPS is missing.
The downside is that dead reckoning drifts. Small biases accumulate into large position error over distance. Wheel odometry suffers from wheel slip, uneven tire pressure, bumps, and incorrect wheel radius assumptions. IMU integration suffers from gyro bias and noise; if you integrate acceleration to get velocity and position without correction, errors explode quickly.
For a beginner mini plan, use dead reckoning primarily for short-term stability: smooth motion between slower global updates (like GPS or landmark matches). A practical pattern is: IMU + wheel odometry predict where you are for the next 0.1–1.0 seconds; then you correct that prediction whenever a trustworthy external measurement arrives.
By the end of this section, Milestone 2 is complete: you can contrast dead reckoning (fast, drifting) with GPS (global, jumpy) and map matching (corrective, map-dependent).
Real localization systems combine multiple estimates into one “best belief” about pose. Conceptually, you do two steps repeatedly: predict (where you expect to be based on motion) and update (correct that prediction using measurements like GPS or landmarks). You don’t need to implement a Kalman filter to understand the engineering goal: keep a stable estimate and keep track of how uncertain it is.
Safe fusion means you must handle outliers. GPS can jump; vision can mis-detect a sign; wheels can slip. If you blindly average everything, one bad measurement can pull your pose into the wrong lane. Instead, treat every update as a proposal: “Does this measurement agree with what I predicted within a reasonable tolerance?” If not, down-weight it or reject it and raise a health flag.
A practical beginner approach uses quality gates:
Milestone 4 starts here: define what “good enough” means numerically and behaviorally. For example: “Good enough to proceed at 10 km/h if estimated position uncertainty < 0.5 m and heading uncertainty < 5°, and at least one of (GPS good, landmark match recent) is true.” The key is not the exact numbers; it’s tying localization quality to allowed actions.
Common mistake: using “last good pose” forever when quality degrades. Your belief should become more uncertain when you aren’t receiving trustworthy updates, and your driving policy should become more conservative in response.
No localization system is perfect, so autonomous behavior must include explicit failure handling. Localization failure is not only “GPS is gone.” It also includes: uncertainty growing too large, pose jumping inconsistently, map matching snapping to different roads, or sensor timestamps drifting. The safest systems treat localization health like a first-class safety input.
Define clear rules for when localization is “good enough” to drive, when to slow down, and when to stop. For a small test drive, conservative rules are a feature, not a limitation. Example policy logic:
Make the rules actionable by linking them to measurable signals: time since last good GPS/landmark update, estimated covariance/accuracy, difference between predicted and measured pose, and map-matching confidence. Then tie them to your mini drive plan: “If localization is Yellow, cap speed at 5 km/h and do not start a new turn. If Red, stop within 2 seconds unless stopping is unsafe; otherwise creep to the nearest mapped pull-over point.”
Common mistake: stopping in the lane because “stop is always safe.” Stopping can be unsafe if it blocks others. Your plan should include pre-mapped safe stopping locations and a slow-down behavior that buys time to decide. Another mistake is ignoring slow time drift: the car looks fine until it reaches a tight maneuver where the accumulated error matters. Your thresholds should anticipate that drift grows with time and distance when updates are missing.
Milestone 4 is completed when you can state, in plain terms, the conditions under which your system is allowed to drive and the exact conservative fallback when localization quality degrades.
1. In this chapter’s mental model, what does “localization” mean?
2. Why does localization have to be continuously maintained rather than solved once?
3. Which set correctly matches the three location-estimation approaches compared in the chapter?
4. What is the key safety decision the chapter asks you to define for your system?
5. What does the chapter mean by describing localization as a “truth maintenance” job?
Up to this point, you can think of your mini self-driving stack as: sensors measure the world, localization estimates where the car is, and now planning/control decide what to do next. This chapter focuses on the “think → act” bridge: choosing a safe action and then executing it with steering, throttle, and brakes. In real systems, planning and control are separated so that decisions stay understandable and testable. A beginner-friendly split is three layers: route planning (where to go), behavior planning (what maneuver to take next), and motion planning (the exact path and speed profile). That split is Milestone 1, and it keeps complexity manageable.
Why split it? Because each layer has different inputs, different failure modes, and different time horizons. Route planning changes slowly (minutes). Behavior planning changes at human driving timescales (seconds). Motion planning and control run fast (10–100+ times per second) to stay smooth and stable. If you mix them, you end up debugging one giant knot: “Why did we brake?” becomes impossible to answer. With clear layers, you can point to the exact rule, plan, or controller that produced an action.
As you read, keep a simple test scenario in mind: a short loop around a parking lot or quiet neighborhood with a start point, a few turns, a stop sign, and maybe a parked car partly blocking the lane. Your goal is not to build a perfect driver—it’s to create a mini drive plan that includes (1) a route, (2) speed targets, (3) safe stopping rules, and (4) crisp “if-this-then-that” behaviors for common situations. You’ll also learn what to never do, because safety is often defined by forbidden actions as much as by desired ones.
Practice note for Milestone 1: Split planning into route, behavior, and motion: document your objective, define a measurable success check, and run a small experiment before scaling. Capture what changed, why it changed, and what you would test next. This discipline improves reliability and makes your learning transferable to future projects.
Practice note for Milestone 2: Write beginner-friendly behavior rules for common situations: document your objective, define a measurable success check, and run a small experiment before scaling. Capture what changed, why it changed, and what you would test next. This discipline improves reliability and makes your learning transferable to future projects.
Practice note for Milestone 3: Create a speed plan with safe following and stopping distances: document your objective, define a measurable success check, and run a small experiment before scaling. Capture what changed, why it changed, and what you would test next. This discipline improves reliability and makes your learning transferable to future projects.
Practice note for Milestone 4: Describe steering and braking control as “follow the target”: document your objective, define a measurable success check, and run a small experiment before scaling. Capture what changed, why it changed, and what you would test next. This discipline improves reliability and makes your learning transferable to future projects.
Route planning answers: “How do I get from start to goal using allowed paths?” For a beginner project, treat the world as a small graph: nodes are intersections or waypoints; edges are drivable segments. Your route planner outputs a list of waypoints or lane segments to follow. This is deliberately coarse—route planning should not decide how you steer around a parked car. It should only decide which street/lane sequence you intend to take.
Workflow: (1) define start and goal in a consistent coordinate system (map frame), (2) constrain allowed paths (no wrong-way edges, no sidewalks, no closed segments), and (3) run a simple search (Dijkstra/A*) to pick the path with lowest cost. Costs can be distance, speed limit, or “avoid unprotected left turns” if you want safety bias.
Milestone 1 starts here: keep route planning stable. If the route changes often, behavior and control will look erratic. Only re-route when you truly cannot proceed (blocked road, wrong turn), and throttle re-plans (e.g., no more than once every few seconds) to avoid route “thrashing.”
Behavior planning chooses the next maneuver given the route and the perceived situation. This is where beginner-friendly “if-this-then-that” rules shine (Milestone 2). You are not optimizing a continuous trajectory yet; you are selecting a discrete behavior state such as Follow Lane, Stop at Line, Yield, Turn Left, Turn Right, Pass Obstacle, or Pull Over.
A practical pattern is a small state machine with clear entry/exit conditions. Example rules you can implement and test:
Common mistakes include rules that conflict (“stop” and “go” both true), missing hysteresis (behavior flips every frame), and unclear priorities. Add a priority order: Emergency actions override everything, then legal obligations (stop/yield), then comfort/efficiency. Keep a short log: current state, reason for state change, and the key measured values (distance, relative speed, gap time). That log is your best debugging tool.
Motion planning turns the chosen behavior into an executable plan: a smooth path (geometry) and a speed profile (velocity over time). This is Milestone 3: create a speed plan with safe following and stopping distances. Even in a mini project, you want the plan to be smooth enough that control can track it without jerky steering or “accordion” braking.
Start simple: generate a centerline path from your route waypoints and smooth it (e.g., using spline fitting). Then build a speed plan in two parts: (1) a target speed based on rules (speed limit, turn speed, school zone), and (2) constraints based on safety (lead vehicle, stop line, obstacle).
Engineering judgment: prioritize “always feasible.” A perfect speed target is useless if it asks for braking harder than your actuators can do or if it ignores delays. Build in margins for latency and estimation error, especially with cheaper sensors. Common mistakes are planning to stop exactly at the line (no margin), reacting too late because you only look a few meters ahead, or producing a path with sharp corners that demands impossible steering rates.
Safety is not only “do the right thing”; it’s also “never do the dangerous thing.” This section turns your mini drive plan into something you can test responsibly (and matches the course outcome of listing the most important safety checks and failure responses). Define buffers (extra space/time) and explicit forbidden actions that trigger a safe fallback.
Useful buffers for beginners:
“Never do” rules should be crisp and easy to monitor in code. Examples:
Failure responses should be boring and repeatable: slow down, stop, hazard signal (if available), and require human takeover. A common mistake is adding complex recovery behavior too early. In a beginner build, “safe stop and wait” is a feature, not a weakness. Write down your safe stopping rule in one sentence and make every module respect it: if uncertainty rises or constraints are violated, the only acceptable output is a controlled stop.
Control is how the car “follows the target” (Milestone 4). Planning produces targets—path points and desired speed—and control computes actuator commands to track them despite disturbances (bumps, slope, model error). The key idea is feedback: measure what the car actually did, compare to the target, and correct.
For steering, a beginner-friendly approach is to pick a lookahead point on the planned path and steer to reduce the heading/lateral error to that point (pure pursuit-like logic). Practical knobs: lookahead distance (longer is smoother but cuts corners; shorter is more accurate but can oscillate) and steering limits (never command beyond what your platform can safely do).
For speed, use a simple feedback controller: compare desired speed vs measured speed and adjust throttle/brake. Many mini platforms use a PI/PID controller. Keep it conservative: avoid aggressive gains that cause overshoot and oscillation. Add a “brake first” rule near stop lines: when you need to stop, prioritize braking control rather than trying to manage speed with throttle reductions alone.
Finally, remember timing: control runs fast. If your planner updates at 10 Hz but control runs at 50 Hz, the controller should hold the latest target and track it smoothly until a new plan arrives.
Edge cases are situations where your neat rules and assumptions break: a cone appears, a pedestrian stands near the curb, lane markings vanish, GPS jumps, or a vehicle behaves oddly. You cannot enumerate every edge case, but you can design your stack to degrade safely and predictably.
Start by classifying uncertainty. If perception is uncertain (object classification unclear), treat it as higher risk. If localization is uncertain (position covariance high), reduce speed and avoid complex maneuvers like passing. If the scene is ambiguous (two possible lanes), prefer the conservative action: slow, center yourself in the widest safe corridor, and stop if needed.
Common mistake: trying to “power through” ambiguity to keep the car moving. For beginner testing, your definition of success should include stopping safely when the system is unsure. This is also where your safety checks matter: stale sensors, high CPU load causing missed deadlines, and actuator saturation (you are commanding more steering/braking than available) should all trigger a safe fallback.
To close the loop with the course outcomes, combine everything into your mini drive plan: a route (waypoints and allowed segments), behavior rules (lane follow, stop, yield, turn, obstacle handling), a speed plan (targets plus following/stopping constraints), and a clearly written safe stopping policy. When you can explain, in plain language, why the car chose an action and how it would fail safely, you’ve built the core of autonomous planning and control.
1. Why does the chapter recommend splitting planning into route, behavior, and motion layers?
2. Which mapping of layers to typical time horizons best matches the chapter?
3. In the chapter’s three-layer split, what is the role of behavior planning?
4. Which set best matches the chapter’s goal for a beginner mini drive plan?
5. What is a key drawback of mixing route, behavior, motion planning, and control into one big block?
You now have the core “sense–think–act” idea and a set of behaviors in mind. This chapter turns those pieces into something you can actually run as a small, controlled experiment: a complete mini drive plan plus a disciplined way to test it, monitor it, and improve it. In real autonomy work, most failures don’t come from one big mistake—they come from vague assumptions, missing boundaries, or poor visibility into what the system was doing when it made a bad choice.
Think of your mini plan as a contract between you and your vehicle: where it may operate, what it should do, how fast it should go, and exactly when it must stop. Then think of testing as a ladder: you start with the safest, slowest version, and only climb to the next rung when you have evidence it is stable. Finally, you close the loop with logging: a simple record of what happened, so you can make changes based on facts, not guesswork.
As you work through the milestones in this chapter, you’ll produce four concrete outputs: (1) a complete route + rule + speed plan, (2) a pre-drive checklist with clear go/no-go criteria, (3) a set of monitoring signals that trigger intervention or an emergency stop, and (4) a test log plus an improvement loop that updates the plan after every run.
Practice note for Milestone 1: Draft your complete mini drive plan (route + rules + speeds): document your objective, define a measurable success check, and run a small experiment before scaling. Capture what changed, why it changed, and what you would test next. This discipline improves reliability and makes your learning transferable to future projects.
Practice note for Milestone 2: Add a pre-drive checklist and go/no-go criteria: document your objective, define a measurable success check, and run a small experiment before scaling. Capture what changed, why it changed, and what you would test next. This discipline improves reliability and makes your learning transferable to future projects.
Practice note for Milestone 3: Define monitoring signals and when to trigger an emergency stop: document your objective, define a measurable success check, and run a small experiment before scaling. Capture what changed, why it changed, and what you would test next. This discipline improves reliability and makes your learning transferable to future projects.
Practice note for Milestone 4: Create a simple test log and improvement loop: document your objective, define a measurable success check, and run a small experiment before scaling. Capture what changed, why it changed, and what you would test next. This discipline improves reliability and makes your learning transferable to future projects.
Practice note for Milestone 1: Draft your complete mini drive plan (route + rules + speeds): document your objective, define a measurable success check, and run a small experiment before scaling. Capture what changed, why it changed, and what you would test next. This discipline improves reliability and makes your learning transferable to future projects.
A mini self-driving plan is not “let’s see if it works.” It is a written template that forces you to specify the goal, the boundaries, and the assumptions. This is Milestone 1: draft the complete plan (route + rules + speeds) in a format you can review before every run.
Start with a single measurable goal, such as: “Complete one loop of the parking-lot route without leaving the lane markings and perform a full stop at the designated stop box.” Keep the goal narrow—early tests are about control and predictability, not coverage.
Next define boundaries. Boundaries are hard limits that should never be crossed, even if it means stopping early. Examples: maximum speed, minimum following distance, maximum steering angle rate, and “no operation if pedestrians are within X meters.” Include physical boundaries too: “Stay within the painted lane” or “Do not cross the centerline.” If you can’t measure a boundary, rewrite it until you can.
Common mistake: mixing goals with assumptions (e.g., “the car will see cones”). That’s not a goal; it’s a risk. Put it in assumptions, then add a boundary: “If cones are not detected reliably, stop.” Engineering judgment here is choosing a plan that is boring by design—because boring is testable.
Your Operational Design Domain (ODD) is the envelope of conditions where your system is allowed to operate. Beginners often skip this and then feel surprised when a shadow, glare, or a slight slope breaks the behavior. A small ODD is not a weakness; it is how you stay safe while learning.
For a mini route, write your ODD as a checklist of environment constraints. Include: location type (empty parking lot, private driveway), road type (flat asphalt, painted lines), traffic level (none), and dynamic agents (no pedestrians, no pets). Also include time-of-day and weather: sunlight angle changes camera appearance, and wet pavement changes braking distance.
ODD must connect directly to your sensors and “sense–think–act” pipeline. If you rely on a camera for lane lines, your ODD should require visible lane markings and exclude heavy glare. If you rely on GPS for waypoint following, your ODD should exclude areas with tall buildings or tree canopies that can degrade GPS. If your localization is wheel-odometry-based, your ODD should exclude loose gravel that causes slip and drift.
Milestone 1 becomes realistic only when the ODD is explicit: the route and rules are written for a particular world. Milestone 2 (go/no-go) will later enforce the ODD at runtime: if the world doesn’t match your envelope, you don’t drive.
A good test procedure is incremental. You do not start at target speed; you earn speed with evidence. Think of this as a staged rollout for a single vehicle. Each stage has entry criteria (what must be true before you try it) and exit criteria (what counts as success).
Stage 0 is static: power on, sensors streaming, controls disabled. Confirm you can see the inputs (camera image, IMU readings, GPS fix) and that your actuation commands are bounded (e.g., throttle command never exceeds your max). This catches wiring, calibration, and frame-rate issues without motion.
Stage 1 is “creep”: 0.2–0.5 m/s in a straight segment. Verify that steering corrections are small and stable. If you see oscillation (left-right-left), stop and reduce controller aggressiveness before you add speed.
Stage 2 introduces turns at low speed. Add only one complexity at a time: first a gentle curve, then a sharper curve, then a stop box. Stage 3 is the full route at low speed. Only Stage 4 raises speed toward your plan targets. At every stage, you should have a clear manual takeover rule and a clear success definition.
Common mistake: changing two things at once (new route + new controller gains). If the run fails, you won’t know why. Change one variable per test cycle. This is where engineering judgment is practical: prefer slower progress with clear causality over fast progress with confusion.
This milestone is about responsibility. Even a “mini” self-driving test needs defined safety roles and a fail-safe story. Decide who has authority to start, pause, and stop. In professional testing, the test is not “autonomous” if humans are improvising emergency responses.
Define at least two roles: a Safety Driver/Operator who can immediately take over or hit a physical stop, and a Test Lead/Observer who watches system state and environment. If you are alone, you must simplify the test so you can safely monitor and intervene—usually that means slower speed and a more open area.
Remote stop (or an equivalent kill switch) should be treated like a primary control, not an accessory. You need a positive test before every run: trigger it at low speed and verify the vehicle goes to a safe state. Safe state should be defined, not assumed: throttle to zero, braking applied, steering neutral (or controlled to maintain stability), and an audible/visible indication that the system is stopped.
Milestone 3 (monitoring signals) is tightly linked to fail-safe behavior. Decide what conditions require: (a) a warning, (b) a controlled stop, or (c) an immediate emergency stop. Examples that often justify a hard stop: loss of localization, obstacle too close, actuator commands saturating for too long, sensor feed missing, or a manual stop request.
Common mistake: relying on “I’ll just take over.” Reaction time is not a plan. Your plan must say when the system stops itself, and what the humans do immediately after.
If you don’t log it, you can’t improve it reliably. Logging is Milestone 4’s foundation: a simple test log and improvement loop. The goal is not to store everything forever; the goal is to capture enough evidence to explain behavior and reproduce issues.
Start with three layers of logging. First, a human-readable run sheet: date/time, test stage, route version, software/config version, weather/lighting notes, and pass/fail with a short description. Second, system signals (time series): vehicle speed, steering angle, throttle/brake commands, localization estimate, localization confidence, and any planner outputs (target speed, target curvature). Third, event markers: “emergency stop triggered,” “obstacle detected,” “lane lost,” “manual takeover,” with timestamps.
Why these? Because most autonomy failures are either (1) the world model was wrong (perception/localization), (2) the decision was wrong (planning/rules), or (3) the vehicle couldn’t execute (control/actuation). Your logs should let you separate those categories. Common mistake: logging only video. Video is helpful, but without synchronized commands and estimates you can’t diagnose oscillation, late braking, or confidence collapse.
Iteration is the discipline of changing your plan based on what you observed, not what you hoped would happen. Treat every test as input to a small “plan update” process: review, identify the top issue, change one thing, and re-test.
Use a short post-run workflow. First, label the run: stage, outcome, and the single most important event. Second, pull the key evidence from logs: plot speed vs. target speed, steering command vs. curvature, and confidence vs. time. Third, assign a root-cause category (perception, localization, planning/rules, control, or safety process). Then write an action item that changes either the drive plan (rules/speeds/ODD), the checklist (go/no-go criteria), the monitoring triggers (Milestone 3), or the implementation.
Examples of plan updates that improve safety and learning speed: lowering speed targets near high-curvature segments; adding a rule “if lane confidence < T for 0.5 s, controlled stop”; tightening ODD to exclude low sun angles; expanding the pre-drive checklist to include camera lens cleaning; adding a requirement that the remote stop test must pass twice before higher-speed stages.
The practical outcome of this chapter is a mini program you can run repeatedly: a written drive plan, a controlled test procedure, defined safety responses, and a logging-driven improvement loop. That is the real core of autonomy engineering—make a clear promise, test it carefully, and update the promise when the world proves you wrong.
1. What best describes the purpose of the mini drive plan in this chapter?
2. According to the chapter, why do many autonomy failures happen?
3. How should you progress when testing your mini self-driving plan?
4. What is the role of the pre-drive checklist and go/no-go criteria?
5. Why does the chapter emphasize using a test log and improvement loop?
- Learning Evolved.
- Intelligence Amplified.