Deep Learning — Beginner
Create beginner-friendly image and voice AI step by step
"Build Your First Image and Voice AI from Scratch" is a short, book-style course designed for people with absolutely no prior experience in artificial intelligence, coding, or data science. If terms like model, dataset, or deep learning sound intimidating, this course changes that. You will start with the simplest ideas first, using plain language and practical examples, and build toward real beginner projects you can understand and explain.
Many AI courses assume you already know programming or math. This one does not. Instead of overwhelming you with theory, it teaches how AI works by showing what computers do with pictures and sound. You will learn how an AI system takes input, finds patterns, and makes predictions. From there, you will move step by step through the full beginner workflow: understanding the problem, preparing data, building a basic model, testing it, improving it, and presenting the result.
This course is structured like a short technical book with six connected chapters. Each chapter builds on the last one, so you never feel lost or forced to jump ahead. First, you learn what image AI and voice AI actually mean in real life. Next, you set up a simple workspace and gather the materials you need. Then you prepare image and audio data so a computer can learn from it. After that, you build your first image AI, then your first voice AI, and finally combine the ideas into a simple project you can share.
The focus is not on complex code or advanced equations. The focus is on understanding. By the end, you will know the moving parts of an AI project and how they fit together. You will also learn the good habits that beginners need most, including organizing files, labeling examples, checking results, spotting mistakes, and improving performance in small, practical ways.
This course is for absolute beginners, career explorers, students, creators, and curious professionals who want a gentle first step into deep learning. It is especially useful if you have been interested in AI but avoided it because it seemed too technical. If you can use a computer, browse the web, and manage files, you can start here.
It is also a strong fit for self-learners who want a practical introduction before moving into more advanced machine learning, computer vision, or speech technology courses. If you are ready to begin, Register free and start building your first AI project today.
The course begins with the foundations: what AI is, what image and voice systems do, and how prediction works. Then you create a beginner-friendly setup and learn how datasets support every AI project. Once your workspace is ready, you move into data preparation, which is one of the most important skills in real AI work. From there, you build and review a simple image model, then repeat the same learning pattern with voice AI so the ideas become familiar and reusable.
The final chapter ties everything together. You will create a simple project plan, review ethical and privacy basics, and practice presenting your work in a clear, confident way. You will also see where to go next if you want to keep learning. To continue exploring related topics, you can also browse all courses on the platform.
By the time you finish, you will not just know AI words—you will understand the process behind a real beginner image and voice AI build. That confidence matters. Once you learn the full workflow in a simple way, advanced tools become much easier later. This course gives you that strong first step.
Senior Machine Learning Engineer and AI Educator
Sofia Chen is a senior machine learning engineer who specializes in making AI easy for first-time learners. She has helped students and teams build practical image and voice systems using simple tools, clear workflows, and beginner-friendly teaching.
Artificial intelligence can sound mysterious when you first hear the term, but the beginner-friendly truth is much simpler: AI is a way to train computers to notice patterns and make useful guesses from data. In this course, we will focus on two very approachable kinds of AI. The first is image AI, where a computer looks at pictures and learns to tell one kind from another. The second is voice or sound AI, where a computer listens to audio and learns to recognize words, sounds, or categories. You do not need advanced math to begin understanding these systems. What you need most is a clear mental model of what the computer receives, what it tries to produce, and how we judge whether it is doing a good job.
A practical way to think about AI is to compare it with human learning. A child learns the difference between a cat and a dog after seeing many examples and hearing feedback. An AI model does something similar, but in a much more mechanical way. It does not truly understand animals, language, or the world. It processes numbers, adjusts internal parameters, and becomes better at mapping inputs to outputs. This distinction matters because beginners often expect AI to behave like a thoughtful assistant. In reality, a first AI model is closer to a pattern recognizer than a thinker. That is not a weakness. It is exactly why AI can be useful for many narrow tasks.
In everyday life, image AI helps sort photos, detect products in stores, scan handwritten digits, and assist with medical screening. Voice and sound AI help transcribe speech, detect spoken commands, classify environmental sounds, and improve accessibility. These are concrete tasks with clear goals. In this chapter, you will learn what AI is and what it is not, see how image AI and voice AI solve simple tasks, understand the basic workflow of an AI project, and choose a first project with confidence. That foundation will make the rest of the course much easier, because you will know not only what to build, but why each step exists.
As you read, keep one engineering habit in mind: beginner AI succeeds when the task is small, the data is clear, and the evaluation is honest. Many first projects fail not because the model is too weak, but because the goal is vague, the labels are messy, or the learner tries to solve too much at once. We will avoid that mistake. You will learn how to select a manageable project, prepare image and audio data in a practical way, and judge early results without panic. A simple model that works reliably is far more valuable than a flashy idea that cannot be tested.
By the end of this chapter, you should be able to explain image and voice AI in plain language, identify the parts of a basic AI workflow, and choose a first project that matches your tools and skill level. That is the right starting point for building your first image classifier and your first sound or voice model from scratch.
Practice note for Understand what AI is and what it is not: document your objective, define a measurable success check, and run a small experiment before scaling. Capture what changed, why it changed, and what you would test next. This discipline improves reliability and makes your learning transferable to future projects.
Practice note for See how image AI and voice AI solve simple tasks: document your objective, define a measurable success check, and run a small experiment before scaling. Capture what changed, why it changed, and what you would test next. This discipline improves reliability and makes your learning transferable to future projects.
Practice note for Learn the basic workflow of an AI project: document your objective, define a measurable success check, and run a small experiment before scaling. Capture what changed, why it changed, and what you would test next. This discipline improves reliability and makes your learning transferable to future projects.
Artificial intelligence means teaching a computer to perform a task by learning from examples instead of following only hand-written rules. In ordinary software, a programmer might write exact steps such as, “if the pixel is dark and round, call it a coin.” In AI, we collect many examples of coins and non-coins, and the model learns patterns that help it make predictions. This is useful when the rules are too messy or too numerous to write by hand. Real images vary in lighting, angle, size, and background. Real audio varies in speed, accent, volume, and noise. AI helps because it can absorb these variations from data.
However, AI is not magic, and it is not human intelligence. A beginner mistake is to assume that if a model gets many examples right, it truly understands what it is looking at or hearing. It does not. It only detects patterns that were useful during training. If the data changes too much, performance can drop quickly. For example, an image model trained only on bright studio photos may struggle on dark phone pictures. A sound model trained on clean recordings may fail in a noisy room. Understanding this limitation is important because good AI work is not just model building. It is also careful problem definition and careful data collection.
In daily life, you already encounter narrow AI systems. Your phone may group photos by faces or objects. A smart speaker may react to a short voice command. A video app may generate subtitles. These tools do not possess general reasoning, but they do one focused task well enough to be useful. That is exactly the mindset you should adopt in your first projects. Instead of trying to build “an AI that understands all speech,” build a model that recognizes a few commands such as yes, no, stop, and go. Instead of trying to classify every object in the world, build a model that distinguishes cats from dogs, ripe fruit from unripe fruit, or handwritten digits from 0 to 9.
Good engineering judgment starts with a narrow goal. Ask: what decision do I want the model to help with? What examples can I collect or download? What will success look like? If you can answer those clearly, you are thinking like an AI practitioner rather than an AI spectator.
To a computer, an image is not “a cat” or “a stop sign.” It is a grid of numbers. Each pixel stores color information, often as red, green, and blue values. A small image might be 64 by 64 pixels with three channels, which means the model receives thousands of numeric values. The job of an image AI system is to transform those raw values into a useful prediction. In a simple image classifier, that prediction could be a label such as cat, dog, apple, or banana. The model learns which visual patterns tend to appear with each label.
At first, this sounds fragile, but modern models are surprisingly effective at discovering useful structure. They may learn low-level features such as edges, corners, or textures, then combine them into larger visual patterns. For beginners, the important concept is not the exact mathematics of every layer. It is the workflow: gather labeled images, prepare them to a consistent size, split them into training and testing sets, train the model, and evaluate how well it generalizes to unseen images. This workflow will appear again and again throughout the course.
Image preparation is a practical step that many beginners underestimate. Real-world images come in different resolutions, orientations, and lighting conditions. Before training, you often resize images to a fixed shape and scale pixel values into a convenient range. Sometimes you also augment the data by flipping, rotating, or slightly changing brightness to help the model become more robust. But augmentation should match reality. Flipping a cat photo is usually harmless; flipping text can create nonsense. This is where engineering judgment matters.
Common mistakes include using too few images, mixing labels carelessly, or evaluating on images that are nearly identical to the training set. If you train on ten photos of one person’s handwritten digits and test on more photos from the same writing session, you may think the model is excellent when it has only memorized a narrow style. Strong beginner practice means using clean labels, enough variety, and a true holdout test set. When you understand images as structured numbers rather than magic inputs, the whole process becomes more manageable and less intimidating.
Audio AI starts with the same core idea as image AI: the computer receives numbers and learns patterns. A sound recording is a sequence of amplitude values over time, often called a waveform. If the recording is sampled at 16,000 times per second, then one second of audio becomes 16,000 numbers. The model can learn directly from waveforms in some cases, but for many beginner projects it is easier to transform audio into a representation that highlights useful patterns. A common choice is a spectrogram, which shows how frequency content changes over time. You can think of it as turning sound into an image-like map that a model can analyze.
This is why image and audio AI are connected more closely than many learners expect. In image tasks, the model looks for visual structure across space. In audio tasks, the model may look for structure across time and frequency. For example, the spoken word “yes” has a different audio pattern than “no,” and a clap has a different pattern than a whistle. Sound classification can be built around commands, environmental sounds, music snippets, or other narrow categories. Speech recognition is broader, because it tries to convert spoken language into text, but beginners often start with simpler sound classification first.
Practical audio preparation matters just as much as image preparation. Recordings may have different lengths, background noise, silence at the beginning, or different microphone qualities. You may need to trim silence, normalize volume, convert everything to the same sample rate, and make clips a consistent duration. If one class is always louder than another, the model may accidentally learn loudness instead of the sound category. That kind of shortcut can produce misleading results.
A common beginner mistake is to use a dataset that is too ambitious, such as noisy multi-speaker continuous speech, before mastering a simpler task like command recognition or dog-bark versus doorbell classification. Start with a project where you can clearly hear and verify the categories yourself. When the audio labels match what your ears perceive, debugging becomes much easier. The best first sound project is not the most impressive one. It is the one you can prepare, train, test, and improve with confidence.
The simplest way to understand any AI project is through three words: input, output, and prediction. The input is the data you give the model. For image AI, that input is a picture. For voice or sound AI, it is an audio clip or features extracted from that clip. The output is the answer you want the model to produce, such as a class label or a piece of text. A prediction is the model’s current best guess about that output. Everything else in machine learning exists to improve the quality of those guesses.
Suppose your input is a 64 by 64 image of fruit, and your output categories are apple, banana, and orange. During training, the model sees many image-label pairs and gradually adjusts itself to reduce mistakes. Later, when you give it a new fruit image, it produces a prediction, often with confidence scores for each class. The same pattern works for audio. The input might be a one-second clip, and the output might be clap, snap, whistle, or silence. The model predicts one of those categories based on learned patterns.
This framing helps you understand the basic workflow of an AI project:
Beginners often focus only on the training step, but the full workflow is what makes a project reliable. If your output labels are vague, the model cannot learn well. If your test set leaks training examples, the score becomes meaningless. If your project goal changes halfway through, your data and evaluation may no longer match. The practical outcome of this section is a strong mental checkpoint: at every stage, ask what the input is, what the desired output is, and how you will judge the prediction. That habit will keep your projects grounded and understandable.
Your first AI project should be small, ethical, and easy to evaluate. “Safe” here means several things. It should avoid high-stakes decisions such as medical diagnosis, legal judgments, or anything that affects someone’s rights or safety. It should use data you are allowed to use. It should have labels that a beginner can understand and verify. And it should be narrow enough that you can complete it from start to finish, including testing and improvement. The goal is not to impress people with scale. The goal is to build confidence through a full working cycle.
Good beginner image projects include handwritten digit recognition, classifying clothing items from a standard dataset, distinguishing cats from dogs, or sorting simple objects such as apples versus bananas. These tasks are popular for a reason: the data is available, the categories are concrete, and evaluation is straightforward. Good beginner audio projects include spoken command recognition using a small vocabulary, environmental sound classification such as clap versus snap, or identifying simple categories like dog bark versus doorbell. These tasks help you learn preprocessing, training, and evaluation without getting lost in complexity.
When choosing among projects, use practical selection criteria:
Common mistakes include choosing a project with too many classes, poor data quality, or unclear success measures. Another mistake is choosing a task because it sounds advanced rather than because it teaches fundamentals. A small project completed well teaches more than a grand project abandoned halfway. In this course, we will favor projects that let you see cause and effect clearly: improve the data, improve the result; compare two models, understand the tradeoff; change preprocessing, observe the impact. That is how confidence grows.
Now that you have met AI through images and sound, it is useful to see how the rest of the course fits together. We will move from understanding to setup, from setup to data preparation, and from data preparation to real models. First, you will set up a beginner-friendly workspace using simple tools and accessible datasets. The focus will be on reducing friction. Good learning environments help you experiment quickly, rerun code safely, and inspect your data visually and audibly. A clean setup is not glamorous, but it prevents many future headaches.
Next, you will prepare image and audio data for first projects. This includes organizing files, labeling examples, resizing images, handling audio length and sample rate, and creating training, validation, and test splits. You will learn that good data preparation is not a side task. It is a core part of AI engineering. Then you will build a simple image classifier step by step. You will see how the model is trained, how loss and accuracy behave, and how to tell whether the model is learning real patterns or simply overfitting.
After that, you will build a simple voice recognition or sound classification project. The exact task may involve short commands or environmental sounds, but the broader lesson will be the same: clear data, clear labels, and clear evaluation lead to understandable progress. Finally, you will test, improve, and compare beginner AI results with confidence. This means reading metrics carefully, inspecting errors, making small changes one at a time, and comparing results fairly. Improvement in AI is rarely a single dramatic leap. It is usually a series of practical refinements.
If you remember only one roadmap idea from this chapter, let it be this: define the task clearly, prepare the data well, train simply, and evaluate honestly. That pattern works for image AI, voice AI, and most beginner machine learning projects. You are not expected to master everything at once. You are expected to build steadily, understand what each step does, and develop judgment. That is the real skill this course will help you build.
1. According to the chapter, what is the most beginner-friendly way to describe AI?
2. What is the key difference between how humans and early AI models learn?
3. Which task is an example of voice or sound AI from the chapter?
4. What habit does the chapter recommend for beginner AI projects?
5. Which first project choice best matches the chapter's advice?
Before you build any image or voice model, you need a workspace that feels calm, predictable, and easy to fix when something goes wrong. Beginners often imagine AI starts with complicated math, but in practice it starts with a few ordinary decisions: which tool to open, where files should live, how examples are named, and how to confirm that your computer can actually read your data. This chapter is about making those decisions well.
For a first project, your goal is not to create the most powerful environment. Your goal is to create a reliable one. A good beginner workspace lets you collect simple image and audio examples, store them in clear folders, run a tiny workflow end to end, and understand what each step is doing. That matters more than using advanced frameworks too early. If your setup is simple, you will spend more time learning AI ideas and less time debugging hidden technical issues.
In this course, you are preparing for two kinds of beginner AI tasks. Image AI learns from pictures, such as distinguishing cats from dogs or ripe fruit from unripe fruit. Voice and sound AI learns from audio, such as recognizing a spoken word or identifying a clap, whistle, or doorbell. Both types of AI need the same foundation: a place to work, examples to learn from, labels that mean something, and a quick way to test that everything loads correctly.
There is also an engineering habit to develop here: choose the smallest workflow that proves you are ready. Instead of downloading huge datasets and ten software packages, start with one notebook, one project folder, and a handful of examples. If that tiny system works, you can grow it with confidence. If it fails, the problem is easier to find. This is how experienced builders reduce confusion.
As you read the sections in this chapter, think in terms of readiness. By the end, you should be able to say: I know which tools I will use, I know where my data comes from, my files are organized, and I can run a small AI-ready check on both image and audio data. That is a major milestone. It turns AI from an abstract subject into a practical workspace you control.
The six sections below move in a realistic order. First, you will pick tools that are friendly to first-time learners. Next, you will understand datasets in plain language. Then you will find usable image and audio examples. After that, you will organize folders, labels, and file names so your projects stay clean. Finally, you will run a tiny workflow to confirm your workspace is truly ready for the image classifier and sound project that come later in the course.
Practice note for Prepare the tools you need without confusion: document your objective, define a measurable success check, and run a small experiment before scaling. Capture what changed, why it changed, and what you would test next. This discipline improves reliability and makes your learning transferable to future projects.
Practice note for Collect simple image and audio examples: document your objective, define a measurable success check, and run a small experiment before scaling. Capture what changed, why it changed, and what you would test next. This discipline improves reliability and makes your learning transferable to future projects.
Practice note for Organize files so your projects stay clean: document your objective, define a measurable success check, and run a small experiment before scaling. Capture what changed, why it changed, and what you would test next. This discipline improves reliability and makes your learning transferable to future projects.
Practice note for Run your first tiny AI-ready workflow: document your objective, define a measurable success check, and run a small experiment before scaling. Capture what changed, why it changed, and what you would test next. This discipline improves reliability and makes your learning transferable to future projects.
Practice note for Prepare the tools you need without confusion: document your objective, define a measurable success check, and run a small experiment before scaling. Capture what changed, why it changed, and what you would test next. This discipline improves reliability and makes your learning transferable to future projects.
The best beginner AI tools are the ones that remove friction. For most learners, a simple setup means using Python, a notebook environment such as Jupyter or Google Colab, and a few well-known libraries. If your computer setup feels uncertain, Google Colab is a strong choice because it runs in the browser and avoids many installation problems. If you want to work locally, Jupyter Notebook or VS Code with Python can also work well, as long as you keep the environment small and focused.
For image projects, beginner-friendly libraries often include Pillow for opening and resizing images, matplotlib for viewing examples, and a deep learning library such as TensorFlow or PyTorch when you are ready to train a model. For audio projects, libraries such as librosa, scipy, or torchaudio help load and inspect sound files. You do not need every tool at once. In fact, one common mistake is installing too many packages before you understand why you need them. Start with the minimum set that lets you load, inspect, and label data.
Good engineering judgment means choosing tools that match your current skill level, not your future ambition. A cloud notebook can be slower in some cases, but it is often easier for beginners because setup is mostly done for you. A local environment gives more control, but can introduce issues with Python versions, missing packages, and file paths. There is no perfect option for everyone. The practical rule is simple: choose the path that gets you to your first working example fastest.
Another good habit is to test tools immediately after choosing them. Open one image, display it, load one audio clip, and print its length. If that works, your workspace is already becoming trustworthy. If it does not, solve the issue now, before datasets grow larger. Beginners often postpone these checks, then face several confusing errors at once. Small tests prevent that pileup.
Your practical outcome for this section is a clear tool stack: one notebook option, one Python environment, and a short list of libraries for images and audio. Keep it boring, stable, and easy to explain. That is exactly what a first AI workspace should be.
A dataset is simply a collection of examples that teaches your model what to notice. For image AI, an example might be one photo of an apple labeled as ripe. For voice AI, an example might be one short recording labeled as clap or hello. The dataset is not magical. It is just organized evidence. Your model studies that evidence and tries to find patterns that connect the input to the label.
Beginners often get intimidated by dataset terminology, but the core ideas are straightforward. You usually split data into training, validation, and test sets. Training data is what the model learns from. Validation data helps you make choices while building, such as whether a setting improves results. Test data is held back until the end to check how well the model performs on examples it has not seen before. If you use the same examples for everything, results can look better than they really are.
Another important idea is class balance. If you collect 500 images of cats and only 20 images of dogs, a model may learn an unfair shortcut. The same issue appears in sound datasets. If one class has far more recordings, accuracy can be misleading. A beginner-friendly approach is to start with a small but balanced dataset, such as 30 to 100 examples per class, rather than a huge uneven collection.
You should also pay attention to consistency. If all your dog images are outdoors and all your cat images are indoors, the model may accidentally learn background clues instead of the animals themselves. If all your clap sounds were recorded in one quiet room and all your whistle sounds in a noisy hallway, your sound model may learn the environment instead of the sound. This is a classic beginner mistake. The cure is to collect examples with some variety inside each class.
In practical terms, a useful beginner dataset is small enough to inspect manually. You should be able to open a sample of files and ask basic quality questions: Is the label correct? Is the file readable? Is one class much louder, blurrier, darker, or more cluttered than the others? That kind of inspection teaches more than downloading a giant dataset you never look at.
Your practical outcome here is simple: you should understand a dataset as labeled examples, know why train-validation-test splits matter, and recognize that balance and consistency affect AI performance just as much as code does. That understanding will guide every collection decision you make next.
For your first image AI project, the best data is easy to understand and easy to label. Start with classes that look meaningfully different to a human observer. Good beginner examples include cats versus dogs, apples versus bananas, sneakers versus sandals, or healthy leaves versus damaged leaves. When classes are visually distinct, you can focus on workflow instead of fighting a difficult classification problem too early.
You have two main paths: use a public beginner dataset or create a tiny custom dataset yourself. Public datasets are convenient because they are already collected and often commonly used in tutorials. Custom datasets can be more fun and memorable because they reflect your own surroundings, such as photos of mugs, pens, or plants taken with your phone. Both approaches are valid. The key question is whether you can label the images clearly and keep the classes balanced.
When finding images online, always check whether you are allowed to use them. For learning projects, open datasets and clearly licensed image collections are safer than random downloads from the web. Even for personal study, it is good practice to know where your data came from. That habit becomes important as your projects grow.
Keep image quality simple and manageable. You do not need ultra-high resolution files. In fact, giant images slow down loading and resizing. A practical beginner workflow is to collect moderate-size images and later resize them to a standard training size such as 128 by 128 or 224 by 224 pixels. Also remove corrupted files, duplicates, and images that do not truly match their label. A few bad files can create confusing errors or weaken your model.
One strong engineering habit is to save the original files and keep preprocessing separate. Do not overwrite raw images if you resize or crop them. Create a processed folder later. This makes it easier to repeat steps or fix mistakes. Your practical outcome for this section is a usable image collection with clear labels, reasonable quality, and a source you understand. That is enough to support your first image classifier later in the course.
Voice and sound data can feel more unfamiliar than image data, but the same beginner rule applies: choose examples that are easy to tell apart. Good first projects include spoken yes versus no, clap versus snap, dog bark versus door knock, or a few short spoken commands such as up, down, and stop. Avoid advanced speech recognition tasks at first. Full sentence transcription is far more complex than simple word or sound classification.
You can gather audio from public datasets, from your own microphone, or from both. Recording your own clips is often an excellent learning exercise because you immediately understand what each label means. Keep recordings short, store them in a standard format such as WAV if possible, and try to maintain similar recording settings across classes. If one group of files is recorded very close to the microphone and another is far away in a noisy room, the model may learn loudness and room echo instead of the intended sound.
Audio introduces a few practical concerns that beginners should know early. Sample rate matters because it affects how sound is represented digitally. You do not need to master the theory yet, but you should try to keep files consistent, for example using a common sample rate across the dataset. Duration also matters. If clips vary wildly in length, you may need trimming or padding later. For now, just aim for recordings of roughly similar length.
Listen to a subset of your files with your own ears. This is the audio equivalent of visually inspecting images. You are checking for clipping, silence, background noise, wrong labels, and accidental duplicate recordings. Many early AI frustrations come from poor audio quality rather than model design. A ten-second listening pass can save an hour of debugging.
It is also wise to define the label carefully. Are you collecting human speech only, or any spoken voice? Are you recording one clap or multiple claps? A vague label creates inconsistent data. The more concrete the label, the easier it is to build a useful dataset.
Your practical outcome in this section is a small, labeled audio collection that is legal to use, reasonably consistent, and manually checked. That is the right foundation for a first voice recognition or sound classification workflow.
Clean organization is one of the biggest differences between a frustrating AI project and a manageable one. When beginners skip this step, they often end up with files scattered across downloads, desktop folders, and renamed copies. That makes it hard to reproduce results and easy to train on the wrong data. A clean structure solves that problem before it starts.
A practical beginner project folder might contain separate directories for data, notebooks, and outputs. Inside data, keep raw and processed versions separate. Within raw data, use one folder per class. For images, that could mean data/raw_images/cat and data/raw_images/dog. For audio, it might be data/raw_audio/clap and data/raw_audio/whistle. This folder structure allows many beginner scripts to infer labels from folder names, which reduces complexity.
File naming should be simple, consistent, and boring. Avoid names like finalfinal2.png or recording new real one.wav. Better names include cat_001.jpg, cat_002.jpg, clap_001.wav, and clap_002.wav. Consistent numbering makes files easier to sort and inspect. Also avoid spaces and strange symbols when possible, since they can create path issues in some environments.
Another important habit is version awareness. If you preprocess images or trim audio, save the results in a new folder rather than replacing the originals. If you later discover that resizing was wrong or labels need correction, you can recover easily. This is real engineering judgment: preserve what you collected, transform copies, and document what changed.
Finally, create your train, validation, and test folders carefully. Do not let near-duplicate files leak across splits. For example, if you recorded three almost identical clips in a row, placing one in each split may make performance look stronger than it really is. Keep your splits honest. Your practical outcome for this section is a folder system that stays clean as the project grows and supports repeatable AI experiments.
Before moving on to model building, run a tiny AI-ready workflow. This is not full training yet. It is a readiness check. The purpose is to prove that your tools, data, and organization all work together. If you can complete this step, you have crossed an important line: your workspace is no longer theoretical.
Start with images. In one notebook, load a few files from each image class, print their file paths, display them, and confirm that the labels match the folders they came from. Then resize the images to one common shape and verify that the new arrays have consistent dimensions. You do not need a model yet. You are checking that the data can be read and standardized without errors.
Then do the same for audio. Load a few recordings from each sound class, print the sample rate and duration, and if possible visualize a waveform or simple spectrogram. Listen to one or two clips. Confirm that all files open correctly and that the labels make sense. If some clips are silent, broken, or wildly longer than others, fix those issues now. This small step prevents many later failures.
A strong beginner checklist looks like this:
Common mistakes at this stage include incorrect file paths, unsupported audio formats, mislabeled examples, and forgetting to separate train and test data. These are normal problems, not signs that you are bad at AI. In fact, catching them now is exactly what good builders do. Tiny checks are part of the workflow, not a delay from the real work.
The practical outcome of this chapter is powerful: you now have the tools you need without confusion, simple image and audio examples you can actually use, a clean folder structure, and a first tiny workflow that proves your workspace is ready. That readiness will make the next chapters much smoother, because you will be building models on top of a system you already trust.
1. What is the main goal of a beginner AI workspace in this chapter?
2. According to the chapter, what should a beginner do before expanding to bigger AI projects?
3. What foundation do both image AI and voice AI need?
4. Why does the chapter encourage simple tools and organization early on?
5. By the end of the chapter, what should a learner be able to say?
Before a beginner builds an image model or a voice model, there is a step that matters more than code: preparing the data. A model does not learn from your intentions. It learns from the examples you feed it. If those examples are messy, inconsistent, mislabeled, or badly split, the model will copy that confusion. This is why data preparation is not a boring side task. It is the foundation of the whole project.
In everyday terms, image AI learns patterns from pictures, and voice or sound AI learns patterns from recordings. If you want a model to tell cats from dogs, it needs clear examples of both. If you want a model to detect spoken words or classify sounds like clapping versus snapping, it needs short, consistent audio clips with reliable labels. The model cannot guess what you meant. It only sees the data as numbers, shapes, colors, loudness, timing, and patterns over time.
In this chapter, you will learn how to clean and label beginner image data, clean and label beginner audio data, split data into training and testing sets, and understand why data quality matters so much. You will also develop a practical engineering mindset: start simple, inspect samples by hand, fix obvious issues early, and make decisions that help your future model learn fairly and clearly.
A good beginner workflow looks like this: collect a small dataset, remove broken or confusing examples, standardize size or duration, create clear labels, split the data into training and test sets, and only then move on to training. This order saves time. Many beginner problems that seem like “model problems” are really data problems in disguise.
Think of data preparation as teaching preparation. If you were tutoring a human student, you would not use blurry flashcards, random answers, and a final exam copied from the practice sheet. AI is the same. Careful examples lead to clearer learning and more trustworthy results.
By the end of this chapter, you should be able to look at a folder of images or audio clips and ask the right questions: Is this file usable? Is the label correct? Is this category too broad? Are my train and test examples too similar? Those questions are what turn a beginner into a practical builder.
Practice note for Clean and label beginner image data: document your objective, define a measurable success check, and run a small experiment before scaling. Capture what changed, why it changed, and what you would test next. This discipline improves reliability and makes your learning transferable to future projects.
Practice note for Clean and label beginner audio data: document your objective, define a measurable success check, and run a small experiment before scaling. Capture what changed, why it changed, and what you would test next. This discipline improves reliability and makes your learning transferable to future projects.
Practice note for Split data into training and testing sets: document your objective, define a measurable success check, and run a small experiment before scaling. Capture what changed, why it changed, and what you would test next. This discipline improves reliability and makes your learning transferable to future projects.
Practice note for Understand why data quality matters: document your objective, define a measurable success check, and run a small experiment before scaling. Capture what changed, why it changed, and what you would test next. This discipline improves reliability and makes your learning transferable to future projects.
Practice note for Clean and label beginner image data: document your objective, define a measurable success check, and run a small experiment before scaling. Capture what changed, why it changed, and what you would test next. This discipline improves reliability and makes your learning transferable to future projects.
Beginners often assume that a stronger model or a more advanced library will fix weak results. In practice, better data usually helps more than fancier tools. A simple model trained on clean, well-labeled data can outperform a complex model trained on messy examples. That is because the model can only learn the patterns present in the data. If the data includes noise, contradictions, or accidental shortcuts, the model learns those too.
Imagine an image dataset for apples and oranges. If many orange photos are bright and taken outdoors, while many apple photos are dark and taken indoors, the model may learn lighting and background instead of fruit shape and color. It may appear accurate during practice, but fail when shown new images. The same issue happens in audio. If one speaker records “yes” in a quiet room and another records “no” next to a fan, the model may learn room noise instead of the words.
This is the core engineering judgment: ask what the model is truly learning. Good data helps the model focus on the right signal. Poor data pushes it toward the wrong clues. That is why reviewing examples by hand is so valuable. You are not just checking file quality. You are checking whether the task itself is represented fairly.
For beginner projects, aim for data that is small but trustworthy. Fifty to a few hundred clean examples per class can be more useful than thousands of confusing ones. Keep classes balanced when possible so one category does not dominate. Use consistent file naming and folder structure. Write down your category definitions in plain language so you do not label similar items differently on different days.
Common mistakes include keeping corrupted files, mixing unrelated categories, using duplicate examples, and labeling based on guesses. The practical outcome of avoiding these errors is huge: training becomes smoother, test results become more meaningful, and model improvement becomes easier to understand. Good data reduces mystery. It turns AI development into a process you can reason about instead of a series of random experiments.
Image models usually need pictures in a consistent format. One image might be 4000 pixels wide and another only 200. One may be portrait, another landscape. If you feed them in without preparation, training becomes harder and slower. That is why resizing and reviewing images is one of the first practical steps in beginner computer vision.
Resizing means converting images to a common size such as 128x128 or 224x224 pixels. The exact number matters less than consistency. Smaller sizes train faster and are fine for simple projects. Larger sizes preserve more detail but require more memory and time. For a first classifier, choose one size and apply it to every image. If possible, preserve the main subject so resizing does not distort it too much.
Reviewing is just as important as resizing. Open a sample of images from every category and inspect them visually. Ask simple questions: Is the target object visible? Is the image too blurry? Is the file broken? Is the category obvious? Are there duplicate photos? If you are building a cat-versus-dog classifier, remove images with no visible animal, heavy text overlays, or strange collage edits. The model will struggle if the training examples do not clearly match the task.
For beginners, a practical workflow is to organize images into folders by class, then scan through each folder manually. Delete unusable files and rename files clearly if needed. If backgrounds vary wildly, that may be acceptable, but be aware of what the model could learn by accident. If every dog photo includes grass and every cat photo includes couches, your labels may be mixed with background clues.
The practical outcome is a cleaner visual dataset that lets the model focus on meaningful patterns. You do not need perfect studio photos. You need examples that are understandable, relevant, and consistent enough for learning.
Audio data needs the same care as image data, but the cleaning process looks different. Instead of checking pixels, you check timing, loudness, and clarity. A beginner audio dataset might contain spoken words, environmental sounds, or simple commands. Whatever the task, each clip should contain the target sound clearly enough for the model to learn it.
Trimming means cutting audio so the important part is easy to find. If a one-second keyword is buried in ten seconds of silence, the model sees lots of useless information. For beginner projects, shorter clips are usually easier to manage. A command like “stop” or “go” might fit into one second. A sound like a clap or cough may need only a brief window. You can trim leading silence, trailing silence, and unrelated noises around the target event.
Reviewing audio means listening to samples from each class. Do not assume all recorded files are usable. Some may be too quiet, distorted, clipped, or filled with background noise. Others may contain the wrong word or sound entirely. If possible, use a simple waveform or spectrogram viewer to inspect suspicious files. Even beginners benefit from seeing whether the signal is strong and whether the clip is mostly silence.
Consistency matters here too. Keep sample rates and durations consistent when possible. If one clip is recorded at one setting and another at a very different one, preprocessing may be needed before training. The goal is not to make every recording identical, but to reduce unnecessary variation that does not help the task.
A useful beginner routine is this: listen to a handful of clips per category, trim obvious silence, remove broken files, and confirm the label by ear. If your categories are “clap,” “snap,” and “background noise,” make sure each clip is dominated by one category rather than several sounds mixed together. The practical result is a dataset that teaches the model what matters, instead of forcing it to guess through static and silence.
Once your files are cleaned, you need labels. A label is the answer you want the model to learn. In image AI, the label might be “cat,” “dog,” or “banana.” In audio AI, it might be “yes,” “no,” “clap,” or “rain.” Labels sound simple, but bad labels are one of the fastest ways to damage a project.
The most important rule is to keep categories clear. If you create labels that overlap, the model gets mixed signals. For example, an image category called “pets” and another called “dogs” is confusing because some dog images belong to both. In audio, categories like “speech” and “command” may overlap unless you define them carefully. A beginner project works best when each file belongs to one obvious class.
This is where ground truth comes in. Ground truth means the best available correct answer for each example. In a beginner dataset, ground truth is often created by you through careful review. That means you should label only what you can confidently identify. If an image is ambiguous or an audio clip is unclear, it is often better to remove it than to guess. Guessing creates noise in the labels, and noisy labels teach the model the wrong lesson.
A practical labeling strategy is to write a short definition for each class before you begin. For instance: “Clap = a short hand-clapping sound with no speech.” “Dog = image where a dog is the main visible subject.” These simple definitions help you stay consistent across many files. They also make collaboration easier if another person helps label data later.
Use folders, spreadsheets, or simple CSV files to store labels cleanly. Keep names consistent: do not mix “Dog,” “dog,” and “dogs” if they mean the same thing. Good labels produce better training and simpler debugging. If your model makes mistakes later, you can inspect whether the issue came from the model or from the labels themselves. That traceability is part of building AI with confidence.
After cleaning and labeling data, the next critical step is splitting it into training and testing sets. Training data is what the model studies. Test data is what you use later to see whether the model learned patterns that generalize to new examples. If you skip this separation, you cannot honestly measure performance.
Think of it like studying for an exam. If the test contains the exact same questions as the study sheet, a high score does not prove real understanding. The same is true in AI. A model can memorize training examples. The test set should contain examples the model has not seen during training, while still representing the same task.
A common beginner split is 80% for training and 20% for testing. For small datasets, you may also keep a validation set later, but at this stage the key lesson is to separate train and test data carefully. Try to keep class balance similar in both sets. If you have 100 cat images and 100 dog images, the test set should include both classes fairly.
Be careful about leakage. Leakage happens when nearly identical examples appear in both training and test sets. For images, duplicates or repeated frames from the same scene can make results look better than they really are. For audio, multiple clips from the same recording session may leak speaker or background clues. If possible, separate related examples so the test set feels genuinely new to the model.
The practical outcome of a good split is trust. When your model performs well on the test set, you have stronger evidence that it learned useful patterns rather than memorizing specific examples. That confidence matters when you start improving the model in later chapters.
Most beginner AI projects do not fail because the math is too advanced. They fail because of a few preventable data mistakes. The good news is that these mistakes are easy to reduce once you know what to watch for.
The first mistake is using low-quality examples just to make the dataset bigger. More data is not always better. Ten bad files can be worse than two good ones because they introduce confusion. The second mistake is inconsistent labeling. If similar files are labeled differently, the model receives contradictory instructions. The third mistake is ignoring edge cases such as blurry photos, overlapping sounds, or recordings with long silence. These edge cases should be reviewed intentionally, not left to chance.
Another common issue is imbalance. If one class has many more examples than another, the model may overpredict the larger class. Beginners should also avoid mixing data preparation rules. For example, resizing only some images, trimming only some audio clips, or changing label names midway through the project creates hidden inconsistency. Even file organization matters. Messy folders often lead to mislabeled or duplicated data later.
There is also a judgment mistake: trying to fix data issues with more model complexity. If the dataset is weak, a more advanced network usually does not solve the root problem. It is better to inspect samples, clean categories, and simplify the task. A smaller, well-defined problem often produces a stronger first success than an ambitious but noisy dataset.
A practical beginner checklist is useful here. Before training, ask: Are the files readable? Are labels clear and consistent? Are train and test sets separate? Are classes reasonably balanced? Did I inspect examples manually? If the answer is yes, you are already working like a careful engineer. The practical result is not just a better dataset. It is a more reliable learning process, one where model results make sense and improvement becomes possible step by step.
1. Why does Chapter 3 say data preparation matters more than code at the start?
2. Which workflow best matches the beginner process described in the chapter?
3. What makes beginner audio data useful for training according to the chapter?
4. Why should training and test data be separated carefully?
5. Which question shows the practical engineering mindset encouraged in this chapter?
In this chapter, you will build your first image AI in a practical, beginner-friendly way. Up to this point, you have prepared data and set up a simple workflow. Now you will use that foundation to train a model that looks at pictures and predicts what they contain. This is the moment where many learners feel that AI becomes real: instead of reading about models, you make one produce answers from images you give it.
An image classifier is one of the simplest and most useful starting projects in deep learning. Its job is straightforward: take an image as input and choose a label such as cat, dog, flower, ripe fruit, cracked road, or handwritten number. Even though the task sounds simple, the workflow teaches core ideas that appear in almost every machine learning project. You will train a model, evaluate it on images it has not seen before, read metrics like accuracy, inspect mistakes, improve results with small changes, and finally save the trained model so you can reuse it later.
The key engineering idea in this chapter is that training a model is not magic. It is an iterative process of making choices, checking evidence, and improving weak points. A beginner often expects the first training run to produce a perfect result. In reality, even professionals expect to adjust the data, model settings, and evaluation process several times. Your goal is not perfection. Your goal is to build a working system, understand what it is doing, and learn how to improve it confidently.
As you work through this chapter, keep a practical mindset. If the model performs poorly, ask why. Are the labels clean? Are the images too small or blurry? Does one class have far more examples than another? Are training and test images too similar or too different? These are not advanced research problems. They are normal engineering questions that matter in almost every project. By the end of this chapter, you will not only have a simple image classifier, but also a repeatable process for diagnosing and improving it.
Think of this chapter as your first complete image AI build. You start with plain-language intuition, move into training, test the model on new images, understand why predictions are right or wrong, improve the data and setup, and then package the result so it is useful beyond one notebook session. That full loop is what makes a project feel real.
Practice note for Train a simple image classifier: document your objective, define a measurable success check, and run a small experiment before scaling. Capture what changed, why it changed, and what you would test next. This discipline improves reliability and makes your learning transferable to future projects.
Practice note for Read results like accuracy and mistakes: document your objective, define a measurable success check, and run a small experiment before scaling. Capture what changed, why it changed, and what you would test next. This discipline improves reliability and makes your learning transferable to future projects.
Practice note for Improve image AI with small changes: document your objective, define a measurable success check, and run a small experiment before scaling. Capture what changed, why it changed, and what you would test next. This discipline improves reliability and makes your learning transferable to future projects.
Practice note for Save and reuse your first model: document your objective, define a measurable success check, and run a small experiment before scaling. Capture what changed, why it changed, and what you would test next. This discipline improves reliability and makes your learning transferable to future projects.
Practice note for Train a simple image classifier: document your objective, define a measurable success check, and run a small experiment before scaling. Capture what changed, why it changed, and what you would test next. This discipline improves reliability and makes your learning transferable to future projects.
A model is a pattern finder that has been tuned by examples. In plain language, it is a system that looks at many labeled images and gradually learns which visual features are useful for separating one category from another. If you show it many pictures labeled apple and banana, it starts to notice shapes, textures, colors, and edges that often appear in each group. It does not understand an apple the way a human does. Instead, it builds internal numeric rules that help it make a prediction.
A helpful analogy is teaching a child with flashcards, except the model learns from numbers rather than words. Each image is converted into arrays of pixel values. During training, the model guesses a label, compares that guess with the correct answer, and then updates itself to reduce future mistakes. This repeated adjustment is what learning means in machine learning. The model is not storing every image exactly; it is compressing experience into parameters, often called weights.
For beginners, one important idea is that a model is only as useful as the task you define. If your classes are clear and your images are labeled correctly, the model has a fair chance to learn. If the classes overlap heavily or the labels are messy, the model becomes confused. For example, trying to separate "day" and "sunny" from images may be difficult because those categories are not cleanly distinct. Good AI projects begin with a clear question.
Another key point is that the model should learn patterns that generalize, not just memorize the training set. If it only remembers the examples it saw during training, it may perform well in practice on those same images but fail on new ones. That is why you split data into training and testing sets. A strong model performs well on images it has never seen before. In real engineering work, that ability to generalize matters more than doing well on familiar data.
When you think of a model, think of it as a tool with strengths and limits. It can become surprisingly accurate on narrow tasks, but it has no common sense outside the examples and labels it was trained on. That simple perspective helps you make better decisions when building and evaluating your first image AI.
Training an image model follows a predictable sequence, and that is good news for beginners. First, you organize your dataset into labeled classes. Each class should represent one category, and images inside each class should genuinely belong there. Next, you split the dataset so the model learns from one portion and is evaluated on another. Many beginner projects use training, validation, and test sets. Training teaches the model, validation helps you tune choices, and test data gives a final fair check.
After splitting the data, you preprocess the images. Common steps include resizing images to a fixed size, converting them into numeric tensors, and scaling pixel values into a smaller range such as 0 to 1. This makes training more stable and efficient. If images come in many dimensions, resizing is essential because neural networks usually expect a consistent input shape. Beginners sometimes worry that resizing will ruin learning. In practice, moderate resizing is normal and necessary.
Then you define a simple model. For a first image classifier, this often means a small convolutional neural network or a beginner-friendly pretrained model used through transfer learning. A small custom network helps you understand the mechanics. A pretrained model often works better faster because it starts from features learned on large image datasets. Either choice is valid, but the engineering judgment is to pick the simplest setup that gets you a clear result.
Now comes training itself. During each epoch, the model sees batches of images, makes predictions, calculates loss, and updates its weights with an optimizer such as Adam. Loss tells the model how wrong it is in a numeric way. Accuracy tells you what percentage of predictions are correct. Beginners often focus only on accuracy, but loss is important too because it shows how confident and wrong the model is, not just whether the final label matched.
As training runs, watch both training and validation metrics. If training accuracy rises while validation accuracy stays flat or drops, the model may be overfitting. That means it is learning the training examples too specifically instead of learning general patterns. If both accuracies remain low, the model may be underfitting, meaning it is too simple, trained too briefly, or using poor data. These observations guide your next changes.
Keep your first training run simple. Do not change five things at once. Train, record results, and make one or two small adjustments. This habit builds a real engineering workflow instead of guesswork. Your practical outcome in this section is a first trained classifier and a clear record of how it behaved during learning.
Once training is complete, the next job is to test the model on images it has not seen before. This is where you learn whether the model has actually learned something useful. A common beginner mistake is to feel excited by high training accuracy and stop there. But training accuracy alone can be misleading. A model can score very well on familiar examples and still fail in real use. Testing on new images gives you a more honest picture.
Start with the held-out test set. Run predictions and calculate accuracy, but do not stop at a single number. Also look at predicted labels, confidence scores if available, and a few visual examples. If the model says an image is a cat with 0.98 confidence, that tells a different story from guessing cat with 0.52 confidence. Confidence is not perfect truth, but it helps you see whether the model is decisive or uncertain.
It is also useful to test beyond the official dataset. Try a few fresh images from your phone, screenshots, or public sources that resemble the real scenario where the model might be used. If your model was trained on neat centered fruit images, test it on cluttered kitchen photos too. This exposes gaps between training conditions and real-world conditions. Many beginner models perform well in clean datasets but struggle when lighting, angles, backgrounds, or image quality change.
Be careful not to accidentally leak test information into training. If you repeatedly tune your model based on the same test results, the test set slowly becomes part of the design process. A better habit is to use validation data for adjustments and reserve the test set for a more final check. This discipline gives you more trustworthy results.
Testing is not just about proving the model works. It is about learning where it works, where it fails, and whether those failures matter for your goal. A model with 88% accuracy may be excellent for a toy app but unacceptable for a safety-critical task. Practical evaluation always depends on use case. By the end of this stage, you should know how the model behaves on unfamiliar images, not just how well it memorized its lessons.
Reading model results means more than checking whether the accuracy number looks high. You need to understand what kinds of mistakes the model makes. This is where confusion matrices, class-by-class accuracy, and visual inspection become powerful. A confusion matrix shows which classes get mixed up with which others. For example, if your model often predicts wolves as dogs but rarely confuses dogs as cats, that pattern tells you something specific about the features it is using.
Inspect correct predictions as well as incorrect ones. Correct cases show where the model is strong. Wrong cases show where the data or setup may be weak. Look at images the model gets wrong and ask practical questions. Is the image blurry? Is the object tiny in the frame? Does the background dominate the image? Is the label questionable? Sometimes the model is wrong for understandable reasons, and sometimes the dataset itself contains inconsistencies.
Accuracy is a useful starting metric because it is easy to interpret, but it can hide important issues. Suppose one class has 90% of the data and another has only 10%. A model might achieve high overall accuracy by mostly guessing the majority class. That is why per-class performance matters. If one category is consistently weak, you may need more examples or cleaner labels for that class.
Another practical habit is to keep a small error log. Save a handful of misclassified images and write short notes about why they may have failed. Over time, patterns emerge. You may notice that low-light images are often wrong, or side-angle objects are misread, or one class includes too much visual variation. This simple notebook habit turns random errors into actionable engineering insight.
Do not take wrong predictions personally. Mistakes are part of the workflow, not evidence that you failed. They are clues. In professional AI work, progress often comes from systematically studying errors and then improving the data or model design. When you can explain why your image AI succeeds and fails, you are moving from just running code to actually building intelligent systems with confidence.
When beginners want better performance, they often reach first for a more complex model. In many cases, the better first move is improving the data. Small changes in data quality can produce larger gains than complicated architecture changes. If labels are inconsistent, classes are unbalanced, or images do not reflect the real task, no model choice will fully rescue the project.
Start by checking label quality. Incorrect labels teach the model the wrong lesson. Even a small percentage of mislabeled images can slow learning and increase confusion between classes. Next, examine class balance. If one category has far fewer examples than the others, the model may neglect it. You can improve this by collecting more examples for weak classes or using simple balancing strategies during training.
Data diversity also matters. A good image classifier should see variation in angle, lighting, scale, background, and position. If all your training examples are neat product photos on white backgrounds, your model may struggle with casual real-world photos. This is why data augmentation is so useful. Flips, slight rotations, crops, brightness shifts, and zoom can expose the model to richer versions of the same category. The goal is not to distort images unrealistically, but to simulate normal variation.
Another practical improvement is to simplify the task. If two classes are too visually similar for your current dataset, consider redefining labels more clearly. Good engineering judgment means matching the ambition of the task to the quality of the available data. A simple, reliable classifier is better than a complex one that promises too much and fails unpredictably.
You can also improve results by tuning training settings: more epochs, a different learning rate, early stopping, or transfer learning from a pretrained network. But change these one at a time and record what happens. Otherwise, you will not know what actually helped. The best beginner workflow is: inspect errors, form one hypothesis, make one change, retrain, and compare results fairly.
The practical outcome here is confidence that improvement is methodical. Better AI does not come from random guessing. It comes from better examples, better evaluation, and small deliberate changes that match the problems you observed.
After you train a model that performs reasonably well, save it. This may sound obvious, but beginners sometimes finish a session, close the notebook, and realize later that the trained weights are gone. Saving the model turns your training effort into a reusable asset. Depending on your framework, this may mean saving the full model, the model architecture plus weights, or a checkpoint file. The key idea is that you should be able to load the model later and run predictions without retraining from scratch.
It is also wise to save more than just the model file. Record the class names, image size, preprocessing steps, dataset version, and any important training settings. Without these details, a saved model can become hard to use correctly. For example, a model trained on 128 by 128 images with normalized pixel values expects future input in the same format. If you feed it differently prepared images, performance may drop even though the model itself is fine.
Once saved, test reloading the model in a fresh session. This is an important engineering check. Load it, preprocess a new image, run a prediction, and confirm the output matches expectations. If loading fails or predictions change because preprocessing was forgotten, that reveals a deployment issue you should fix early.
Sharing your image AI can be as simple as giving someone the model file and a short usage script, or as polished as creating a small web demo. For a first project, keep it simple. A command-line script or notebook cell that loads the model and predicts a label from an image path is enough to make the project feel complete and useful. This step changes the model from a training exercise into a tool.
Finally, save your results and lessons learned. Write down the final accuracy, the main mistakes, and what improved the system most. That short summary becomes part of your project documentation and helps you later when you build your first voice AI. In a real AI workflow, saving and reusing models is not an extra detail. It is what makes your work portable, testable, and ready for the next stage.
1. What is the main goal of an image classifier in this chapter?
2. According to the chapter, what should a beginner expect after the first training run?
3. Why does the chapter recommend inspecting mistakes, not just checking accuracy?
4. Which of the following is presented as a normal engineering question when a model performs poorly?
5. Why is saving the trained model an important step in this chapter?
In this chapter, you will build the first complete voice or sound AI in this course. Up to now, you have already seen the general pattern of a beginner AI project: collect examples, prepare them into a consistent format, train a model, test it on new data, and improve it based on what goes wrong. Voice AI follows the same broad workflow as image AI, but the raw material is different. Instead of pixels arranged in a grid, you now work with sound waves that change over time. That one difference changes many practical decisions: how you record data, how you cut clips into equal lengths, how you handle silence, and how you judge whether a prediction is truly useful.
A beginner-friendly voice AI does not have to be a full speech assistant. In fact, one of the best first projects is a simple sound classifier. For example, your model might tell apart the words “yes” and “no,” detect a clap versus a snap, or classify short environmental sounds such as dog bark, door knock, and keyboard typing. These projects are easier to finish than full sentence transcription, yet they still teach the core ideas behind real voice systems. If you can reliably classify short audio clips, you already understand the basic engineering mindset of voice AI.
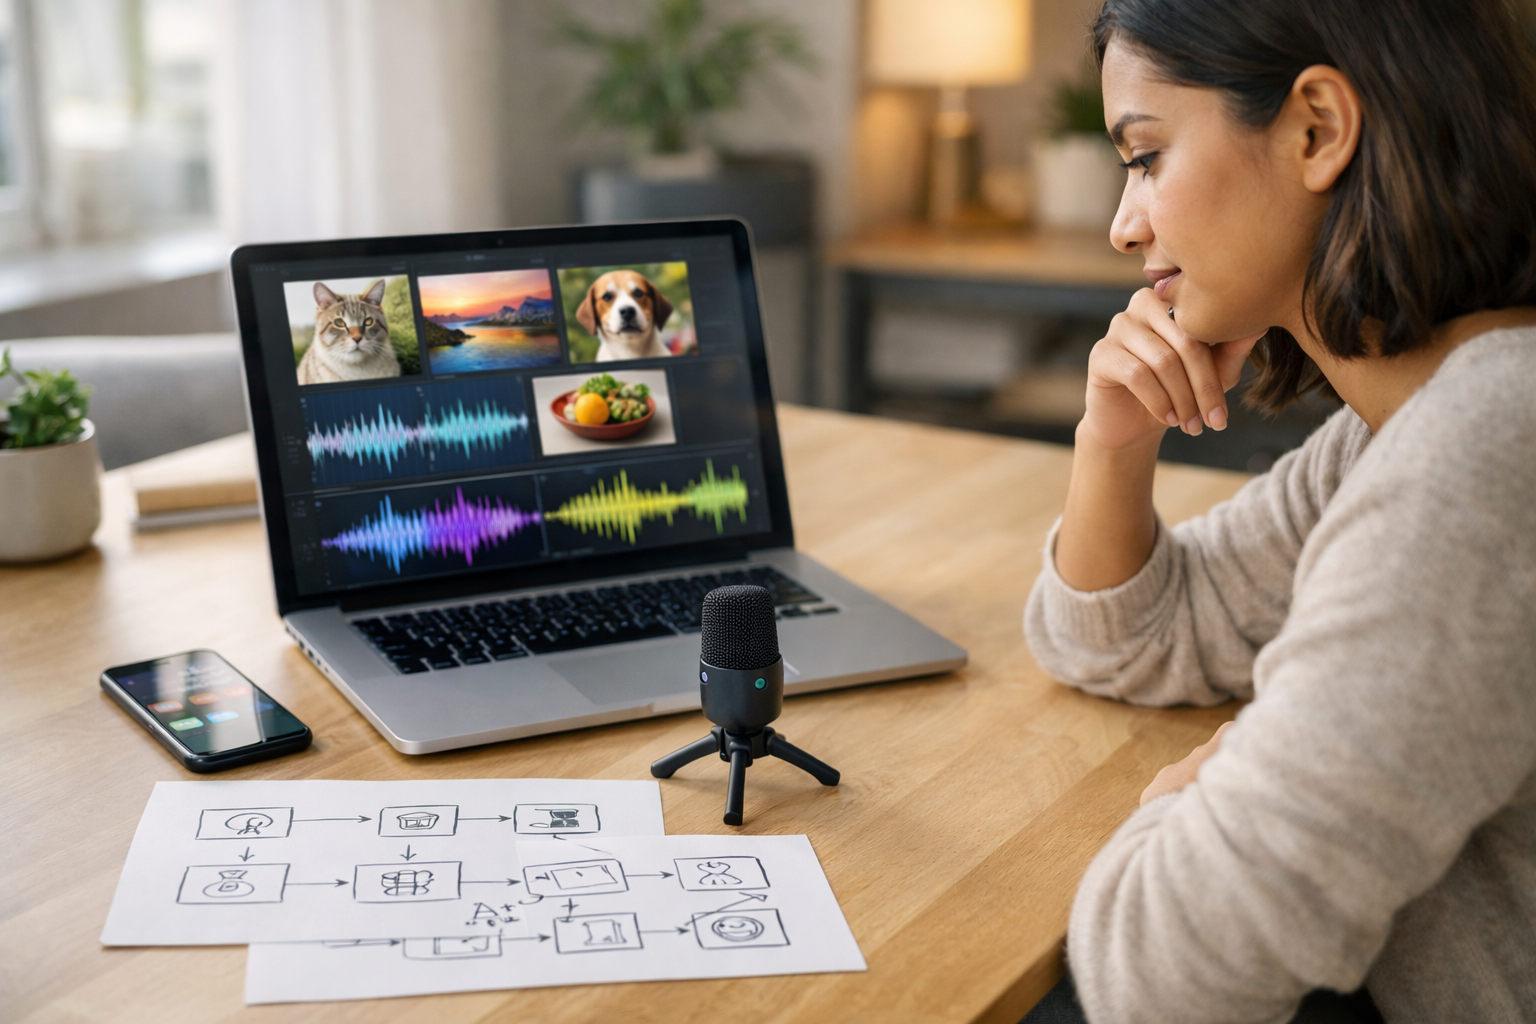
The key concept is that a model does not learn from sound the way a human does. It learns from patterns in numbers. A recording starts as a waveform, which is simply a sequence of values that represent air pressure over time. Most beginner models do better when you convert that raw waveform into a visual-like representation such as a spectrogram or mel spectrogram. This gives the model a stable pattern to learn from, much like an image classifier learns edges, shapes, and textures. In everyday terms, you are turning a sound into a picture of how its energy is distributed over time and frequency.
As you work through this chapter, keep your goal practical: make a model that performs reliably enough on new recordings to demonstrate real learning. You will train a simple voice model, test predictions on unseen audio, handle noise and recording differences, and compare the behavior of voice AI with the image AI you built earlier. You will also practice engineering judgment. That means deciding when a bad result comes from weak data rather than a weak model, when more examples matter more than more complexity, and when a simpler problem is the smarter place to start.
A common beginner mistake is to focus only on training accuracy. A model can appear successful if it memorizes the exact clips it has already seen. Real success comes from testing on new audio recorded later, ideally in slightly different conditions. Another common mistake is inconsistent recordings. If one class is recorded loudly in a quiet room and another class is recorded softly with background noise, the model may learn the room or microphone quality instead of the sound category itself. The best beginner projects are controlled, balanced, and small enough to inspect by hand.
By the end of this chapter, you should be able to explain in simple terms how a computer “hears,” train a small model to recognize a word or sound, check whether its predictions are trustworthy, and make practical improvements without guessing blindly. That confidence is the real milestone. You are no longer just using AI tools; you are learning how to think like a builder who can diagnose and improve a working system.
Practice note for Train a simple voice or sound model: document your objective, define a measurable success check, and run a small experiment before scaling. Capture what changed, why it changed, and what you would test next. This discipline improves reliability and makes your learning transferable to future projects.
Before a model can learn from audio, you need to represent sound in a form that is consistent and useful. A raw audio file is a time series of amplitude values. If you open a waveform, you see how the signal rises and falls over time. That is valuable, but raw waveforms can be hard for a beginner model to learn from directly because small timing shifts can make similar sounds look very different. A more practical starting point is to convert each clip into a spectrogram or mel spectrogram. This representation shows how much energy is present at different frequencies over time.
You can think of this as translating sound into a visual pattern. A short clap produces a sharp burst. A spoken vowel spreads energy across bands in a more structured way. A dog bark, a whistle, and a keyboard click all create distinct shapes. This is why many beginner sound classifiers feel similar to image classifiers: the model looks for stable patterns in a 2D representation. In that sense, voice AI and image AI are cousins. Both look for useful structure, but the source of that structure is different.
To prepare your data well, you should standardize several things. First, choose one sample rate, such as 16 kHz, and convert all clips to it. Second, trim or pad clips so they have the same duration, such as 1 second. Third, normalize volume carefully so that one recording is not much louder than another unless loudness itself matters for the task. Fourth, keep labels clean and unambiguous. If a clip contains both a spoken word and a loud background sound, it may confuse training.
A strong workflow is to listen to a few examples from every class and view their spectrograms. This helps you verify that your preprocessing is not damaging the signal. If all clips become too quiet, too clipped, or mostly silent, the model will struggle no matter what architecture you choose. Good engineering judgment starts here: if the representation is poor, the model is not the first thing to blame.
If you compare this with image preprocessing, the parallel is clear. In image AI, you resize pictures and normalize pixel values. In voice AI, you standardize clip length, sample rate, and audio features. The details differ, but the lesson is the same: models learn best from inputs that are consistent, relevant, and cleanly labeled.
Once your audio is converted into a consistent feature format, you can train a simple model. For a beginner project, keep the architecture modest. A small convolutional neural network working on spectrograms is often enough for short word recognition or sound classification. You do not need a giant speech model to learn the essentials. In fact, smaller models are easier to train, easier to debug, and easier to compare fairly when you make changes.
Your training set should include enough variation within each class to capture the normal ways the sound can appear. If your classes are “yes,” “no,” and “silence,” include different speakers, slightly different speeds, and natural variation in pronunciation. If your classes are environmental sounds, include small changes in distance, timing, and intensity. The goal is not to make every example identical. The goal is to show the model what belongs to the class while avoiding irrelevant shortcuts.
A practical training loop usually includes these steps: load audio, convert to features, batch the examples, feed them into the model, compute the loss, update weights, and track accuracy on both training and validation sets. The validation set matters because it tells you whether the model is learning general patterns or only memorizing training examples. If training accuracy rises but validation accuracy stays weak or falls, that is a sign of overfitting.
For first experiments, use balanced classes whenever possible. If you have 200 clips of “yes” and only 30 of “no,” the model may become biased toward the larger class. You can partly address this with class weighting or resampling, but it is better to gather more balanced data if you can. Another useful habit is to save training notes: number of classes, sample rate, clip length, feature type, model version, and test score. This makes your experiments repeatable.
Common beginner mistakes during training include mixing test clips into training, using clips of wildly different lengths, and changing multiple variables at once. If you adjust the model size, learning rate, feature type, and dataset all in one run, you will not know what caused the result. Change one important thing at a time and observe carefully. That discipline helps you improve faster than random trial and error.
At this stage, success means more than a high percentage. You want a model that is simple enough to understand, accurate enough to trust on new clips, and stable enough that retraining does not produce wildly inconsistent behavior. That is the foundation of a practical beginner voice AI.
Testing is where voice AI becomes real. A model that predicts well on familiar training data is not yet useful. The real question is whether it can handle audio it has never heard before. To test properly, record or collect new samples after training. Ideally, use the same labels but slightly different conditions: another time of day, a different microphone, a new speaker, or a different room. This shows whether the model learned the sound category itself or simply memorized details of the original recordings.
When you test speech or sound predictions, do not look only at overall accuracy. Also inspect which classes are confused with one another. A confusion matrix is extremely helpful here. For example, if “yes” is often mistaken for “silence,” that suggests a clipping, trimming, or low-volume issue. If “clap” and “snap” are mixed up, maybe the examples are too short, too noisy, or too limited in variation. A single score can hide these practical problems.
Listen to clips that the model gets wrong. This is one of the most valuable habits in audio work. Sometimes the model is wrong because the label is wrong. Sometimes the recording contains a delay before the main sound, so most of the clip is silence. Sometimes background hum dominates the signal. In other words, testing is not just about grading the model. It is also about auditing the data pipeline.
It is useful to review prediction confidence as well. If the model is 99% sure about clearly wrong outputs, that can mean it is overconfident or trained on narrow data. If it gives moderate confidence on difficult clips, that may be reasonable. In real applications, confidence thresholds can help you reject uncertain predictions instead of forcing an answer every time.
Compared with image AI, audio testing often feels more fragile because timing, silence, and noise matter so much. A photo still contains the object if it is shifted slightly. A one-second audio clip can become much harder if the key sound starts late or is partly masked. That is why careful testing is not optional in voice AI. It is part of the model-building process itself.
Real audio is messy. Even simple beginner recordings include background hum, room echo, breath sounds, microphone differences, and accidental silence at the beginning or end. If you ignore these factors, your voice AI may perform well only in the exact conditions where it was trained. Handling noise and recording differences is one of the most important practical skills in this chapter.
Start with silence. Many short clips contain empty time before or after the sound of interest. Too much silence can confuse the model because it reduces the proportion of useful signal. Voice activity detection or simple trimming based on amplitude can help, but be careful not to cut away weak sounds. For a first project, a good compromise is to keep a fixed clip length and center the main sound as consistently as possible.
Volume is another issue. If one class is consistently louder, the model may treat loudness as a shortcut. Basic normalization can reduce this problem, but you should avoid flattening everything so aggressively that natural differences disappear. Listen before and after processing. Your ears are still a valuable debugging tool. The goal is consistency, not distortion.
Noise can be handled in several ways. You can record in quieter conditions, which is often the easiest fix. You can add controlled background noise during training so the model becomes more robust. You can also include a “background” or “unknown” class if your application needs to reject unrelated sounds. This is especially useful for wake-word style tasks or small command recognizers.
A practical strategy is data augmentation. Add small random shifts in time, slight volume changes, or mild background noise to training clips. This teaches the model not to depend on one perfect version of each sound. However, use augmentation with judgment. If you add too much noise or shift the clip so far that the target sound is cut off, you may create bad training data instead of better data.
Compared with image AI, these problems are similar in spirit but different in form. An image model must handle lighting, angle, and blur. A voice model must handle noise floor, silence placement, microphone quality, and timing. In both cases, the model becomes more useful when it sees realistic variation during training. Robustness is not magic. It is usually the result of better data design.
When beginner voice AI underperforms, the best improvement is often not a more advanced model. It is better examples. This is one of the most important engineering lessons in practical AI. If your model struggles, ask first whether the training set truly represents the task. Are there enough samples per class? Do they cover different speakers, tones, distances, and recording conditions? Are the labels clean? Is one class too broad and another too narrow?
Better examples means more than simply collecting more files. It means collecting the right variation. Suppose your model recognizes “yes” well when you speak slowly but fails when someone else says it quickly. The fix is not necessarily a deeper network. The fix may be to include more speakers and speaking styles. If your sound classifier fails on a phone microphone after training on laptop audio, add examples from both devices. The model can only generalize across patterns it has been shown.
It also helps to refine the task itself. If two classes are extremely similar for a small model and a tiny dataset, simplify the problem. Perhaps classify “speech” versus “non-speech” before trying to classify many words. Or detect a clap versus background noise before expanding to multiple hand sounds. Good builders scale complexity gradually. They prove the pipeline on a manageable problem, then extend it.
Review hard cases and build around them. If quiet recordings often fail, collect more quiet recordings. If late-start clips cause errors, align your clips better or train with slight time shifts. Improvement becomes faster when it is targeted. This is why keeping notes about failure patterns matters. General frustration does not guide engineering; specific error patterns do.
This is also where comparison with image AI becomes useful. In image projects, better lighting, framing, and category balance often matter more than clever architecture changes. Voice AI is no different. Data quality, consistency, and representative variation usually produce bigger gains than model complexity at the beginner level. That is a reassuring lesson: improvement is often achievable with thoughtful collection and review, not only with advanced mathematics.
After you train a useful voice model, save more than just the weights. A model file alone is not enough to make your work reproducible. You should also save the preprocessing choices that define how raw audio becomes model input: sample rate, clip length, feature type, normalization steps, label order, and any confidence threshold used during prediction. If those settings are lost or changed, the same model may behave incorrectly even though the weights are intact.
Create a simple review package for your project. This can include the saved model, a small test set of representative clips, a short note describing the dataset, and a results summary. Record the training date, model version, validation accuracy, test accuracy, and a few known failure cases. This may sound formal, but it is one of the habits that separates a one-off experiment from a real engineering artifact. It also makes future improvements much easier because you can compare versions fairly.
When reviewing your voice AI, ask practical questions. Does it still work if you record from a different distance? Does it confuse silence with soft speech? Does it fail more often on one speaker than another? How long does prediction take? Could this model run on a phone or a small embedded device if needed? These questions move you from “I trained a model” to “I understand the behavior of the system.”
This is also the right moment to compare voice AI results with your earlier image AI results. Image models often feel easier because the object remains visible in a stable frame, while audio events unfold over time and can be hidden by noise or silence. On the other hand, voice tasks can sometimes require less data if the categories are narrow and the clips are short. The workflow is strikingly similar: preprocess consistently, train on labeled examples, test on unseen data, inspect errors, and improve the dataset. The input type changes, but the builder’s mindset remains the same.
By saving carefully and reviewing honestly, you create a foundation for the next level of projects. You will know what your model can do, where it fails, and what kind of data would improve it. That is the practical outcome of this chapter: not just a trained voice AI, but a documented, testable, understandable one.
1. What is a good first voice AI project for a beginner in this chapter?
2. Why do beginner voice models often use spectrograms or mel spectrograms instead of only raw waveforms?
3. According to the chapter, what is a common mistake when evaluating a voice model?
4. If one sound class is recorded loudly in a quiet room and another is recorded softly with background noise, what problem might happen?
5. Which setup best matches the chapter’s advice for building a reliable beginner voice AI?
In this chapter, you move from building separate beginner models to thinking like a real project creator. Up to this point, you have worked with image AI and voice AI as individual systems. Now the goal is to combine those ideas into one small but meaningful project, judge whether it works well enough for its purpose, explain it clearly to other people, and decide what to learn next. This is an important shift. Many beginner courses stop after training a model, but in practice, a model is only one piece of a full project. A useful AI system needs a clear task, a repeatable workflow, honest evaluation, and a simple way to share results.
A combined project does not need to be complicated. In fact, the best first multi-input project is usually very small. You might build a system that looks at an image of an object and listens to a spoken label, then checks whether they match. You might create a recycling helper that uses an image to guess whether an item is plastic, paper, or metal, and uses a voice command such as "explain" or "next item" to guide the interaction. You might build a pet helper that classifies a cat or dog image and then reacts to a spoken command like "save result" or "try again." The point is not to impress people with complexity. The point is to connect inputs, outputs, and user needs in a simple flow.
When you combine image and voice ideas, your engineering judgment becomes more important than your coding. You must decide what each model should do, how much accuracy is good enough, and where rules may work better than AI. For example, maybe your image model identifies fruit types, but your voice part only needs to recognize three commands: "start," "repeat," and "stop." In that case, a lightweight sound classifier may be enough. Good beginners do not use AI everywhere just because they can. They use it where it adds value and keep the rest of the system simple and reliable.
This chapter also focuses on evaluation in a beginner-friendly way. You do not need advanced mathematics to tell whether your project is improving. You can inspect predictions, count correct and incorrect examples, compare a few versions, and write down patterns in mistakes. If your model fails often on dark images, noisy audio, or a particular class, that tells you where to improve your dataset or workflow. This practical mindset is more valuable than memorizing formulas without understanding them.
Presenting your project matters too. If you can explain your AI in plain language, people are more likely to trust your work, give useful feedback, and understand its limits. A strong beginner presentation includes the problem, the data, the model behavior, the results, and what you would improve next. It also avoids pretending the model is smarter than it is. Honest communication is part of responsible AI building.
Finally, this chapter helps you grow beyond your first build. After one working project, you will start seeing many directions: better datasets, cleaner interfaces, stronger evaluation, deployment to mobile or web, and more advanced model architectures. The key is to choose one next step at a time. A successful learner does not try to master everything at once. They build, test, reflect, and expand steadily.
By the end of this chapter, you should be able to sketch a small project that uses image and voice together, assemble a simple end-to-end pipeline, evaluate the result with confidence, present it clearly to non-technical people, and plan a realistic next stage in your AI journey. That is how a collection of beginner exercises becomes a real portfolio project.
Practice note for Combine image and voice ideas into one simple project: document your objective, define a measurable success check, and run a small experiment before scaling. Capture what changed, why it changed, and what you would test next. This discipline improves reliability and makes your learning transferable to future projects.
A good first combined AI project starts with a very small user story. Instead of saying, "I want to build a smart assistant," say, "I want a tool that looks at a fruit image and listens for a spoken confirmation such as apple, banana, or orange." This smaller framing makes decisions easier. You know the image model has one job, the voice model has one job, and the final program only needs to compare or combine their outputs.
The most useful design question is: what problem becomes easier when image and voice work together? Think in everyday terms. Images are good for recognizing visible patterns such as objects, handwritten digits, or simple categories. Voice or sound is good for commands, labels, or audio events. When the two are combined, you can build systems that feel interactive. For example, a beginner-friendly kitchen helper might classify produce from a photo and use voice commands to move through steps. A classroom demo might identify an animal in a picture and read back the result after hearing "describe."
Keep your first idea narrow. Limit the number of image classes, limit the number of audio commands, and define one success condition. If you choose five image labels and three spoken commands, that is already enough to create a satisfying demo. If you choose twenty image classes and free-form speech recognition, your project may become hard to debug and hard to explain.
It also helps to separate AI work from rule-based logic. Suppose your project is a "match checker" for flashcards. The image model predicts what object is shown. The voice model predicts the spoken word. Then a simple rule compares the two labels and says match or no match. That comparison step does not need machine learning at all. This is an example of good engineering judgment: use AI for perception, use normal program logic for decisions that are already clear.
Common mistakes include choosing a project that is too ambitious, collecting mismatched image and audio labels, and forgetting the user experience. Beginners often focus only on training models, but the project should feel like a smooth interaction from input to output. A small, well-scoped idea teaches more than a large unfinished one.
Once you have a project idea, build the full workflow from start to finish before worrying about perfection. An end-to-end flow means a user gives input, your program processes it, the models make predictions, and the system returns a clear result. Even if the first version is rough, having the whole loop working teaches you where the real problems are.
A practical beginner flow often looks like this: first, capture or load an image. Second, record or load a short audio clip. Third, preprocess each input in the same way you did during training. For images, that may mean resizing and normalizing. For audio, it may mean trimming silence, converting to a consistent sample rate, and generating features or spectrograms. Fourth, send each prepared input to its model. Fifth, collect the predictions. Sixth, combine them with simple program logic. Seventh, display the result in plain language.
For example, imagine a recycling helper. The image model predicts "plastic bottle." The voice model predicts the command "explain." Your code then prints: "This looks like a plastic bottle. Place it in plastic recycling if your local rules allow it." If the voice model predicts "next," the app clears the screen and waits for a new item. Notice that the intelligence is not only inside the models. It also lives in the order of steps and the logic that connects them.
Start by testing each stage independently. Make sure your image model works on saved test images. Make sure your audio model recognizes commands from test recordings. Then connect them. If the full system fails, isolate the issue. Did preprocessing change the input format? Did labels use different spelling across image and audio data? Did the app expect confidence scores in a format your model does not return? Integration bugs are normal.
Good project builders also add simple fallback behavior. If the voice command confidence is low, ask the user to repeat. If the image is blurry, display "uncertain result" instead of pretending confidence. This makes your project more honest and more usable.
A common mistake is to keep retraining models when the real issue is in the pipeline around them. Sometimes the model is acceptable, but file handling, label mapping, or UI flow is confusing. Build the system, observe where users get stuck, and improve the weakest part first.
Many beginners think evaluation must be highly technical, but you can learn a great deal with simple checks. The main question is not, "Can I calculate every metric?" The main question is, "Does my project perform well enough for its intended use?" That answer comes from observation, counting, and comparison.
Start with a small test set that the model did not train on. Use examples that feel realistic, not only easy ones. For an image model, include different lighting, angles, and backgrounds. For a voice model, include different speaking speeds, volumes, and a little background noise. Then count how often the model is correct. You can keep a table with columns such as input file, predicted label, actual label, and notes. This already gives you useful evidence.
Next, look for patterns in errors. Maybe your image classifier confuses cats and dogs when only part of the animal is visible. Maybe your voice model mistakes "stop" for "start" when the speaker is far from the microphone. These observations are more actionable than a single score because they point directly to possible fixes: better training examples, clearer labels, more balanced classes, or improved preprocessing.
For a combined project, evaluate both parts and the final user outcome. A simple question is: did the system help the user complete the task? If your match-checking tool predicts the image correctly 85% of the time and voice correctly 90% of the time, the full experience may still feel weaker if both must be right together. That is why testing the complete flow matters.
A beginner-friendly improvement habit is to change only one thing between experiments. For example, add more noisy audio samples and retest. Or resize images differently and retest. If you change many things at once, you will not know what helped. Avoid the common mistake of declaring success from training accuracy alone. A project is only convincing when it works on new data and behaves reasonably in realistic conditions.
Being able to explain your AI project clearly is part of the build, not an extra task at the end. Most people do not care about layer names or optimizer settings first. They care about what the project does, why it is useful, and how reliable it is. A strong explanation turns a technical exercise into something other people can understand and support.
A simple presentation structure works well. First, describe the problem in one everyday sentence. For example: "This tool helps a user identify an object in an image and control the app with short voice commands." Second, explain the inputs and outputs. "It takes a photo and a short audio clip, then returns a label and an action." Third, describe how it was built in plain language. "I trained one small model on labeled images and another on a few spoken commands, then linked them with simple program rules." Fourth, share the results honestly. "It works well in quiet settings and clear lighting, but struggles with noisy audio and cluttered backgrounds." Fifth, explain what you would improve next.
Use examples instead of jargon whenever possible. Rather than saying, "The model generalizes poorly under distribution shift," say, "It performs worse when the image is much darker than the training examples." That is more concrete and easier to trust. If you include technical words, define them quickly.
Demonstrations are especially powerful. Show one successful example, one failure example, and what you learned from that failure. This communicates maturity. It shows you are not claiming magic. You are showing evidence and limits.
When presenting to teachers, classmates, managers, or friends, include the human side of the design. Why did you choose this problem? Who might use it? What choices did you make to keep it simple and safe? These answers show engineering judgment, not just coding ability.
A common mistake is overselling. Do not say your model "understands" the world if it only classifies a few categories. Say exactly what it does. Clear, modest language makes your project sound more professional, not less. People trust builders who know both the strengths and the boundaries of their systems.
Even simple beginner AI projects should be built with responsible habits. Working with images and audio means you may collect personal data, and that creates real obligations. If a photo includes faces, homes, or personal belongings, or if an audio clip contains someone’s voice, you should think carefully about consent, storage, and sharing. A good rule is to collect only what you truly need and keep it only as long as necessary.
Start with privacy by design. If possible, use public beginner datasets or your own non-sensitive data. If you record other people, ask permission clearly. Explain how the data will be used and whether it will be stored. Avoid uploading personal recordings or images to random services without understanding their policies. If you share your project publicly, remove private files and sensitive metadata.
Ethics also includes fairness and limitation awareness. A model trained on only one type of background, accent, microphone quality, or image style may perform poorly on other users. That does not always mean the project is harmful, but it does mean you should not present it as universal. Be honest about who and what the model was tested on.
Good habits make future projects stronger too. Name files clearly, track where your data came from, document preprocessing steps, and save experiment notes. This is part of trustworthy AI work. If you later notice a problem, you will be able to trace what happened.
A common beginner mistake is to think ethics is only for large companies. In reality, ethical habits begin with the first small build. Respecting privacy, being honest about limits, and keeping organized records will make you a better engineer and a more careful creator.
Finishing your first working image-and-voice project is a major step. You now know something many beginners do not: building AI is not only about training a model. It is about shaping data, connecting parts, testing behavior, and communicating results. The next stage is to grow with intention rather than jumping randomly into harder topics.
One path is to improve quality. You can collect better data, balance your classes, clean labels, or add more realistic examples. For image AI, you might try more varied lighting and backgrounds. For voice AI, you might add different speakers or controlled background noise. Another path is to improve the interface. You can turn your notebook into a small web app, desktop tool, or mobile demo. This teaches deployment and user experience, which are valuable real-world skills.
You can also go deeper technically. After a first classifier, explore transfer learning more seriously, try a slightly stronger architecture, or compare feature extraction methods for audio. If evaluation interests you, learn confusion matrices, precision, recall, and calibration in a practical way. If engineering interests you, learn version control, experiment tracking, and model packaging. The right next step depends on your goal.
A helpful approach is to choose one growth project for each category: one data improvement, one model improvement, and one presentation or deployment improvement. This keeps learning balanced. For example, you might gather 100 more audio clips, test a better pretrained image model, and wrap the final system in a simple app interface.
Keep a portfolio mindset. Save screenshots, a short project summary, sample outputs, and a note about what you learned. Employers, teachers, and collaborators often care more about a well-documented small project than an unfinished ambitious one.
Most importantly, continue building. Your second project will feel easier because you now understand the full workflow. Your confidence should come not from perfection, but from evidence that you can create, test, explain, and improve an AI system step by step. That is the real foundation for long-term growth in deep learning.
1. What is the main goal of combining image and voice ideas in this chapter?
2. According to the chapter, what is a beginner-friendly way to evaluate an AI project?
3. What does the chapter suggest about using AI in every part of a project?
4. Which presentation approach best matches the chapter’s guidance?
5. What is the recommended mindset for planning the next step in your AI learning journey?
- Learning Evolved.
- Intelligence Amplified.


