AI Robotics & Autonomous Systems — Beginner
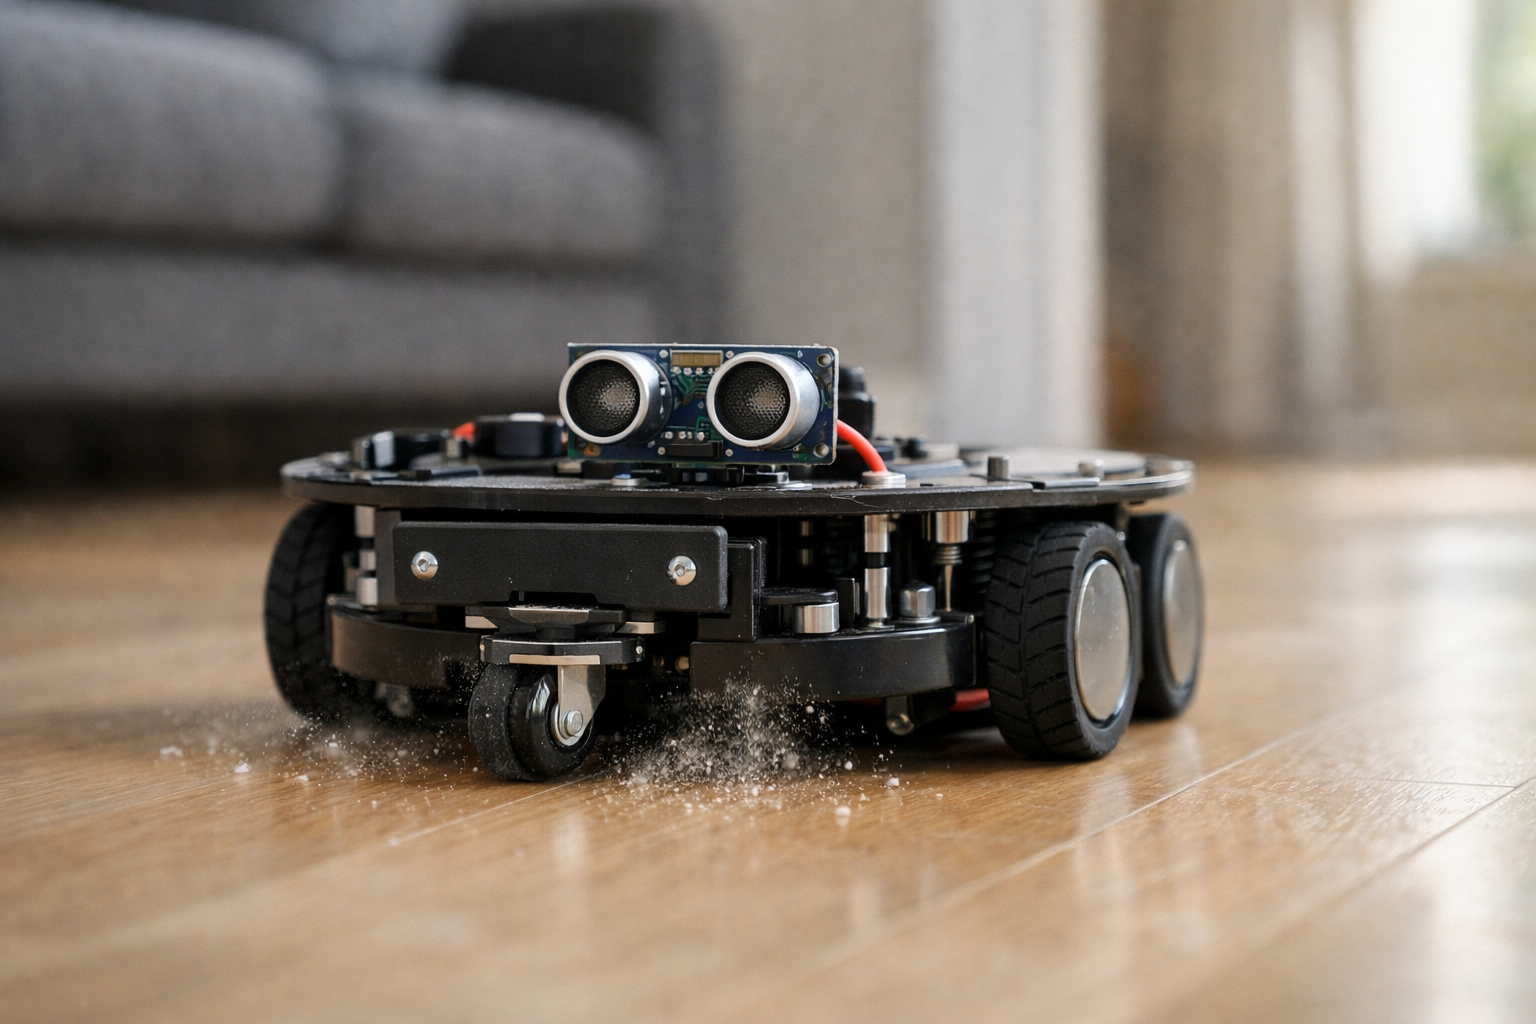
Build a beginner-friendly cleaner bot that avoids obstacles and roams rooms.
This beginner course is a short, book-style build guide that walks you from zero knowledge to a working cleaner-style robot that can drive around rooms and avoid obstacles. You’ll learn home robotics from first principles: what sensors do, how motors move a robot, how power works, and how simple “if-then” rules can create behavior that feels smart.
Instead of throwing complicated math or buzzwords at you, the course focuses on a practical goal: a small cleaner bot that can roam a room, react to walls and furniture, and keep moving without constant help. You’ll build confidence one layer at a time—first understanding the parts, then assembling the hardware, then uploading and adjusting easy starter code, and finally testing the robot in real spaces like a living room or hallway.
By the end, you will have a compact wheeled robot with a simple sensor setup (such as a bumper switch and/or distance sensor). It will:
This course is designed like a short technical book. Each chapter depends on the last, so you never feel lost:
Many robotics tutorials assume you already know electronics, programming, or “AI.” This one doesn’t. Every concept is introduced in plain language, starting with the idea that a robot is just a loop: sense the world, decide what to do, then act. You’ll also get safety habits from the beginning—especially around batteries, switches, and testing on the floor near furniture.
You’ll finish with skills you can reuse for future projects: choosing compatible parts, wiring with confidence, calibrating motor direction, tuning sensor thresholds, and debugging using a clear order of operations.
This course is for anyone curious about home robots—students, hobbyists, educators, and teams who want a friendly starting point before more advanced autonomy. If you can follow step-by-step instructions and install a simple program on your computer, you can build this.
If you’re ready to build your first navigation-capable cleaner bot, Register free and start Chapter 1 today. Or, if you want to compare learning paths, you can browse all courses on Edu AI.
Robotics Educator & Autonomous Systems Engineer
Sofia Chen designs beginner-friendly robotics learning paths and prototypes small autonomous robots for indoor environments. She specializes in turning sensors, motors, and simple logic into reliable real-world behavior through clear, step-by-step builds.
A “home robot” can sound like a magical appliance, but for this course we’ll treat it as an engineering system with a clear goal: a small cleaner bot that can move around a room and avoid obstacles reliably. That’s it. It won’t map your entire house, recognize your dog, or understand voice commands. It will do something more valuable for beginners: behave predictably, teach you the fundamentals of autonomy, and give you a platform you can improve.
In this chapter you’ll define what success looks like and set up the habits that make the rest of the build smooth. A robot project fails most often not because of “AI,” but because of unclear goals, unsafe testing, weak power planning, and confusing wiring. We’ll reduce those risks by grounding everything in three building blocks—sensing, thinking, acting—and by planning a first test area plus a checklist you can use after every change.
As you read, keep two mental models in mind. First: your robot only knows what its sensors can detect. Second: your robot can only do what its motors and power system can deliver. The rest of the course is about tightening the loop between sensing, decision-making, and action until the bot behaves well in real rooms.
Practice note for Define the goal: a cleaner bot that moves and avoids obstacles: document your objective, define a measurable success check, and run a small experiment before scaling. Capture what changed, why it changed, and what you would test next. This discipline improves reliability and makes your learning transferable to future projects.
Practice note for Understand the 3 building blocks: sensing, thinking, acting: document your objective, define a measurable success check, and run a small experiment before scaling. Capture what changed, why it changed, and what you would test next. This discipline improves reliability and makes your learning transferable to future projects.
Practice note for Set up your workspace and safety basics: document your objective, define a measurable success check, and run a small experiment before scaling. Capture what changed, why it changed, and what you would test next. This discipline improves reliability and makes your learning transferable to future projects.
Practice note for Plan your first test area and success checklist: document your objective, define a measurable success check, and run a small experiment before scaling. Capture what changed, why it changed, and what you would test next. This discipline improves reliability and makes your learning transferable to future projects.
Practice note for Define the goal: a cleaner bot that moves and avoids obstacles: document your objective, define a measurable success check, and run a small experiment before scaling. Capture what changed, why it changed, and what you would test next. This discipline improves reliability and makes your learning transferable to future projects.
Our cleaner bot has a narrow, testable goal: drive around a defined area, avoid collisions, and keep moving in a way that tends to cover the room over time. Think “basic autonomy,” not “perfect cleaning.” The physical cleaning attachment can be as simple as a microfiber pad or a small sweeping brush, but the project’s real focus is navigation behavior you can observe and improve.
What it does do: (1) moves under its own power, (2) detects nearby obstacles and edges (depending on sensors you choose), (3) makes simple decisions repeatedly—many times per second—and (4) recovers from common situations like bumping into a chair leg or getting too close to a wall.
What it doesn’t do in this beginner build: create a detailed map, localize itself on that map, plan optimal routes, or guarantee full coverage. Those capabilities require more sensors (often lidar or camera), more computation, and more software complexity. If you try to demand “full Roomba behavior” on day one, you’ll end up with mismatched expectations and troubleshooting chaos.
Define success in measurable terms. Example success checklist for your first milestone: the bot can start from rest, drive forward for 30 seconds, turn away when it detects an obstacle, and continue without human help for 5 minutes in a small test area. This kind of checklist prevents the common mistake of “it worked once” optimism. You’ll use the checklist repeatedly as you add features.
Robots interact with rooms through two categories of hardware: sensors (information coming in) and actuators (action going out). For this course, actuators are your drive motors, and sensors are whatever tells you “I’m too close to something” or “I hit something.” The simplest cleaner bot can work with a small set of sensors: a bumper switch, an infrared (IR) distance sensor, an ultrasonic distance sensor, or a downward-facing “cliff” sensor to avoid stairs.
Actuation is equally important. Two geared DC motors in a differential drive configuration (left and right wheels driven independently) are beginner-friendly because they let you move forward, reverse, and turn by changing motor directions and speeds. Turning is not a special feature—it’s just running one wheel faster than the other, or running them in opposite directions for a pivot.
Engineering judgment starts here: choose parts that match your goal and your risk tolerance. For a first build, prefer parts with clear documentation and lots of examples. Typical common mistakes include underpowered motors (robot stalls on carpet), misreading sensor specs (distance sensors often have minimum/maximum ranges), and expecting sensors to work identically on all materials. Plan to validate each sensor on your actual floor and furniture, not just on a workbench.
“Thinking” in this course is not a neural network. It’s a loop of simple rules you can inspect and tune. A beginner robot succeeds when its behavior is understandable: you should be able to point to a rule and say, “That’s why it turned.” This makes debugging possible.
A useful first policy is a reactive controller: the robot continuously reads sensors, then decides what to do next based on thresholds. For example: if distance ahead is greater than 25 cm, drive forward; if it’s less than 25 cm (or bumper is pressed), stop, back up for 0.5 seconds, then turn right for 0.4 seconds, then continue forward. That sequence is crude, but it produces surprisingly decent wandering behavior.
To move from “random wandering” toward “coverage,” you’ll add a second idea: wall/edge behavior. When a side sensor detects a wall, the robot can follow it at a rough distance, occasionally breaking away to explore open space. You don’t need a map; you need stable, repeatable reactions. The practical outcome is a bot that spends less time spinning in the middle and more time tracing boundaries, which increases the chance it will pass through more of the room.
Common mistakes in decision-making include stacking too many rules at once (so behaviors conflict), using thresholds without hysteresis (causing jittery oscillations), and forgetting that sensor readings are noisy. The workflow you’ll use throughout the course is incremental: verify one rule with one sensor, then add the next rule. If you can’t explain a behavior, your robot isn’t “smart”—it’s uncontrolled.
Power is the quiet determinant of whether a robot is fun or frustrating. Your motors draw far more current than your microcontroller and sensors, especially during starts, turns, and stalls. If the battery or wiring can’t deliver that current, you’ll see resets, brownouts, weak turning, or “it works on the bench but not on the floor.”
Three concepts matter most: voltage, current, and capacity. Voltage must match your motor driver and motors; current must cover peak demands (often several times the “running” current); capacity (mAh or Wh) determines runtime. A useful habit: treat any motor’s stall current as a design input, because brief stalls happen constantly in a room (wheel catches on carpet, bumper hits a wall, robot pivots against friction).
Engineering judgment here is choosing a battery chemistry and voltage that are safe and manageable for your experience level. Many beginners start with AA packs or protected Li-ion/LiPo solutions specifically designed for robotics. Whatever you choose, commit to one rule: never “just try a different battery” without checking motor driver voltage limits and polarity. One reversed connector can end a project in a second.
A clean workspace is a robotics tool. You will repeatedly wire, rewire, and retest. A cluttered table creates shorts, lost screws, and confusing “ghost” problems. Set up a small area where the robot can’t drive off the edge, snag cables, or hit fragile items.
Minimum recommended tools: a small screwdriver set, wire strippers, side cutters, a multimeter, and a way to make reliable connections (breadboard and jumpers for early prototypes; crimp connectors or solder for anything that moves). Keep labels or masking tape handy—label motor wires and battery leads early. The most common wiring mistake is swapping left/right motors or reversing polarity, which can make code debugging feel impossible when the real issue is hardware orientation.
Plan your first test area now. Choose a section of floor with consistent traction (no thick rug initially), clear boundaries, and a nearby “kill switch” (physical switch or quick battery disconnect). Your practical outcome is a repeatable test environment: if the robot behavior changes, you can trust it’s your code or wiring, not a new chair position or different lighting.
This course is easier when you treat it as staged engineering rather than one big leap. Each stage ends with a concrete demonstration in your test area and an updated success checklist. If you can’t pass a stage reliably, don’t “add one more feature” to compensate—fix the stage first.
Stage 1: Bring-up (actuation only). Wire battery, motor driver, and motors. Upload starter code that drives forward, stops, reverses, and turns on command. Your checklist: each wheel spins the intended direction, turning is consistent, and nothing overheats.
Stage 2: Add one sensor and one rule. Add a bumper or distance sensor. Implement a single avoid behavior: detect → stop → back up → turn. Test against a wall and chair legs. Tune timings and thresholds until it works 10 times in a row.
Stage 3: Combine behaviors for navigation. Add a second sensor (optional) and introduce wall/edge behavior alongside wandering. The goal is simple room coverage: the bot keeps moving, spends time near boundaries, and recovers from typical traps.
Stage 4: Reliability in real rooms. Expand the test area, introduce rugs or thresholds, and log failures. Improve wiring strain relief, wheel traction, sensor mounting angles, and code parameters.
Throughout, keep a written checklist for “done”: safe power-on, clean wiring, stable motion, obstacle avoidance, and a repeatable 5–10 minute run. This roadmap aligns with the course outcomes: you’ll learn what a home robot is, select beginner-friendly parts, wire without guesswork, upload and adjust motion code, implement wander + wall/edge behavior, and troubleshoot in real environments with a disciplined process.
1. Which project goal best matches the chapter’s definition of a beginner-friendly home robot?
2. Why does the chapter emphasize a clear success definition and a repeatable checklist after each change?
3. What are the three building blocks used to frame the robot as an engineering system?
4. Which statement best reflects the chapter’s first mental model for autonomy?
5. According to the chapter’s second mental model, what most directly limits what the robot can do in the real world?
This chapter turns the idea of a “simple cleaner bot” into a concrete, buyable set of parts. A beginner-friendly bill of materials is not about picking the fanciest components—it’s about choosing parts that fit together electrically and mechanically, are safe to handle, and are forgiving when you inevitably wire something backward once. Your goal is a small mobile platform that can drive forward, turn reliably, detect obstacles, and survive repeated testing on the floor.
As you read, think in systems: the chassis holds geometry, wheels convert motor torque into motion, the motor driver translates tiny logic signals into motor power, sensors provide “close enough” awareness, and the battery provides stable energy. When these match, your build feels straightforward. When they don’t, you’ll see common failure modes: a bot that stutters, browns out, refuses to turn, or “detects” ghosts.
We’ll also keep cleaning in mind. A first cleaner bot doesn’t need suction; it can push dust toward a collection point with a small brush or microfiber pad. That means you want a stable chassis (so it doesn’t tip when it bumps furniture), enough torque to push light debris, and sensors that prevent it from ramming walls repeatedly.
Use this chapter to assemble your parts list with budget options. You’ll leave with engineering judgment: what matters, what’s optional, and what combinations are known to work for a beginner build.
Practice note for Choose a simple chassis and drive style: document your objective, define a measurable success check, and run a small experiment before scaling. Capture what changed, why it changed, and what you would test next. This discipline improves reliability and makes your learning transferable to future projects.
Practice note for Select motors and a motor driver that match: document your objective, define a measurable success check, and run a small experiment before scaling. Capture what changed, why it changed, and what you would test next. This discipline improves reliability and makes your learning transferable to future projects.
Practice note for Pick sensors for obstacle detection: document your objective, define a measurable success check, and run a small experiment before scaling. Capture what changed, why it changed, and what you would test next. This discipline improves reliability and makes your learning transferable to future projects.
Practice note for Create a parts list with budget options: document your objective, define a measurable success check, and run a small experiment before scaling. Capture what changed, why it changed, and what you would test next. This discipline improves reliability and makes your learning transferable to future projects.
Practice note for Choose a simple chassis and drive style: document your objective, define a measurable success check, and run a small experiment before scaling. Capture what changed, why it changed, and what you would test next. This discipline improves reliability and makes your learning transferable to future projects.
The chassis is your robot’s skeleton. For a first cleaner bot, choose a simple 2-wheel differential-drive chassis (two powered wheels on the left/right) plus a passive caster (a small free-rolling wheel) for stability. This layout is popular because it is mechanically simple and easy to control: to go forward, both wheels spin; to turn, one wheel slows or reverses.
Look for an acrylic or metal “2WD robot car” kit with mounting holes and included standoffs. Avoid very tiny chassis plates at first—small platforms are harder to balance, harder to mount sensors on, and more sensitive to cable drag. A footprint around 15–20 cm wide gives you space for a battery, controller board, and sensors without stacking everything vertically.
Wheel choice matters more than it seems. Larger wheels roll over small thresholds and carpet edges more easily, but they require more torque. Softer rubber tires improve traction and reduce wheel slip during turns. If your kit includes hard plastic tires, expect inconsistent navigation on smooth floors; upgrading to rubber tires is often the single best “feel” improvement.
The caster should spin freely and not wobble. A sticky caster can make the robot drift and can overload one motor during turning. Place the caster so the robot’s center of mass is roughly inside the triangle formed by the two drive wheels and the caster. A common mistake is putting the battery too far forward, which increases caster load and makes turning harder.
Motors are where many beginner builds go off-track because motor listings emphasize RPM (speed) without explaining torque (twisting force). Your cleaner bot needs enough torque to start moving from rest, turn without stalling, and push a light brush/pad. Torque increases with gearing, while speed decreases. That’s why small “TT” DC gearmotors are so common: they trade speed for usable torque through a gearbox.
A practical target for indoor floor roaming is a wheel speed that yields roughly 0.2–0.5 m/s. Faster looks exciting but reduces sensor reaction time and increases collisions. For a 65 mm diameter wheel, 100–200 RPM at the wheel gives a beginner-friendly speed range. If you choose 300+ RPM motors on a light chassis, expect overshoot when turning and poor wall behavior.
Torque isn’t always specified clearly. If you see “stall current,” treat it as a warning: the motor can draw that much current when blocked. Your motor driver and battery must tolerate brief peaks near stall during bumps and turns. Two small gearmotors might each have a stall current around 1–2 A; that means your system should comfortably handle a few amps without resetting the controller.
Matching motors matters. Buy a paired set (same gear ratio) and mount them symmetrically. If one motor is slightly faster, your robot will arc instead of driving straight, and you’ll spend time compensating in software. Software can help, but good hardware alignment saves hours.
Your controller pin (Arduino-style) can output only a small amount of current—great for LEDs and logic signals, not motors. Motors are inductive loads: they draw high startup current, generate electrical noise, and can send voltage spikes back into your electronics. A motor driver is the “translator” that takes low-power direction and speed commands and safely switches higher motor current.
For a 2WD bot, you want a dual H-bridge driver so you can control left and right motors independently and reverse them. The driver should support your battery voltage and your motor current (including brief peaks). Popular beginner options include TB6612FNG (efficient, cooler) and L298N (easy to find, but wastes more power as heat). If you use L298N, expect lower battery efficiency and slightly weaker motors because of voltage drop; it still works for learning, just plan for it.
Speed control uses PWM (pulse-width modulation). Practically, that means the controller sends a rapidly switching signal and the motor “averages” it into slower or faster rotation. The motor driver must support PWM on its enable/speed pins (most do). Direction uses two logic pins per motor. Plan your wiring so left/right motors are clearly labeled; confusing them is the classic cause of “turn left” code spinning the wrong way.
Electrical noise is a real-world issue. Motors can reset microcontrollers if power is shared poorly. Good judgment here is to keep motor power and logic power organized: use a common ground, keep motor wires twisted or short, and add a bulk capacitor near the driver (many modules include one). If your robot randomly reboots when it bumps something, suspect voltage sag from motor current spikes.
Sensors define how your robot “knows” the world, but beginner navigation doesn’t require perfection. For a wandering + wall/edge behavior routine, you mainly need: (1) obstacle detection in front, and optionally (2) contact sensing for gentle bump-and-turn behavior. Three beginner-friendly sensor types cover most needs: bumpers (switches), ultrasonic distance sensors, and infrared (IR) proximity sensors.
A bumper switch is the simplest and most reliable: if you touch something, you know it. A front bumper made from a lever micro-switch or two side-by-side switches can dramatically improve robustness because it’s immune to shiny/black surfaces that confuse distance sensors. The tradeoff is it detects obstacles only after contact, so keep speeds moderate and ensure your chassis can survive taps.
Ultrasonic sensors (like HC-SR04 style modules) measure distance by timing an echo. They work well for broad obstacle avoidance at short-to-medium range. They can struggle with soft fabrics, angled surfaces, or narrow chair legs. Mount them level and away from vibrating parts. Also consider the mechanical field-of-view: if the sensor is too high, it may “see over” low obstacles; too low, it may read the floor edge.
IR proximity sensors are inexpensive and fast, but they are sensitive to surface reflectivity and ambient light. They can be excellent for short-range wall following when calibrated, but may behave inconsistently across different rooms. A practical approach is combining sensors: use ultrasonic for early warning and a bumper as a fail-safe.
Power is not just “a battery.” It’s a system: battery chemistry and voltage, current capability, a main switch, safe connectors, and a clean ground layout. For beginner indoor bots, common choices are AA battery packs (simple, lower current), 2-cell Li-ion/LiPo packs (more performance), or USB power banks (convenient but sometimes noisy or auto-shutoff).
A safe, practical default is a 2S (7.4V nominal) Li-ion/LiPo pack feeding a motor driver that supports it, plus a 5V regulator (or the controller’s regulated input) for logic. If that sounds like too much at first, a 6xAA NiMH pack is forgiving and less fire-risk, though it may struggle to deliver high peak currents on carpet. Avoid rectangular 9V alkaline batteries for motors; they cannot supply the needed current and will cause brownouts.
Add a real power switch in series with the battery positive lead. Unplugging wires to turn the robot off leads to connector wear and accidental shorts. Use connectors that don’t fall apart during movement—JST-VH, XT30/XT60, or screw terminals on driver modules are common. If you use loose Dupont jumpers for power, expect intermittent resets when the robot bumps something.
Plan for wiring clarity. Use red for positive and black for ground consistently. Tie down cables so they can’t touch the wheels. If your build includes a small cleaning brush motor later, it should have its own driver channel or transistor and must be accounted for in battery current.
The controller is the robot’s decision-maker: it reads sensors, computes what to do next, and commands the motor driver. For a first cleaner bot, an Arduino-style microcontroller is ideal because it has predictable timing, lots of examples, and simple wiring. An Arduino Uno or Nano-class board is sufficient for obstacle avoidance and a basic coverage routine (wander with occasional turns, plus wall/edge behavior).
Choose a board with easy USB programming and enough GPIO pins: you’ll typically need 4–6 pins for a dual motor driver (direction + PWM), 2–4 pins for ultrasonic (trigger/echo) and bumpers, and optionally status LEDs. If you plan to add more sensors later, a Mega-class board gives more pins, but it’s physically larger.
USB setup is part of your bill of materials. Make sure you have a known-good USB data cable (some cables are charge-only). Install the correct driver if your board uses a USB-to-serial chip (common clones may use CH340). A practical workflow is to do your first motor test while powered by USB (motors powered from the battery but grounds connected). This lets you print debug messages to the serial monitor while the robot moves—critical for diagnosing reversed motors, incorrect sensor thresholds, or intermittent power issues.
Mount the controller so you can access the USB port without disassembling the robot. Beginners often bury the board under the battery, making every code change painful. Leave service loops in wires so connectors aren’t strained when you open the chassis.
1. What is the main goal of a beginner-friendly bill of materials (BOM) for the cleaner bot?
2. In the chapter’s “think in systems” approach, what role does the motor driver play?
3. Which set of issues best reflects what happens when parts don’t match electrically or mechanically?
4. For a first cleaner bot (without suction), which design priorities best support pushing dust with a brush or microfiber pad?
5. Why does the chapter encourage building a small platform that can drive forward, turn reliably, detect obstacles, and survive repeated testing?
This chapter turns your parts pile into a real robot: a rolling platform with a safe power path, a motor driver that can actually control direction, and sensors that can survive bumps and tugged wires. If you’ve ever felt that wiring is “mysterious,” the goal here is to replace that feeling with a repeatable workflow: mount components so nothing shifts, route power so you can shut it off instantly, and connect signals so they don’t get confused by motor noise.
Think like a robot builder, not a “wire plugger.” Every connection answers a question: Where does current flow? What is the reference ground? Which way is “forward” for each motor? And what happens when a wheel stalls against a chair leg? A beginner-friendly cleaner bot succeeds when it is stable, serviceable, and predictable—especially when you’re doing your first tests on the floor.
You’ll work in five phases: (1) assemble the chassis and mount components, (2) understand a simple wiring diagram and label conventions, (3) wire power safely (battery → switch → motor driver/controller) with a common ground, (4) connect the motor driver to the motors and controller with correct left/right orientation, and (5) install and connect obstacle sensors with clean cable routing. Then you’ll do a disciplined first power-on with a pre-power checklist and a plan for quick shutoff.
Throughout, keep one rule in mind: when something behaves oddly, don’t guess—measure, inspect, and isolate. The build choices you make now determine how quickly you can troubleshoot in later chapters when you add navigation behaviors.
Practice note for Assemble the chassis and mount components: document your objective, define a measurable success check, and run a small experiment before scaling. Capture what changed, why it changed, and what you would test next. This discipline improves reliability and makes your learning transferable to future projects.
Practice note for Wire power safely: battery, switch, and common ground: document your objective, define a measurable success check, and run a small experiment before scaling. Capture what changed, why it changed, and what you would test next. This discipline improves reliability and makes your learning transferable to future projects.
Practice note for Connect motor driver to motors and controller: document your objective, define a measurable success check, and run a small experiment before scaling. Capture what changed, why it changed, and what you would test next. This discipline improves reliability and makes your learning transferable to future projects.
Practice note for Install and connect sensors for obstacle detection: document your objective, define a measurable success check, and run a small experiment before scaling. Capture what changed, why it changed, and what you would test next. This discipline improves reliability and makes your learning transferable to future projects.
Practice note for Perform a pre-power checklist and first power-on: document your objective, define a measurable success check, and run a small experiment before scaling. Capture what changed, why it changed, and what you would test next. This discipline improves reliability and makes your learning transferable to future projects.
Practice note for Assemble the chassis and mount components: document your objective, define a measurable success check, and run a small experiment before scaling. Capture what changed, why it changed, and what you would test next. This discipline improves reliability and makes your learning transferable to future projects.
Practice note for Wire power safely: battery, switch, and common ground: document your objective, define a measurable success check, and run a small experiment before scaling. Capture what changed, why it changed, and what you would test next. This discipline improves reliability and makes your learning transferable to future projects.
Practice note for Connect motor driver to motors and controller: document your objective, define a measurable success check, and run a small experiment before scaling. Capture what changed, why it changed, and what you would test next. This discipline improves reliability and makes your learning transferable to future projects.
Start with the chassis because mechanical sloppiness becomes electrical trouble later. Motors that twist under load tug on wires. A battery that slides changes the center of mass and can cause wheel slip, which looks like “bad code” but is really physics. Assemble the chassis on a flat surface and tighten fasteners gradually, alternating sides so the frame doesn’t warp.
Mount heavy items low and near the center: the battery is usually the heaviest, so place it between the wheels if possible. The motor driver and controller (Arduino-class board, ESP32, etc.) should be accessible for inspection—don’t bury them under the battery. Leave clearance around the motor driver for airflow and so you can touch-test temperature safely later (with the back of a finger, briefly).
Balance matters for a cleaner bot because it frequently bumps obstacles and transitions across rugs. If one wheel is lightly loaded, it will spin and the robot will “veer,” making obstacle avoidance unpredictable. A simple check: lift the robot by the center and ensure it doesn’t tilt dramatically forward/back. Also press down near each corner; the chassis should not flex enough to scrape wheels or castors.
Before moving on, verify wheels spin freely by hand and nothing rubs. If the chassis fights you now, it will fight you more once wiring is added.
A wiring diagram is just a map of intent: what connects to what, and which connections carry power versus signals. Beginners often get stuck because diagrams use labels (VIN, GND, OUT1) rather than showing physical wire placement. The trick is to translate labels into three categories: power (battery + and −), motor outputs (high current to motors), and logic/signal (low current control lines and sensor signals).
Adopt a color convention early. It reduces mistakes and makes debugging faster. A common, practical scheme: red for positive battery voltage, black for ground, and other colors for signals (yellow/white/green/blue). Don’t rely on color alone—add small labels with tape: “BAT+”, “GND”, “L_MOTOR”, “R_MOTOR”, “TRIG”, “ECHO”. A label that takes 20 seconds can save 20 minutes later.
Learn the key labels you’ll see on beginner motor drivers: VM (motor supply), VCC (logic supply, sometimes 5V), GND (common reference), and outputs like A01/A02, B01/B02 or OUT1/OUT2, OUT3/OUT4. Controller pins often include 5V, 3V3, GND, and named GPIO pins. Sensors typically show VCC, GND, and one or two signal pins.
Your goal is not to memorize every board, but to confidently classify each pin. When you can point at a diagram and say “this is high current” versus “this is a signal,” the fear goes away.
Wire power like you expect to need a fast shutdown—because you do. The clean beginner pattern is: battery → main switch → split to motor driver VM and controller power, with all grounds tied together. The main switch should cut the battery positive line, not just a signal line. Place the switch where you can hit it instantly without lifting the robot.
Start by identifying your battery type and voltage (for example, 2S Li-ion/LiPo ~7.4V nominal, or 6xAA ~9V fresh). Confirm that the motor driver’s motor supply range supports it, and that your controller gets the correct regulated voltage (many controllers want 5V or 3.3V, not raw battery). If you use a buck converter, it goes after the switch: battery → switch → buck → controller 5V (or VIN, per your board). Keep the high-current motor supply separate from delicate logic where possible, but always share ground.
Common ground is not optional. The controller’s PWM and direction signals are measured relative to its ground. If the motor driver ground floats, your signals become meaningless and the robot behaves erratically (random motor twitching, resets, or no motion).
Engineering judgment: keep power distribution simple. Every extra adapter and connector is another failure point. But do not skip the switch—being able to cut power immediately is the difference between a small mistake and a burned board.
Motors are the robot’s muscles, and most early “navigation bugs” are actually motor wiring issues. You must establish a consistent meaning for “left motor forward” and “right motor forward.” Begin by physically defining left and right from the robot’s perspective (imagine you are sitting on it facing forward). Mark the chassis with a small “L” and “R” near the motors.
Connect each motor to one channel of the driver (A outputs for one motor, B outputs for the other). At this stage, don’t worry if the motor spins backward; that is solved by swapping the two motor wires or flipping the direction logic in code. What matters is that you know which channel is left and which is right, and that both motors respond predictably to commands.
Polarity affects direction. If you command “forward” and one wheel spins forward while the other spins backward, the robot will spin in place. This is common and not dangerous, but it must be corrected before you attempt obstacle avoidance. The fastest workflow:
Also watch for mechanical mirroring: identical motors mounted on opposite sides may be flipped. That means “positive voltage to the red lead” might produce forward rotation on one side and backward on the other, depending on how the gearbox is oriented. This is why observation beats assumptions.
Common mistakes include loose screw terminals (intermittent motion), routing motor wires alongside sensor wires (noise), and forgetting to secure wires so they don’t touch the wheels. After direction is correct, add cable ties so motor wires have slack for suspension/bumps but cannot reach moving parts.
Obstacle detection sensors are your robot’s “eyes,” but they are far more sensitive to wiring quality than motors. Treat sensor wiring as low-noise, low-current signal wiring. Typical beginner cleaner bots use bump switches, IR proximity sensors, or an ultrasonic module. Regardless of type, the pattern is the same: VCC to the correct voltage, GND to common ground, and signal to a controller input pin (sometimes two signals, like TRIG/ECHO).
First, confirm voltage requirements. Many ultrasonic and IR modules want 5V; many controllers (especially ESP32) use 3.3V logic on inputs. If a sensor outputs 5V and your controller input is not 5V-tolerant, you may need a divider or level shifting. This is a place for careful reading of the sensor and controller specs rather than guessing.
Route sensor wires away from motor power wires and away from the motor driver if possible. Motors generate electrical noise that can show up as false triggers or flaky distance readings. Use short runs, twist signal with ground when practical, and add a small service loop so the sensor can be repositioned without ripping wires.
Practical outcome: when you later run code that prints sensor readings, you should see stable “no obstacle” values that change decisively when you place a hand or wall near the sensor. If readings flicker randomly, suspect routing, grounding, or voltage mismatch before blaming the code.
Your first power-on is a controlled test, not a celebration. Prepare a quick-shutoff plan: one hand near the main switch, robot on a stand or with wheels lifted, and nothing flammable nearby. If you have a bench supply with a current limit, this is the best time to use it; otherwise, be conservative and alert.
Run a pre-power checklist. Visually trace the power path: battery positive goes to the switch, then to motor driver VM and any regulator feeding the controller. Confirm polarity at every connector. Confirm that motor outputs are not shorted and that no bare wire strands bridge terminals. Verify common ground: battery ground, motor driver ground, controller ground, and sensor ground all connect.
After a safe idle power-on, test in steps: (1) controller boots (LEDs/serial), (2) sensor readings look sane, (3) motors spin at low duty cycle while wheels are off the ground, (4) a gentle ground test on a clear floor. If anything resets when motors start, suspect a power drop or wiring resistance—shorten power leads, improve connections, and consider separate regulation for logic.
Practical outcome: you end this chapter with a robot you can confidently power on and off, and a wiring layout you can explain. That confidence is what lets you iterate quickly when you begin real navigation behaviors.
1. Which workflow best matches the chapter’s recommended build phases for making the robot stable and predictable?
2. Why does the chapter insist on wiring power as battery → switch → motor driver/controller (instead of powering everything directly from the battery)?
3. What is the practical purpose of establishing a common ground in the robot’s wiring?
4. A wheel spins the opposite direction from what you expect when you command “forward.” According to the chapter’s mindset, what should you do first?
5. When something behaves oddly during early hardware tests (e.g., resets or strange motion), what approach does the chapter recommend?
This chapter is the moment your cleaner bot stops being a wiring project and becomes a machine with intent. You’ll install the programming tools, load starter code, and then build up a small set of behaviors: move forward, stop, reverse, turn, read a sensor, and react. The goal isn’t fancy autonomy yet—it’s reliability. A robot that drives the same way every time is easier to debug, safer to test, and more likely to navigate a real room without constantly getting stuck.
Two engineering ideas will guide everything you do here. First, separate “hardware truth” from “code assumption.” Motors don’t spin equally, floors aren’t uniform, batteries sag, and sensor readings have noise. Second, develop behaviors in tiny steps and test each step in isolation. If you try to build obstacle avoidance before forward motion is consistent, you’ll be guessing which part is broken.
Practical outcomes by the end of this chapter: you can upload code without guesswork, command repeatable motion primitives (forward/stop/reverse/turn), interpret a sensor value in plain language, and combine those pieces into a basic obstacle-avoid routine that forms the foundation for room coverage in later chapters.
Practice note for Install the programming tools and load starter code: document your objective, define a measurable success check, and run a small experiment before scaling. Capture what changed, why it changed, and what you would test next. This discipline improves reliability and makes your learning transferable to future projects.
Practice note for Move forward, stop, and reverse reliably: document your objective, define a measurable success check, and run a small experiment before scaling. Capture what changed, why it changed, and what you would test next. This discipline improves reliability and makes your learning transferable to future projects.
Practice note for Turn left/right and calibrate direction: document your objective, define a measurable success check, and run a small experiment before scaling. Capture what changed, why it changed, and what you would test next. This discipline improves reliability and makes your learning transferable to future projects.
Practice note for Read a sensor value and react to it: document your objective, define a measurable success check, and run a small experiment before scaling. Capture what changed, why it changed, and what you would test next. This discipline improves reliability and makes your learning transferable to future projects.
Practice note for Create a basic obstacle-avoid routine: document your objective, define a measurable success check, and run a small experiment before scaling. Capture what changed, why it changed, and what you would test next. This discipline improves reliability and makes your learning transferable to future projects.
Your robot’s “personality” lives in firmware: the program running on the microcontroller (Arduino-class board or similar). The workflow is always the same: install the IDE, connect the board over USB, select the correct board/port, compile, upload, then verify the robot responds. Do not skip verification—most first-time issues are toolchain or connection problems, not your wiring.
Install the Arduino IDE (or your board vendor’s IDE). Then connect the board with a known-good USB cable (many “charging-only” cables cause silent failure). In the IDE, pick Tools → Board (choose your exact model) and Tools → Port (choose the newly appeared device). Before touching motors, upload a minimal “blink” or “serial hello” program to confirm you can compile and upload reliably.
Serial.begin(115200); and print status messages so you can see where the program is in its logic.Once uploads work, load the starter code for your bot (the course-provided template that includes motor pin definitions and basic helpers). Compile it once without changes. A clean compile is your baseline; from there, make small edits and re-test.
Motor control has three knobs: direction, speed, and time. With a typical DC motor driver, direction is set by two digital inputs (IN1/IN2 per motor), and speed is set by PWM (a value like 0–255 on an Arduino). Timing is simply “how long you hold that command” using delays or a timer.
Start by writing (or using in starter code) a tiny set of motion primitives: forward(speed), stop(), reverse(speed), turnLeft(speed), turnRight(speed). Internally, each primitive sets motor directions and PWM outputs. Then test each one alone for 1–2 seconds at a moderate speed. If the robot lunges or the driver overheats, stop and reduce speed.
Engineering judgment: don’t chase maximum speed. Cleaner bots benefit from steady, predictable motion. Start around 30–50% PWM. Also, remember batteries: a fresh pack may make your “50%” feel fast, while a low pack makes it sluggish. That’s why you test with the same power source you’ll actually drive with, not only USB power.
Common mistakes include swapped motor wires (forward command spins one wheel backward), wrong PWM pins (no speed control), and enabling the motor driver incorrectly (missing EN pin logic). Fix these now—later behaviors assume your primitives are trustworthy.
If you command both wheels to the same PWM, the robot often curves. That’s not “bad code”—it’s real-world mismatch: motors have slightly different constants, gearboxes have different friction, wheel diameters vary, and weight distribution changes traction. Calibration is how you compensate so “go straight” becomes a repeatable action.
Do a simple straight-line test on the floor you care about (tile vs carpet changes everything). Place the robot on a line (tape helps), command forward for 2 seconds, and observe drift. If it curves right, the left wheel is effectively stronger (or the right is weaker). You can compensate by scaling one side’s PWM down slightly, or by adding a small offset.
Implement calibration as numbers you can easily adjust at the top of your code, for example: leftTrim and rightTrim multipliers (like 0.90–1.10). Then define a helper that applies trim before writing PWM. Re-run the test until drift is acceptable. Don’t expect perfection; you want “good enough” that the robot doesn’t constantly collide or spiral.
The practical outcome is that your motion primitives become “portable.” When you start combining behaviors—reverse then turn then forward—small drift errors compound. Calibration reduces that compounding.
Now you’ll give the robot a way to “notice” the world. For a beginner cleaner bot, two common options are a distance sensor (ultrasonic or IR) and a bumper switch. A distance sensor answers: “How far is the nearest obstacle in front?” A bumper answers: “Did I hit something?” Both can work; distance gives earlier warning, bumpers are simple and robust.
Read sensors in plain language by converting raw signals into meaningful units or states. For distance sensors, convert to centimeters (or millimeters) and then decide what “too close” means. For bumpers, convert the digital read into true/false: pressed or not pressed. Print readings to Serial while the robot is stationary to confirm the values make sense before mixing with motion.
Also watch timing. Some sensors take time to measure; if your loop reads the sensor too fast, you may get repeated stale values. A short delay or a non-blocking timer can improve stability. The practical outcome: you can reliably translate sensor data into a simple condition such as “path clear” vs “obstacle ahead.”
With motion primitives and sensor readings working, you can build the simplest possible decision system: if-then rules. This is not “AI” in the modern sense, but it is autonomy: the robot changes behavior based on what it senses, without you driving it.
A good beginner rule set is intentionally small. Example: If obstacle is close, stop, reverse briefly, then turn; else move forward. This creates an obstacle-avoid routine that looks like wandering. You’re effectively encoding a reflex. Keep the logic readable and deterministic so debugging is straightforward.
Engineering judgment here is about choosing timings that prevent oscillation. If you reverse too little, you’ll re-trigger the obstacle immediately. If you turn too long, you waste time spinning. Start with simple constants: reverse 300–600 ms, turn 400–900 ms, forward continuously otherwise. Then refine using real-room tests, not desk tests.
All autonomous robots run a loop. In your cleaner bot, it can be as simple as: sense → decide → act, repeated many times per second. Thinking in this loop helps you avoid messy code where motor commands are scattered everywhere. You want one place where sensors are read, one place where decisions are made, and one place where actuators are commanded.
Start by structuring your main loop into three blocks:
distanceCm and bumperPressed.action (FORWARD, REVERSE, TURN_LEFT, TURN_RIGHT, STOP) based on if-then rules.action, possibly with short timed “maneuvers” for reverse/turn.To make behaviors reliable, add two practical techniques. First, use brief “committed actions” for maneuvers: when you decide to reverse, actually reverse for a fixed time before re-sensing; this prevents jitter where the robot flips decisions every few milliseconds. Second, add simple “stuck” protection: if you hit obstacles repeatedly within a short window, increase the turn time or choose the opposite direction.
When you test in a real room, expect edge cases: chair legs, rugs, and shiny surfaces that confuse distance sensors. Treat each failure as data. Adjust thresholds, trims, and timings one at a time, and keep notes. By the end of this chapter, your bot should wander, avoid obvious obstacles, and demonstrate the core navigation rhythm you’ll build on for room coverage (including wall/edge behavior) in the next chapter.
1. Why does Chapter 4 emphasize making basic motions (forward/stop/reverse/turn) reliable before building obstacle avoidance?
2. What does separating “hardware truth” from “code assumption” mean in this chapter’s context?
3. Which development approach best matches the chapter’s recommended method for creating robot behaviors?
4. What is the primary purpose of calibrating left/right turns in Chapter 4?
5. What does the chapter describe as the key outcome of reading a sensor value and reacting to it?
A cleaner bot does not need a perfect map to be useful. In a typical home, “good enough” coverage comes from repeating simple behaviors reliably: move forward, avoid collisions, trace edges, and occasionally change direction to reach new space. The goal of this chapter is not to build a research-grade navigator, but to make your robot act like a practical appliance: it should keep moving, handle common room features (walls, chair legs, doorways), and avoid getting trapped in the same small area.
You will build a coverage routine made of two modes: wandering (a controlled random walk) and boundary behavior (wall/edge following). Then you’ll add stuck detection, improve obstacle avoidance timing and thresholds, and choose movement settings that trade speed for stability. Finally, you’ll run a repeatable real-room test plan and measure results in the way real product teams do: how it “feels,” how long it runs, and how often it jams.
As you implement the chapter, resist the temptation to add complexity (mapping, SLAM, path planning) before your basic behaviors are robust. A simple robot that never gets stuck beats a smart robot that stops under a chair.
Practice note for Add wandering with boundaries to avoid getting stuck: document your objective, define a measurable success check, and run a small experiment before scaling. Capture what changed, why it changed, and what you would test next. This discipline improves reliability and makes your learning transferable to future projects.
Practice note for Handle common room features: walls, chair legs, doorways: document your objective, define a measurable success check, and run a small experiment before scaling. Capture what changed, why it changed, and what you would test next. This discipline improves reliability and makes your learning transferable to future projects.
Practice note for Improve obstacle avoidance with better timing and thresholds: document your objective, define a measurable success check, and run a small experiment before scaling. Capture what changed, why it changed, and what you would test next. This discipline improves reliability and makes your learning transferable to future projects.
Practice note for Create a basic cleaning pattern and test it: document your objective, define a measurable success check, and run a small experiment before scaling. Capture what changed, why it changed, and what you would test next. This discipline improves reliability and makes your learning transferable to future projects.
Practice note for Measure performance: coverage feel, runtime, and jams: document your objective, define a measurable success check, and run a small experiment before scaling. Capture what changed, why it changed, and what you would test next. This discipline improves reliability and makes your learning transferable to future projects.
Practice note for Add wandering with boundaries to avoid getting stuck: document your objective, define a measurable success check, and run a small experiment before scaling. Capture what changed, why it changed, and what you would test next. This discipline improves reliability and makes your learning transferable to future projects.
Practice note for Handle common room features: walls, chair legs, doorways: document your objective, define a measurable success check, and run a small experiment before scaling. Capture what changed, why it changed, and what you would test next. This discipline improves reliability and makes your learning transferable to future projects.
Practice note for Improve obstacle avoidance with better timing and thresholds: document your objective, define a measurable success check, and run a small experiment before scaling. Capture what changed, why it changed, and what you would test next. This discipline improves reliability and makes your learning transferable to future projects.
Practice note for Create a basic cleaning pattern and test it: document your objective, define a measurable success check, and run a small experiment before scaling. Capture what changed, why it changed, and what you would test next. This discipline improves reliability and makes your learning transferable to future projects.
When people hear “navigation,” they often imagine a robot building a map and computing paths. For a beginner cleaner bot, navigation is simpler: it is the ability to continuously choose the next safe motion using only local sensor readings and a small amount of memory (timers and counters). Your robot is not trying to know where it is; it is trying to avoid wasting time and avoid damage while exploring new floor area.
Think of navigation as a loop that runs many times per second: read sensors → decide a motion → drive motors → repeat. The loop needs three ingredients. First, reactive safety: if something is close, slow down or turn. Second, coverage bias: add rules that tend to spread the robot out over time (for example, don’t always turn the same direction). Third, recovery: when the world surprises you (chair legs, rugs, door thresholds), detect that you’re not making progress and escape.
A common mistake is assuming “forward until obstacle” equals navigation. In a real room, that gets you stuck in corners, cycling between two table legs, or bouncing in a doorway. Another mistake is using sensor readings directly without timing logic, which causes rapid oscillation (turn-left, turn-right, turn-left…) because readings fluctuate. In this chapter you’ll use short, intentional time windows: commit to a turn for 300–700 ms, then reassess.
Practical mindset: your robot is a cleaner, not a cartographer. You can accept imperfect paths as long as the robot keeps moving and revisits new areas over time.
Two simple behaviors create surprisingly good coverage: random walk (wandering) and edge following (boundary behavior). Random walk means the robot drives forward most of the time, and when it must turn (or on a timer), it chooses a new heading with some randomness. Edge following means that once the robot reaches a wall or the perimeter of furniture, it traces it for a while instead of immediately turning away.
Why this works: walls define the room’s shape, and edges lead you around obstacles and into adjacent open areas. Randomness prevents repeating the exact same loop. A practical pattern is a two-mode state machine:
If you only have a single front distance sensor, you can still approximate edge behavior by: (1) after an obstacle-triggered turn, bias the turn direction consistently for a short time (e.g., always turn right for the next few seconds), which tends to create “wall-hugging” arcs; and (2) use a longer forward drive after the turn so the robot commits to moving alongside the boundary rather than immediately re-triggering avoidance.
Doorways are a special case: they look like open space, which is good, but the door frame can catch bumpers or cause repeated turns. Add a “boundary patience” rule: if you detect alternating near/far readings quickly, slow down and reduce turn aggressiveness for a moment, letting the robot slip through instead of ricocheting.
Practical outcome: your robot should look purposeful—wandering broadly, then tracing along walls and furniture edges instead of jittering in place.
Real rooms create “trap geometries”: chair legs in pairs, U-shaped table supports, thick rug edges, and narrow gaps. A cleaner bot must assume it will get stuck sometimes, and it needs an escape routine that is more forceful than normal avoidance. The key is detecting “not making progress” with beginner-friendly signals.
Start with simple, robust stuck detectors:
Then implement a three-step escape that is intentionally different from normal behavior. Example: (1) back up longer than usual (700–1200 ms), (2) rotate in place a larger angle (e.g., 120–180 degrees), (3) drive forward for a “commit” interval (1–2 s) before allowing another avoid-trigger. That last step is crucial: without it, the robot may immediately see the same obstacle again and fall back into the loop.
Common mistake: escaping with a tiny backup and tiny turn. That only works for gentle bumps, not chair-leg corrals. Another mistake is escaping in exactly the same direction each time. Add randomness to the escape turn, or alternate left/right on each stuck event.
Engineering judgement: stuck detection will occasionally misfire. That’s acceptable if the escape is safe and brief. It is better to “over-escape” occasionally than to sit spinning for minutes draining the battery.
Obstacle avoidance quality is mostly tuning: choosing distance thresholds, timing windows, and interpreting noisy readings. Whether you use ultrasonic, IR time-of-flight, or bump switches, you will see fluctuations caused by surface angle, dark materials, sunlight, and electrical noise from motors. If your robot behaves inconsistently from one room to another, assume the thresholds are too tight or the readings are not filtered.
Use a two-threshold scheme (hysteresis) to reduce twitching:
This prevents the robot from bouncing between “avoid” and “forward” when readings hover around a single value. Add a small filter: take 3–5 quick samples and use the median, or apply an exponential moving average. Filtering is especially important when the robot turns, because the sensor sweeps past edges and returns spiky values.
Timing matters as much as distance. If you turn for too short a duration, you may still be facing the obstacle; too long, and you waste time and miss openings. A practical approach is to start with fixed times (e.g., back up 300 ms, turn 500 ms) and then adjust while watching the robot in a chair-leg area. Increase the backup time if the bumper remains pressed or the front distance stays near after turning. Decrease turn time if the robot “overreacts” and spins away from open space.
Common mistake: testing thresholds with the robot lifted or held in the air. Always tune with the robot driving on the floor, because motor vibration and battery sag change sensor behavior. Also note that doorways and table edges can cause “false far” readings; use the clear threshold plus a short confirmation delay (e.g., require clear for 100–200 ms) before resuming full forward speed.
Cleaner bots succeed by being stable, not fast. Higher speed reduces reaction time, increases stopping distance, and amplifies sensor noise (because readings change faster). It also increases wheel slip during turns, which makes your “turn for 500 ms” produce different angles on different floors. Your job is to pick movement settings that keep behavior repeatable in carpet, tile, and wood.
Start with two speeds: cruise (normal forward) and maneuver (turning/edge following). As a rule, maneuver speed should be noticeably slower than cruise, because turning is when you most need control. If you are using PWM motor control, you might begin around 40–55% duty for cruise and 25–40% for maneuver, then adjust based on whether the robot can overcome small thresholds without stalling.
To improve turning consistency, prefer in-place turns for escapes and obstacle reactions (one wheel forward, one backward) rather than wide arcs, because arcs depend heavily on floor friction. For edge following, arcs can be fine, but keep them gentle and slow. If your robot has a caster wheel, watch for caster “flutter” at higher speed; that can cause the robot to wobble and repeatedly re-trigger avoidance.
Battery voltage changes over the run. If the robot becomes sluggish near the end, your thresholds may become effectively too small (you approach obstacles more slowly, giving the filter more time to smooth). Consider adding a minimum speed floor so the robot doesn’t stall, and shorten the “commit forward” time when battery is low to reduce the chance of pushing into objects.
Practical outcome: the robot should move like a cautious appliance—steady forward motion, deliberate turns, and no frantic oscillation near walls.
A navigation routine is only proven by repeatable room tests. Build a simple test plan that covers common home features: walls, chair legs, doorways, and clutter transitions. Do not rely on a single “good run” in an empty space. Instead, run short trials, record what happens, change one variable, and run again.
Set up three test zones:
For each zone, do 3–5 repeat runs of 5 minutes. Track three measurements that match real product concerns: coverage feel (does it revisit new areas, or does it loop?), runtime (battery life until behavior degrades), and jams (count how many times you must rescue it). You can log simple counters in code: obstacle triggers, stuck events, time spent in EDGE vs WANDER, and maximum consecutive avoid events.
When you see a failure, label it before changing code. Examples: “oscillates at wall,” “pins between chair legs,” “bounces in doorway,” “rides along couch then stops.” Each label suggests a specific fix: oscillation → add hysteresis and longer action windows; chair-leg pin → stronger escape routine and repeat-collision detection; doorway bouncing → slower maneuver speed plus reduced turn aggressiveness; stopping → increase backup duration or adjust near threshold.
Finally, rerun the same scenario after each change. If the fix helps one zone but harms another, you’ve learned an important engineering truth: navigation is a set of tradeoffs. Your job is to choose the most reliable behavior across real rooms, not to optimize for one perfect demo.
1. Why does Chapter 5 recommend focusing on simple behaviors instead of building a perfect map?
2. What is the purpose of using two modes—wandering and boundary behavior—in the coverage routine?
3. Which design goal best reflects the chapter’s “practical appliance” mindset?
4. What is the main reason to add stuck detection and tune obstacle avoidance timing/thresholds?
5. According to the chapter, what should you measure in a repeatable real-room test plan?
A cleaner bot that works on your bench but fails in a real room is not “broken”—it is unfinished engineering. Real floors add friction changes, carpet edges, chair legs, battery sag, and cable tugging. This chapter gives you a repeatable way to debug, strengthen, and lightly upgrade your robot without restarting the whole design.
The key mindset shift is to treat your robot as three interacting systems: power, motion, and sensing/decision-making. When something goes wrong—random resets, weak turning, constant collisions—your job is to isolate which system is at fault, prove it with quick tests, and only then change one variable at a time. By the end, you’ll have a safer, more durable robot, one simple upgrade that improves reliability or usability, and a small “demo + documentation” package you can share confidently.
Keep your tools handy: a small screwdriver, spare jumper wires, electrical tape or heat shrink, zip ties, and (ideally) a multimeter. If you don’t have a multimeter, you can still do most checks with careful observation, but consider it a first “real robotics” investment because it turns guesswork into measurement.
Practice note for Debug the most common build issues step-by-step: document your objective, define a measurable success check, and run a small experiment before scaling. Capture what changed, why it changed, and what you would test next. This discipline improves reliability and makes your learning transferable to future projects.
Practice note for Make the robot safer and more durable: document your objective, define a measurable success check, and run a small experiment before scaling. Capture what changed, why it changed, and what you would test next. This discipline improves reliability and makes your learning transferable to future projects.
Practice note for Add one simple upgrade (your choice) without redesigning everything: document your objective, define a measurable success check, and run a small experiment before scaling. Capture what changed, why it changed, and what you would test next. This discipline improves reliability and makes your learning transferable to future projects.
Practice note for Create a final demo and documentation checklist: document your objective, define a measurable success check, and run a small experiment before scaling. Capture what changed, why it changed, and what you would test next. This discipline improves reliability and makes your learning transferable to future projects.
Practice note for Debug the most common build issues step-by-step: document your objective, define a measurable success check, and run a small experiment before scaling. Capture what changed, why it changed, and what you would test next. This discipline improves reliability and makes your learning transferable to future projects.
Practice note for Make the robot safer and more durable: document your objective, define a measurable success check, and run a small experiment before scaling. Capture what changed, why it changed, and what you would test next. This discipline improves reliability and makes your learning transferable to future projects.
Use the same troubleshooting flow every time: power → motors/driver → sensors/software. This order matters because unstable power can mimic “bad code,” and motor problems can look like “bad sensors.” Start by simplifying the robot until only the suspected subsystem remains.
Step 1: Verify power, unloaded. Disconnect motors from the motor driver (or disable motor outputs in code) and power the controller. Confirm it boots consistently and stays on for at least a minute. If it resets while doing nothing, you likely have a wiring short, an undervoltage issue, or a faulty regulator. If you have a multimeter, measure battery voltage at the battery terminals and again at the controller’s input while it is powered; a large drop indicates a bad connection or undersized wiring.
Step 2: Verify motors and motor driver, without sensors. Run a minimal “motor test” sketch that drives forward for 2 seconds, stops, turns in place, stops, and repeats. The robot should move smoothly and repeatably. If it veers, the issue is mechanical (wheel friction, alignment) or motor mismatch, not navigation logic. Swap left/right motor connections at the driver; if the veer direction changes, the motor channels differ electrically. If it stays the same, the chassis/wheels are the culprit.
Step 3: Add sensors back one at a time. For each sensor, print raw readings to serial (or blink an LED pattern) while the robot is stationary. Move your hand or an object and confirm the readings change correctly. Only after raw readings look right should you re-enable the behavior logic (avoid, wall/edge routine). This staged approach prevents “compound failures” where two small issues hide each other.
This workflow is the difference between tinkering and engineering: you are building evidence, not hunches.
Most first-time robots fail in a few predictable ways. Recognizing the signature symptoms helps you diagnose quickly.
Brownouts (voltage dips) and random resets. If the robot reboots when motors start, or the microcontroller disconnects from USB when you command a turn, that’s classic brownout behavior. Motors draw a surge at startup and during stalls; if your battery can’t supply it (or wiring/connectors add resistance), the controller voltage drops below its safe threshold. Fixes include: using a battery with adequate discharge capability, shortening power leads, tightening screw terminals, separating motor power from logic power where possible, and adding a bulk capacitor across motor supply (only if you understand polarity and voltage rating). Also check that the motor driver ground and controller ground are solidly common; floating grounds create “ghost” behavior.
Loose or intermittent wires. A loose jumper can look like a software bug because it fails only when the robot vibrates. Do a “wiggle test”: with power on and the robot safely lifted, gently wiggle connectors and watch for resets or sensor spikes. Replace breadboard jumpers on moving parts with crimp connectors, screw terminals, or soldered joints with strain relief. Tie down cables so the connector is not the mechanical load point.
Reversed motors or swapped channels. If your code says “forward” but the robot spins, one motor is reversed. The clean fix is to swap the two motor leads for that motor at the driver output (or invert direction in software consistently). Ensure your left/right mapping matches your code assumptions; label the motor driver outputs with tape once verified. A common mistake is “fixing” the problem twice—swapping wires and flipping code—ending up back at the wrong direction. Make one change, test, then lock it in.
Mechanical drag and wheel slip. If turns are inconsistent, check for hair or tape on axles, uneven wheel contact, or a caster that binds. Robots navigate with physics first; software can’t compensate for a wheel that sometimes sticks.
Your battery is both the robot’s fuel and its biggest safety risk. Good habits protect your hardware, your home, and your future self when you pick up more ambitious projects.
Match the charger to the chemistry. Use a charger designed for your battery type (e.g., Li-ion/LiPo vs. NiMH). Never “try it and see.” A mismatched charger can overcharge cells, causing swelling, heat, or failure. If you’re using a USB power bank or protected Li-ion pack, it typically includes built-in charging and protection; if you’re using a hobby LiPo, follow LiPo-specific procedures strictly.
Charge in a safe location. Charge on a non-flammable surface away from clutter. Don’t charge under pillows, on carpet, or inside the robot unless your design explicitly supports that safely. Stay nearby during charging. If anything becomes hot, smells odd, or swells, stop and isolate it.
Avoid deep discharge and voltage sag. Many navigation “bugs” are actually low-battery behavior: sensors get noisy, motors slow, and the controller resets under load. Establish a simple rule: if performance changes noticeably, stop and recharge. If your controller supports it, read battery voltage (through a proper voltage divider) and reduce speed or end the run when voltage is low. This improves reliability and battery lifespan.
Inspect and protect wiring. Battery leads should be the most secure connections on the robot. Use strain relief so a tug doesn’t rip pads or loosen terminals. Add a switch or removable connector so you can power down quickly during debugging. If you add a fuse, place it close to the battery positive lead so a short anywhere downstream is protected.
Battery care isn’t just safety—it’s also “data quality.” Stable voltage produces repeatable motor response, which makes your room-coverage routine far more consistent.
Upgrades should be chosen for maximum benefit with minimal redesign. Pick one improvement and integrate it cleanly: mechanical (bumper), sensing (second sensor), or usability (status LED). The goal is to learn controlled iteration, not to create a new robot mid-course.
Option A: Better bumper (mechanical reliability). If your robot frequently snags chair legs or fails to detect a soft obstacle, a bumper is a high-value upgrade. Add a springy front strip (foam, flexible plastic) that triggers a simple switch when pressed. Mount it so it can move a few millimeters and reliably hit the switch. In code, treat a bumper hit as a high-priority event: stop motors immediately, back up briefly, then turn away. This reduces motor stalls (and brownouts) and protects furniture.
Option B: Add a second distance sensor (coverage quality). A single forward sensor can miss angled walls. Adding a second sensor at ~30–45° to one side helps maintain a wall-follow or edge behavior more smoothly. Keep wiring short and routed away from motor leads. In software, start simple: if side distance is too small, steer away; if too large, gently steer toward. Don’t chase perfection—just reduce scraping and oscillation.
Option C: Status LED (debuggability). A single LED can save hours. Define a few patterns: slow blink = idle, solid on = running, fast blink = low battery or sensor fault. When the robot misbehaves away from your laptop, the LED tells you whether it’s executing logic or resetting. Place the LED where you can see it during a run, and document the meaning of each pattern.
Whichever upgrade you choose, apply the Chapter 6 troubleshooting discipline: test the upgrade alone first, then reintegrate it into the full behavior routine.
A cleaner bot lives in dust, hair, and crumbs—exactly the conditions that degrade sensors and mechanics. Basic maintenance turns a “one-day demo” into a robot you can run weekly.
Cleaning routine (after every few runs). Remove hair from wheel axles and the caster. Wipe sensor faces (especially IR or ultrasonic openings) with a dry cloth. Clear debris from the chassis underside so it doesn’t change ground clearance or snag on rugs. If you added a small brush or sweep attachment, inspect it for wrapped fibers that increase motor load.
Tighten and secure. Vibration loosens fasteners and shifts sensor angles. Re-tighten wheel hubs, motor mounts, and any standoffs. Re-check adhesive mounts; if a sensor tilts upward, your “wall distance” readings become “ceiling distance.” Add thread-lock (or a small dab of removable adhesive) only where appropriate and only after you’re confident the placement is final.
Re-test like an engineer. After maintenance, run the same short acceptance test you used in debugging: forward/stop/turn, then a 2–3 minute room run. Compare behavior to your earlier notes. If it regressed, maintenance likely introduced a new variable (pinched wire, shifted sensor, tighter wheel friction). Catching this early prevents slow, confusing drift in performance.
Software maintenance matters too. Keep a “known good” version of your code. When you tune parameters (turn time, threshold distances), change one value at a time and comment the reason. This discipline makes your robot’s behavior understandable weeks later, which is essential if you plan to share the build.
A strong robotics project is not only the machine—it’s also the ability for someone else (or future you) to reproduce and evaluate it. Your final deliverable is a short demo plus documentation that makes your design choices clear.
Photos and diagrams. Take clear photos from top, bottom, and side. Include one close-up of the motor driver wiring and one of the sensor mounting. Use labels (masking tape is fine) on major connectors: battery, left motor, right motor, sensor power, and ground. If you can, add a simple hand-drawn wiring diagram showing which microcontroller pins go to which driver inputs and sensors. The goal is “no guesswork” for a reader.
Wiring and configuration notes. Provide a short bill of materials with exact part names and battery type. List key configuration values from your code: motor speed settings, sensor thresholds, turn duration, and any behaviors (wander + wall/edge). Include safety notes: where the power switch is, how to stop it quickly, and how you charge the battery.
Demo script (2–3 minutes). Write a repeatable script so your demo is consistent: (1) show the robot powered off, explain sensors and bumper/LED upgrade; (2) power on, show the status indicator; (3) place it in a small area with 2–3 obstacles; (4) run the routine and narrate what it’s doing: wandering, avoiding, following an edge, recovering from a bump; (5) end by safely powering down and mentioning one limitation and one future improvement. Practicing this script reveals weak points (like unreliable starts) that you can fix before you share.
When your build is documented and demo-ready, you’ve achieved the real course outcome: a simple home robot that senses, moves, decides, and performs reliably enough to evaluate in real rooms.
1. When the robot shows problems like random resets, weak turning, or constant collisions, what is the recommended first step?
2. Why does the chapter say a cleaner bot that works on the bench but fails in a real room is not necessarily “broken”?
3. After identifying which system is at fault, what approach does the chapter recommend for making fixes?
4. Which set of tools best matches what the chapter suggests keeping handy for troubleshooting and durability work?
5. What is the intended outcome by the end of Chapter 6?
- Learning Evolved.
- Intelligence Amplified.